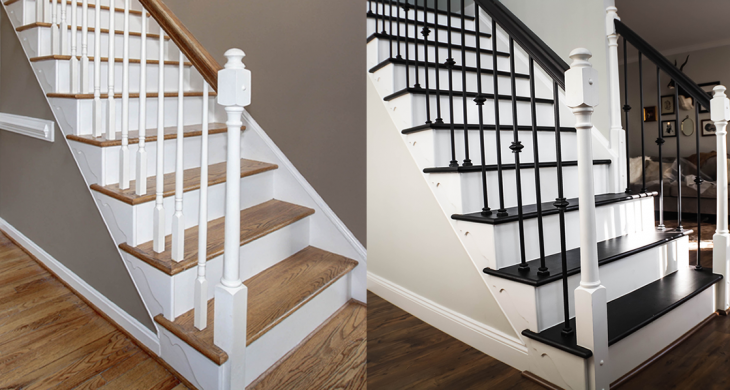


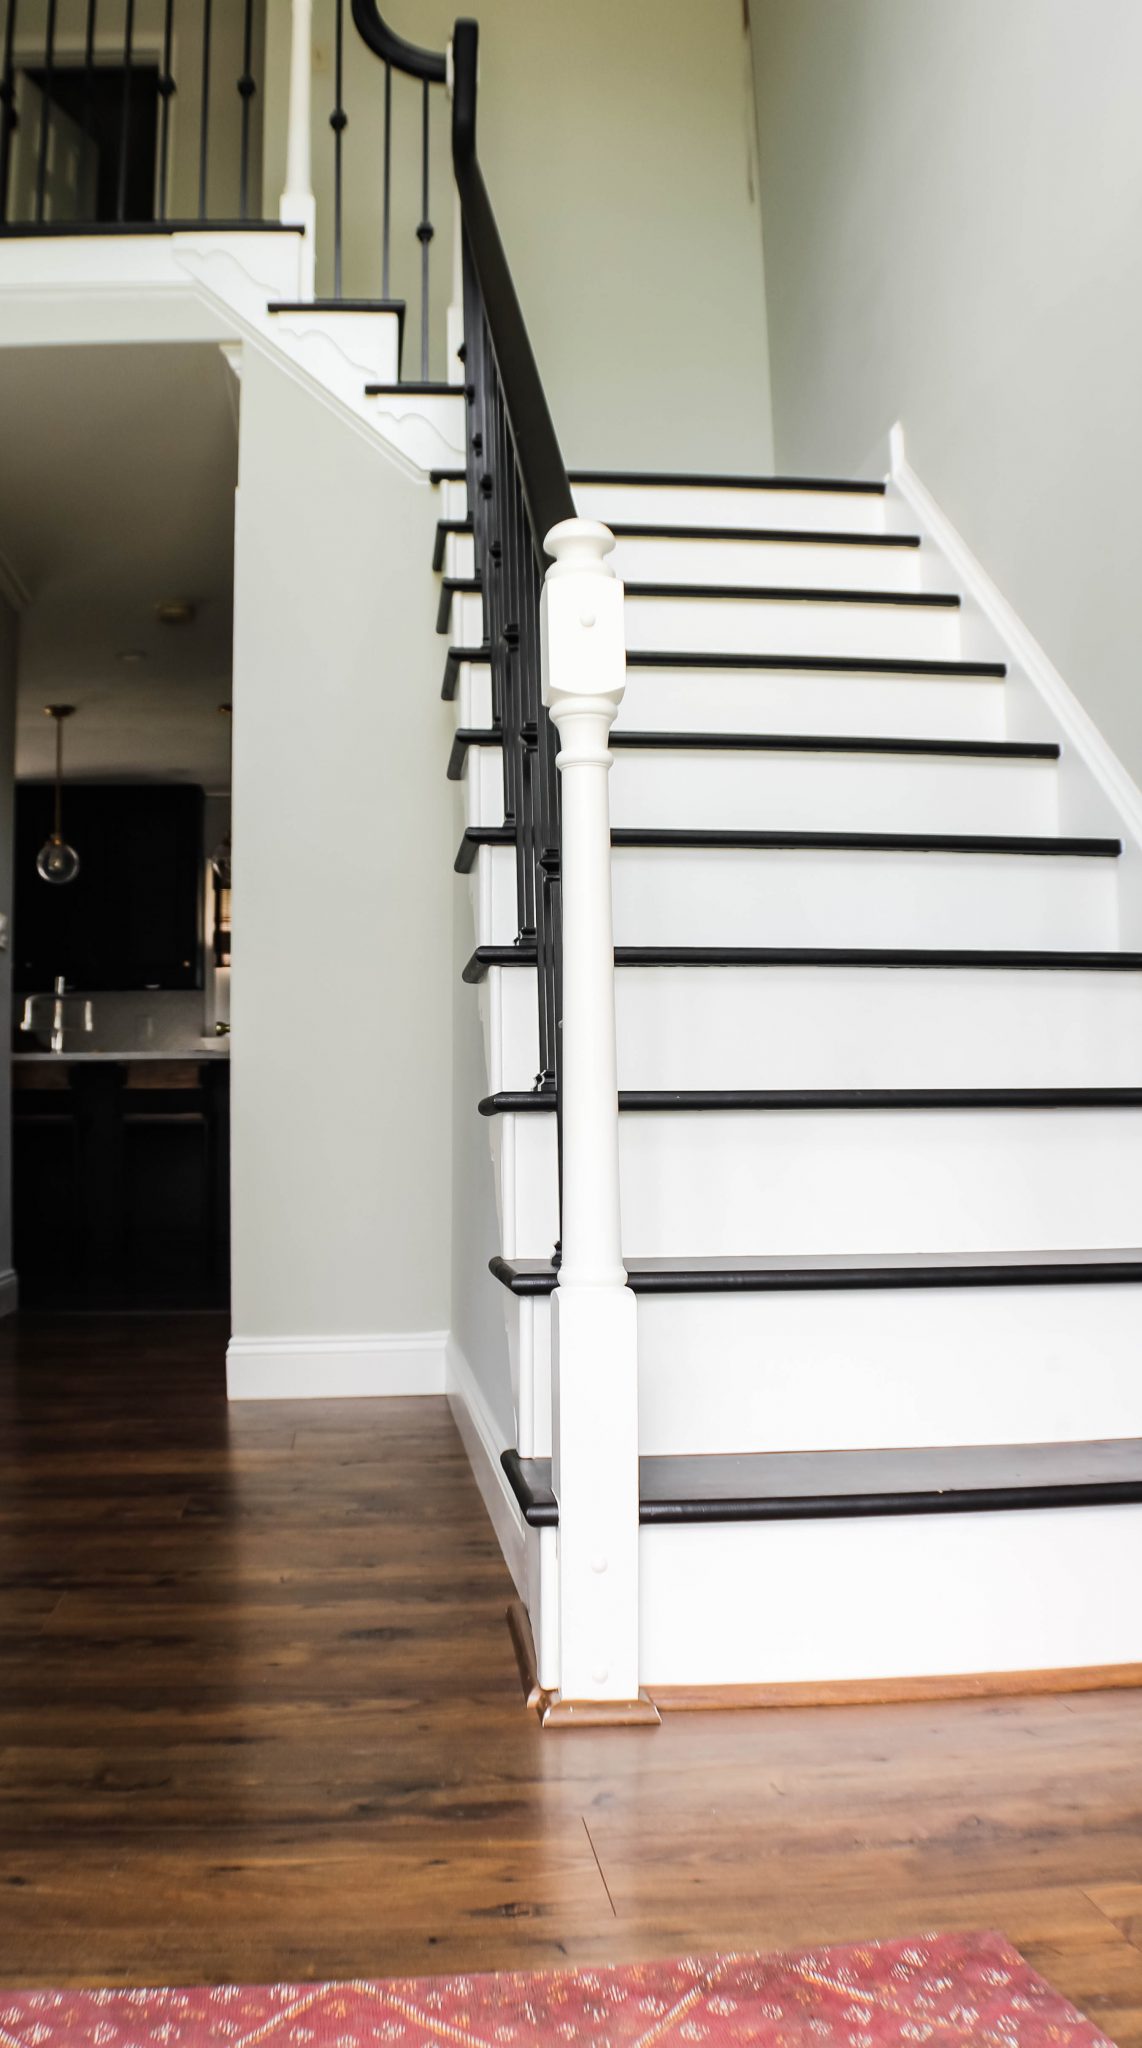
Continuing with out grand plans for the staircase makeover – next up after the install of the iron balusters was painting the old oak stair treads and railing black. I would file this overall portion of the project under “easy”, but note that it’s very time consuming and definitely a multi-day project. We had a few 2am nights and put on the last coat of white touchup 2 hours before the office Christmas party 🤪
Below are six steps to get this look for your stairs, as well as some tips for executing the project and maintaining it afterward.
How to Paint Oak Staircase: 6 Steps
01. Sand Oak Finish
We used our circular sander for this, but you can use your tool of preference or even good ol’ fashioned elbow grease. I recommend using a 220 grit sand paper; enough to rough up the surface but not to cause too deep of marks that may show through your finished surface. As with most refinishing, you’re trying to remove the gloss coat and create enough texture for the new paint to adhere to…you do not need to sand down to the bare wood!
Also, don’t forget to sand your railing if you’re painting that as well.
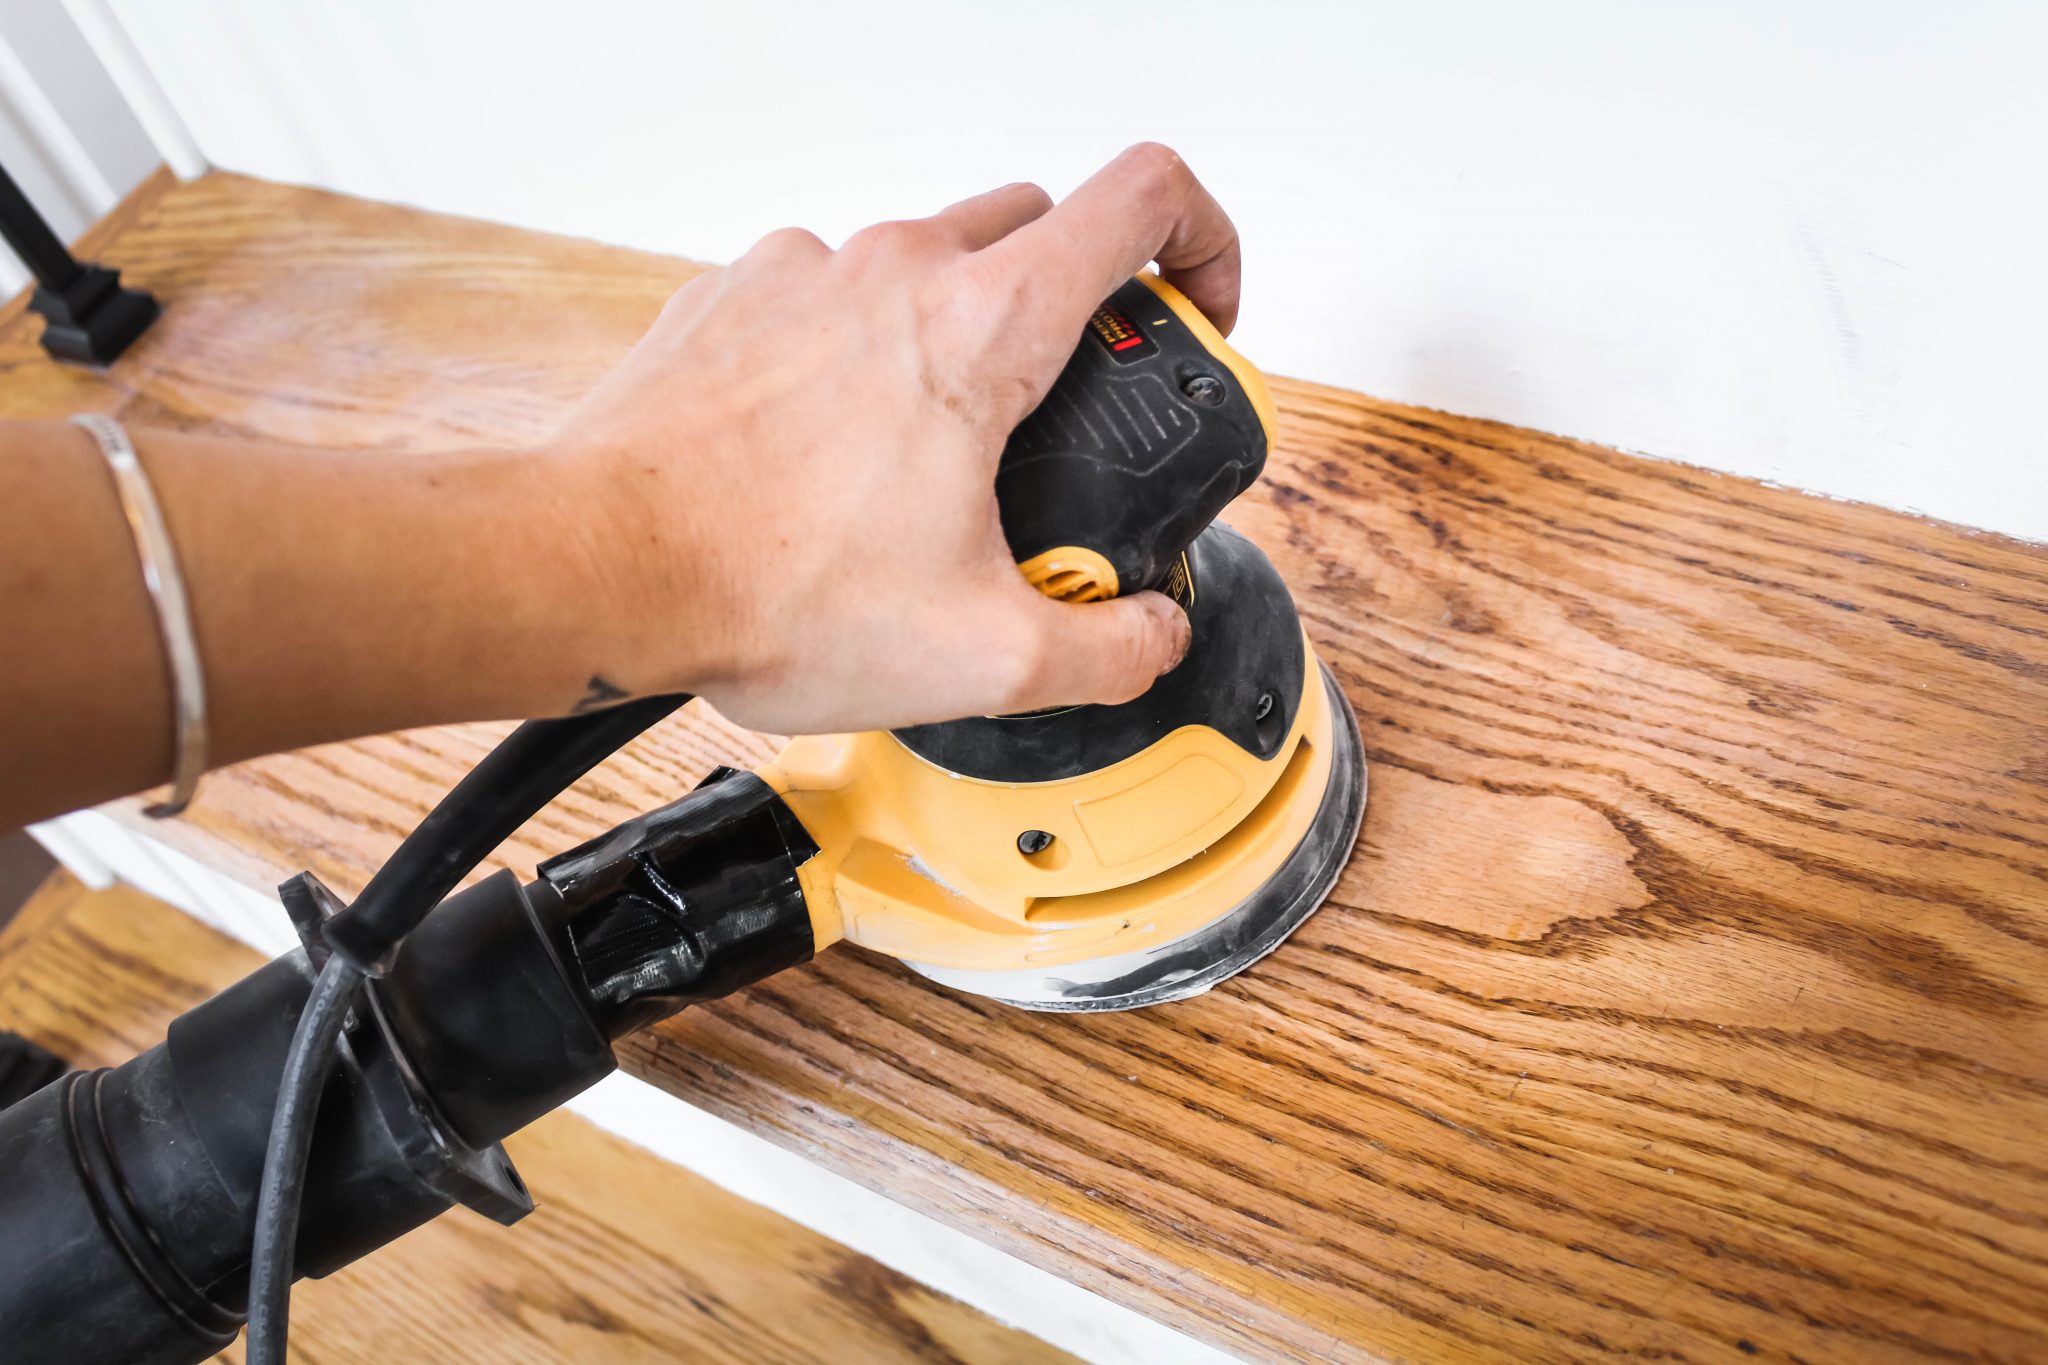
Sand old oak treads and railing
02. Clean Sanded Surfaces
After you’ve done a thorough job of sanding all the surfaces you’re refinishing, clean them! I know, so boring…but an important and necessary step. We just used a damp cloth to wipe away any dust or debris left over after running the shop-vac.
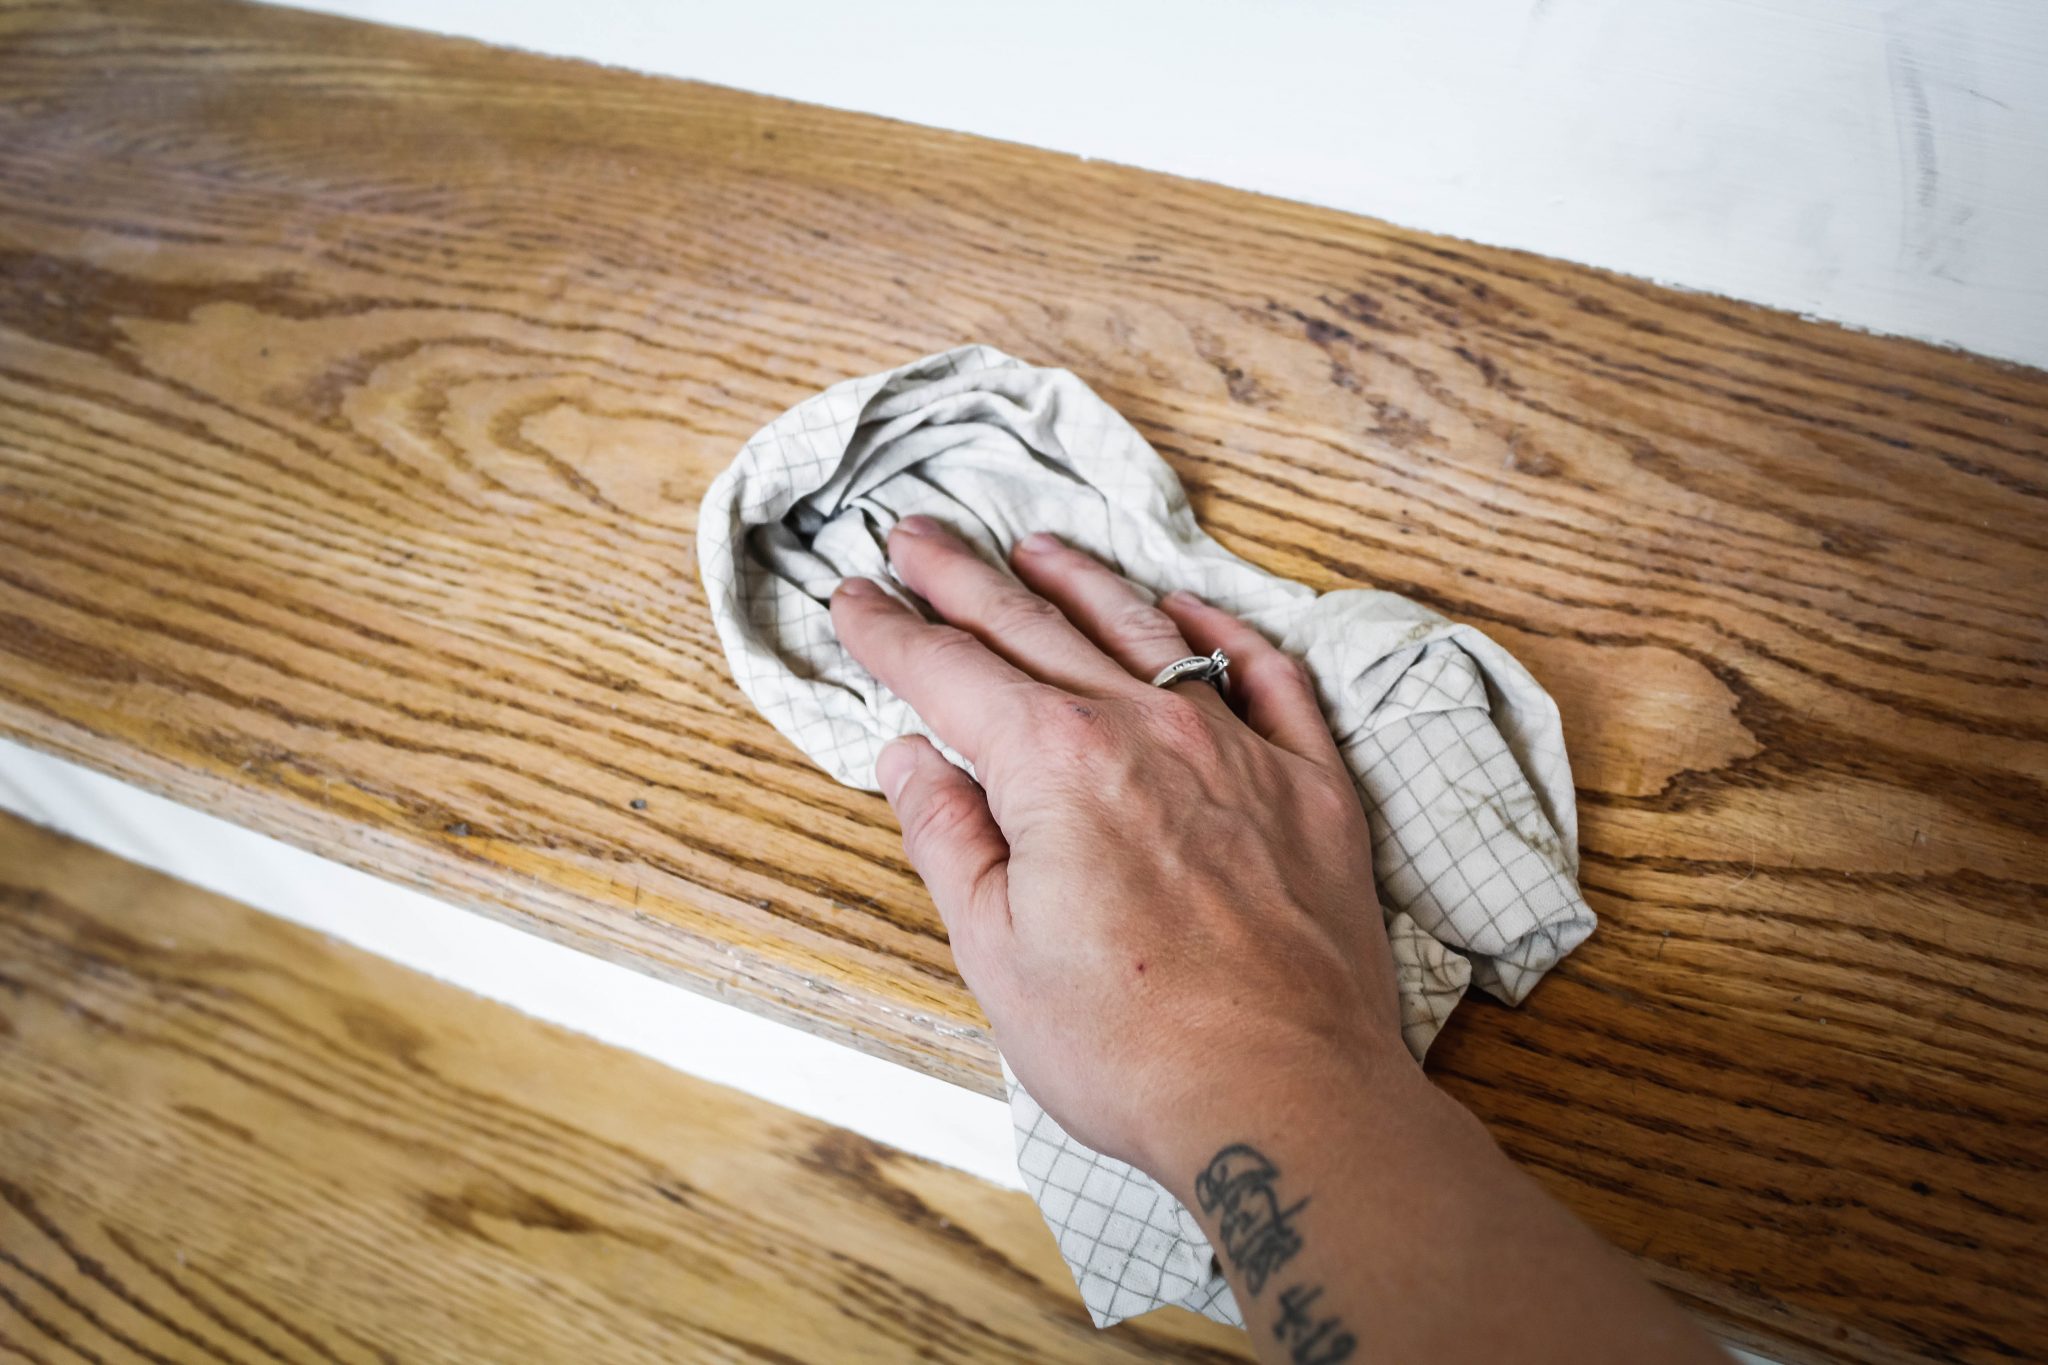
Clean sanded surfaces
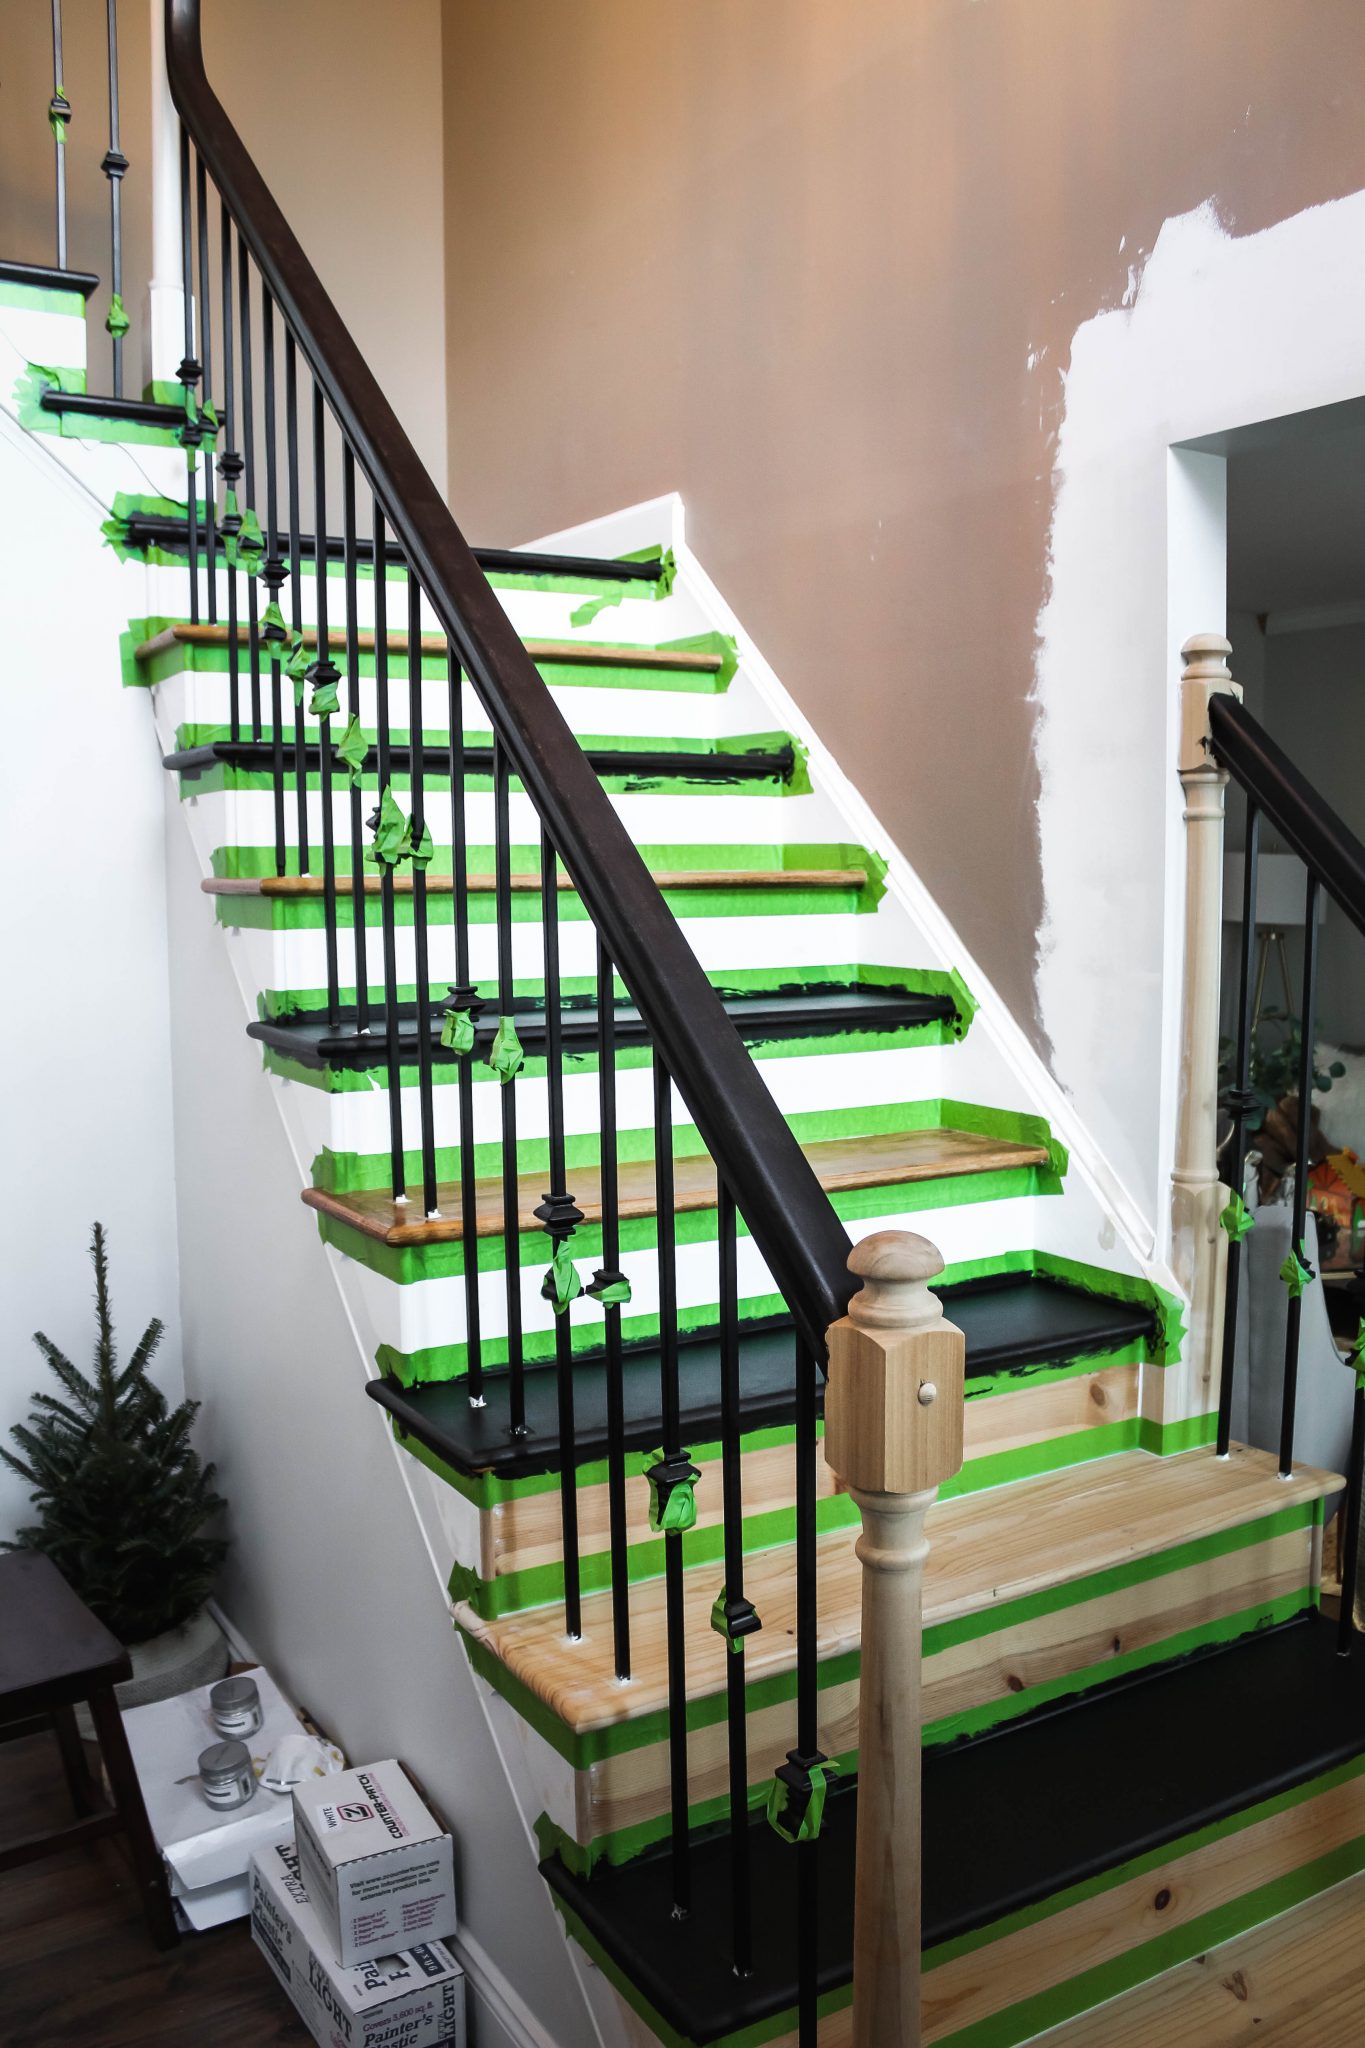
03. Tape and Tape – and Tape Some More…
Yes, our favorite activity: taping off. This is by far the most time consuming part of this project. However, a good tape job will save you so much time a headache, so JUST DO IT. Pay attention during this part too, because it’s easy after hours of taping to sort of go into robot mode and accidentally tape off the opposite things you should be taping, ha.
Here is a close-up shot of the way we taped around the rounded edges to get a good, clean line.
Another tip: if you have baluster shoes, you should loosen them, pull them up and tape them to the baluster so that you can paint directly under them (you will see this in a photo on the next step).
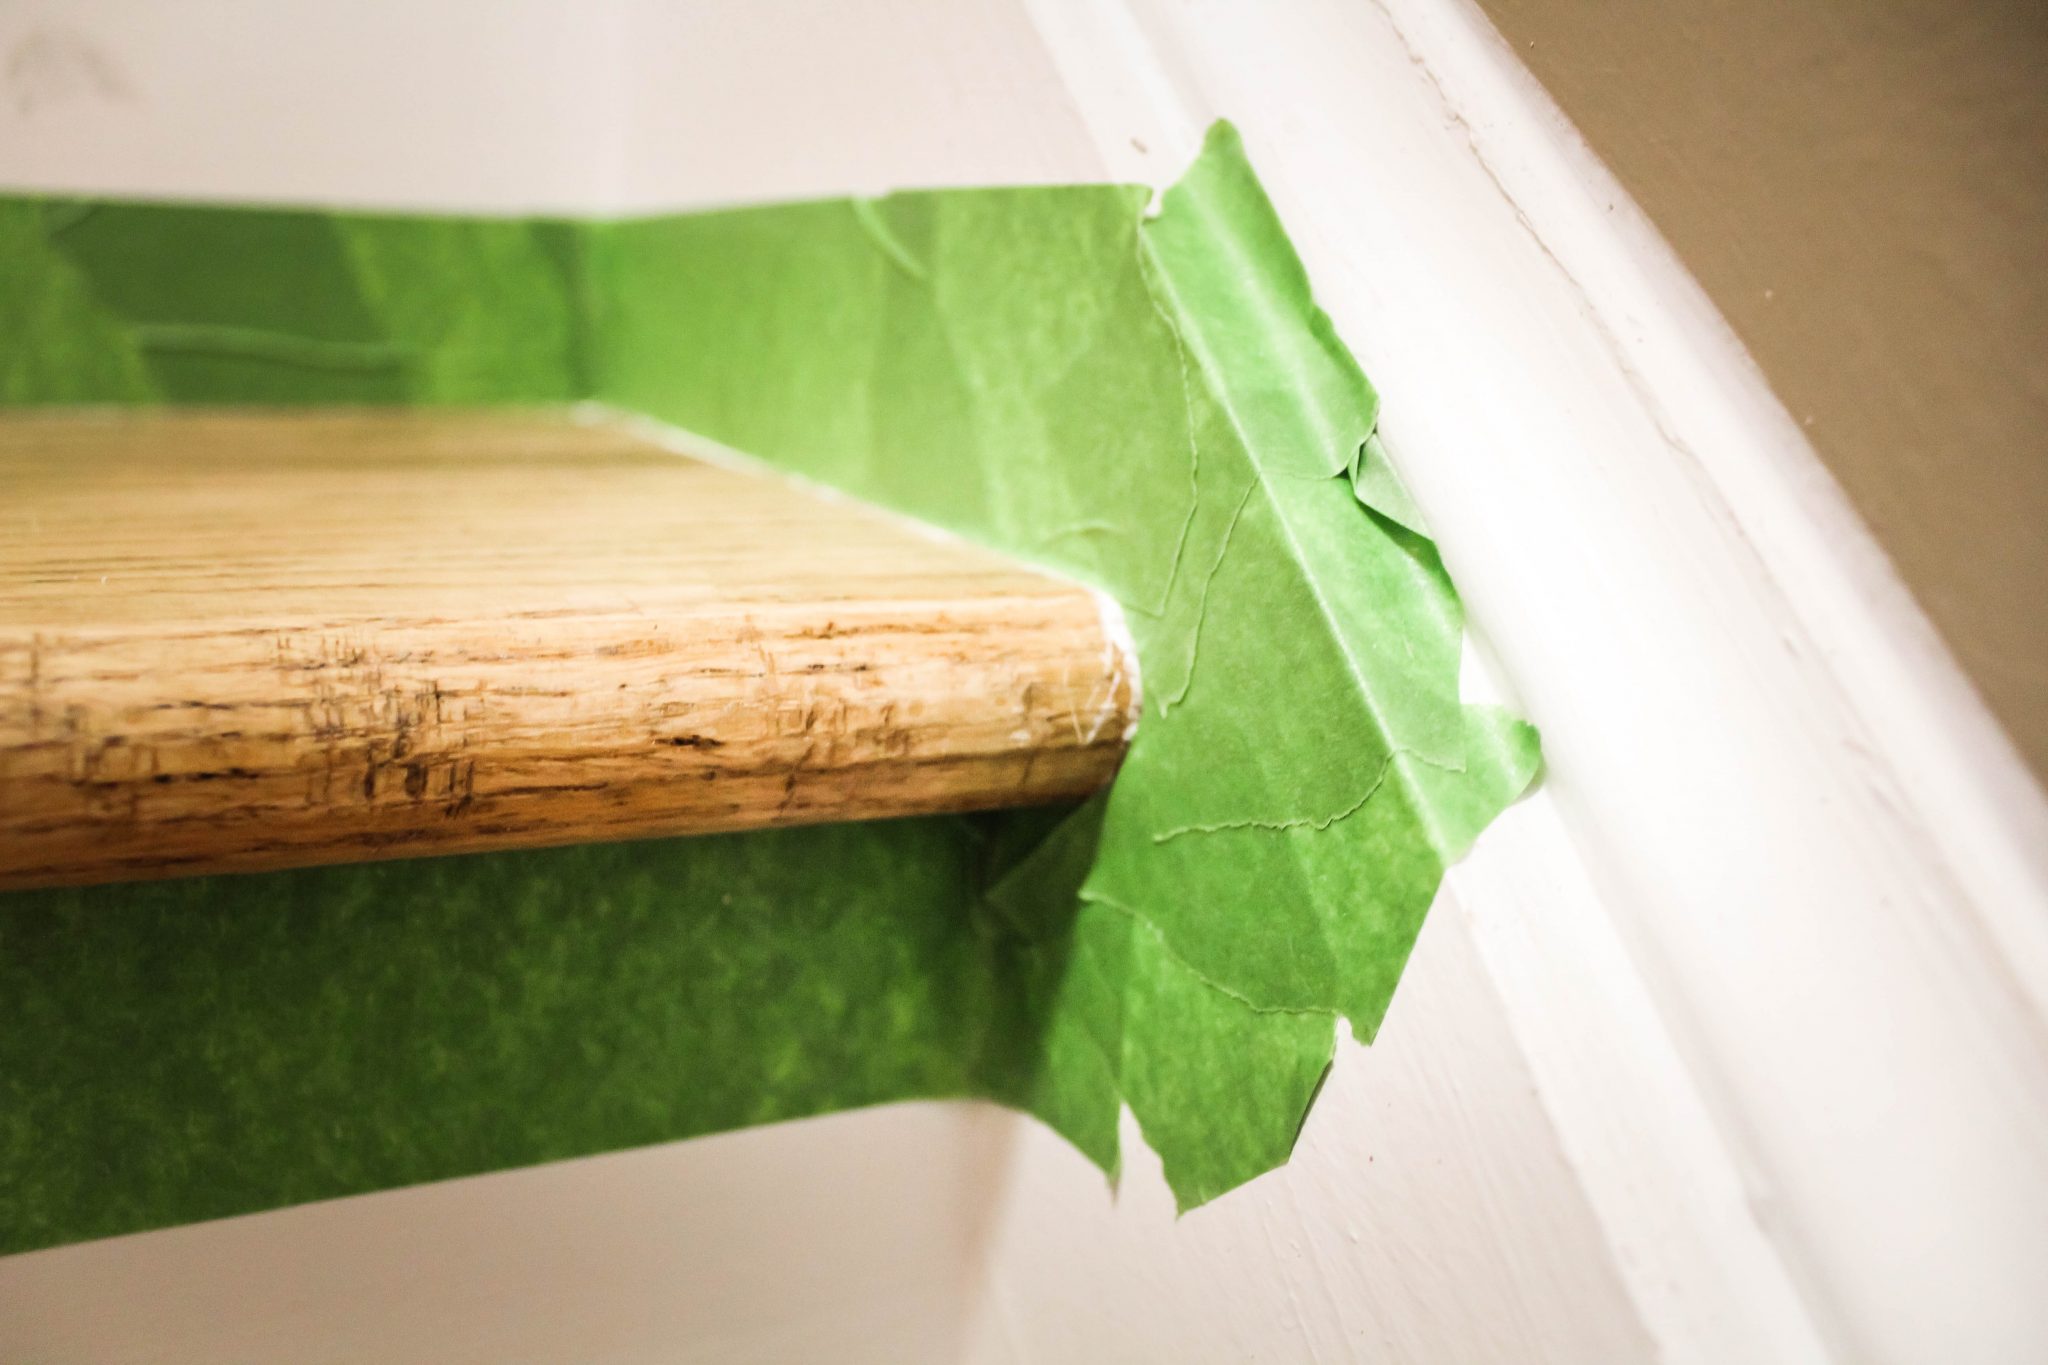
Taping off stair treads in preparation for paint
04. Paint Treads and Railing (first set)
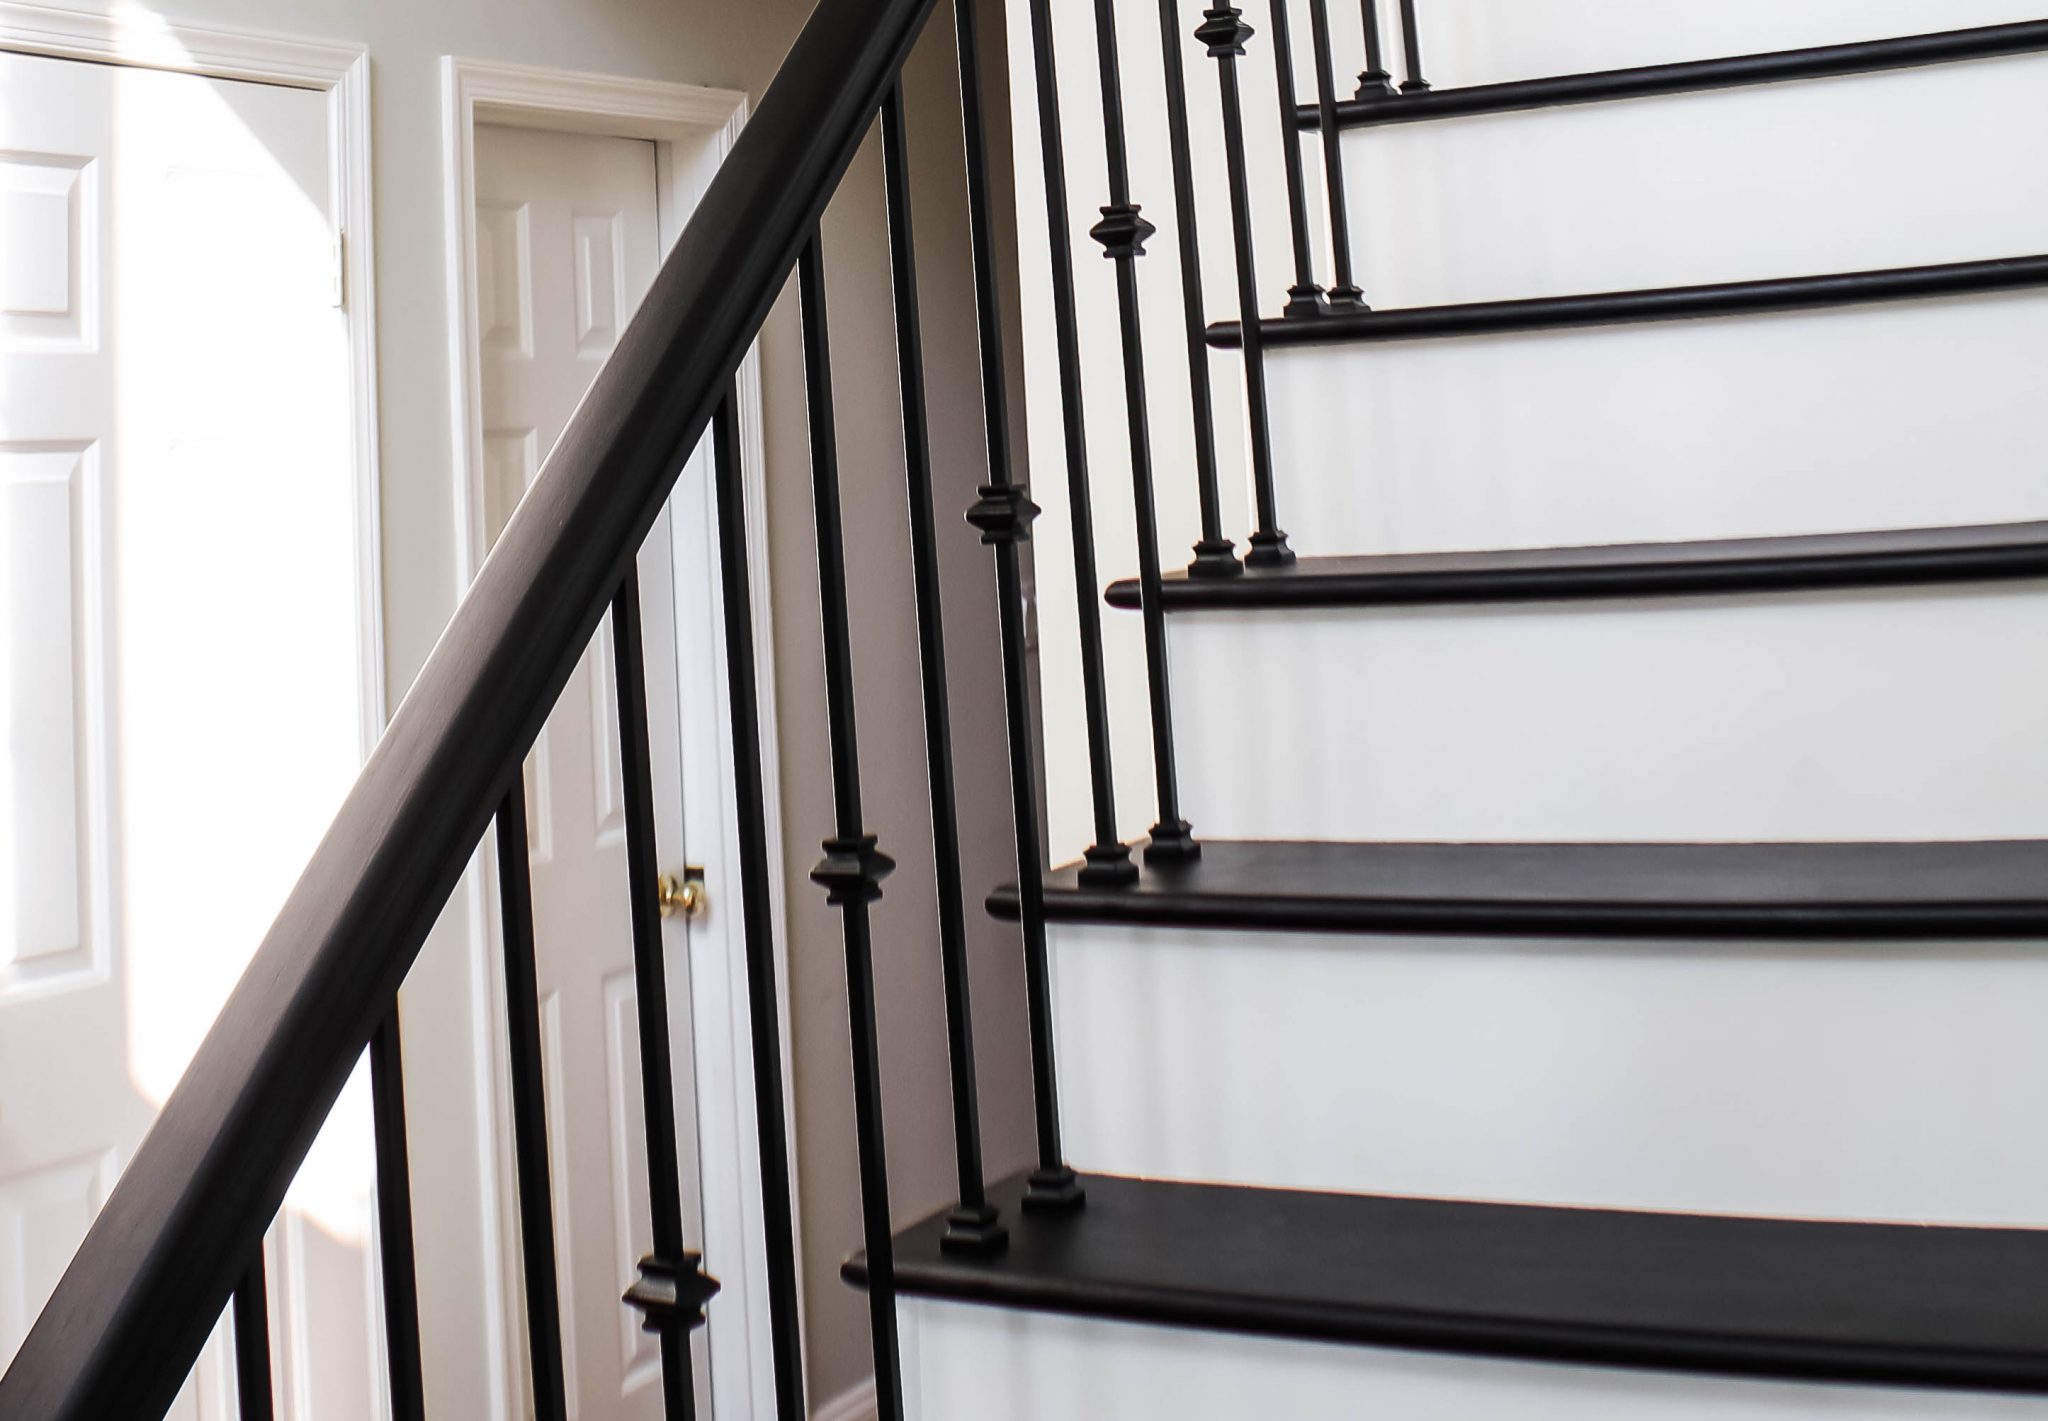
We did so much research into picking the right paint. We read lots of other blogs and articles, but ultimately went with what our paint pros and Sherwin Williams suggested: a two part floor epoxy (parts A and B). Note: this stuff is not cheap, and a gallon is way more paint than you’ll need for this so be prepared to spend some $$ and then have more than half the product left over. That said, we just really wanted something tough – because dogs, and toddlers – but you DO NOT need to get an epoxy paint. There are plenty of people who use plain ol’ paint for this and report that it holds up fine. Even with the epoxy, if someone drops luggage or a vacuum (not naming names), it’s going to scratch.
Which brings me to my next PSA: black paint is high maintenance. We already knew this, but I just want to throw that out here if you hadn’t thought of it. Black shows EVERYTHING: scratched, dog hair, crumbs, sand, dust…so just be ready. It’s so beautiful, and in my opinion, worth it…but you’re going to have to maintain it with regular sweeps/wipe downs and the occasional paint touchup. But we are really happy with the epoxy, the way it coated and has held up so far (6 months later at the time I’m writing).
Now for the fun, let’s paint! You will want to start with every other step – duh! So start at the top of the stairs to leave yourself the most room and paint a step, skip a step, paint a step, skip a step, etc, etc, etc. Ok, great, you’ve got your first coat! Get ready to do that at least 4-6 more times 😬
Follow the instructions for drying time on your chosen paint, and re-coat those same steps until they are finished. We went with three coats on each step – again, dogs and toddlers! We also did our railing with the first set of steps, but if you think you need that to get up and down while skipping steps for the next couple of days, you may want to save that for last.
Paint every other step tread and your railing
05. Finish Painting Treads (second set)
Once you’ve completed all your coats on the first set of steps, repeat this process for the next set. This is when it gets difficult to remember which steps are wet and which are dry…so find a way to mark them and think before you step! You’re already doing enough work, let’s not add more by accidentally ruining your finish!
In general, just pay attention. I don’t know why it’s so hard to remember what is wet and what color is going where…but it is! Or maybe it was the long days and late nights of work, or not fully explaining my design vision to the hubby, but we had some mishaps like the black paint on what should be the white the newel post pictured below – oy vey.
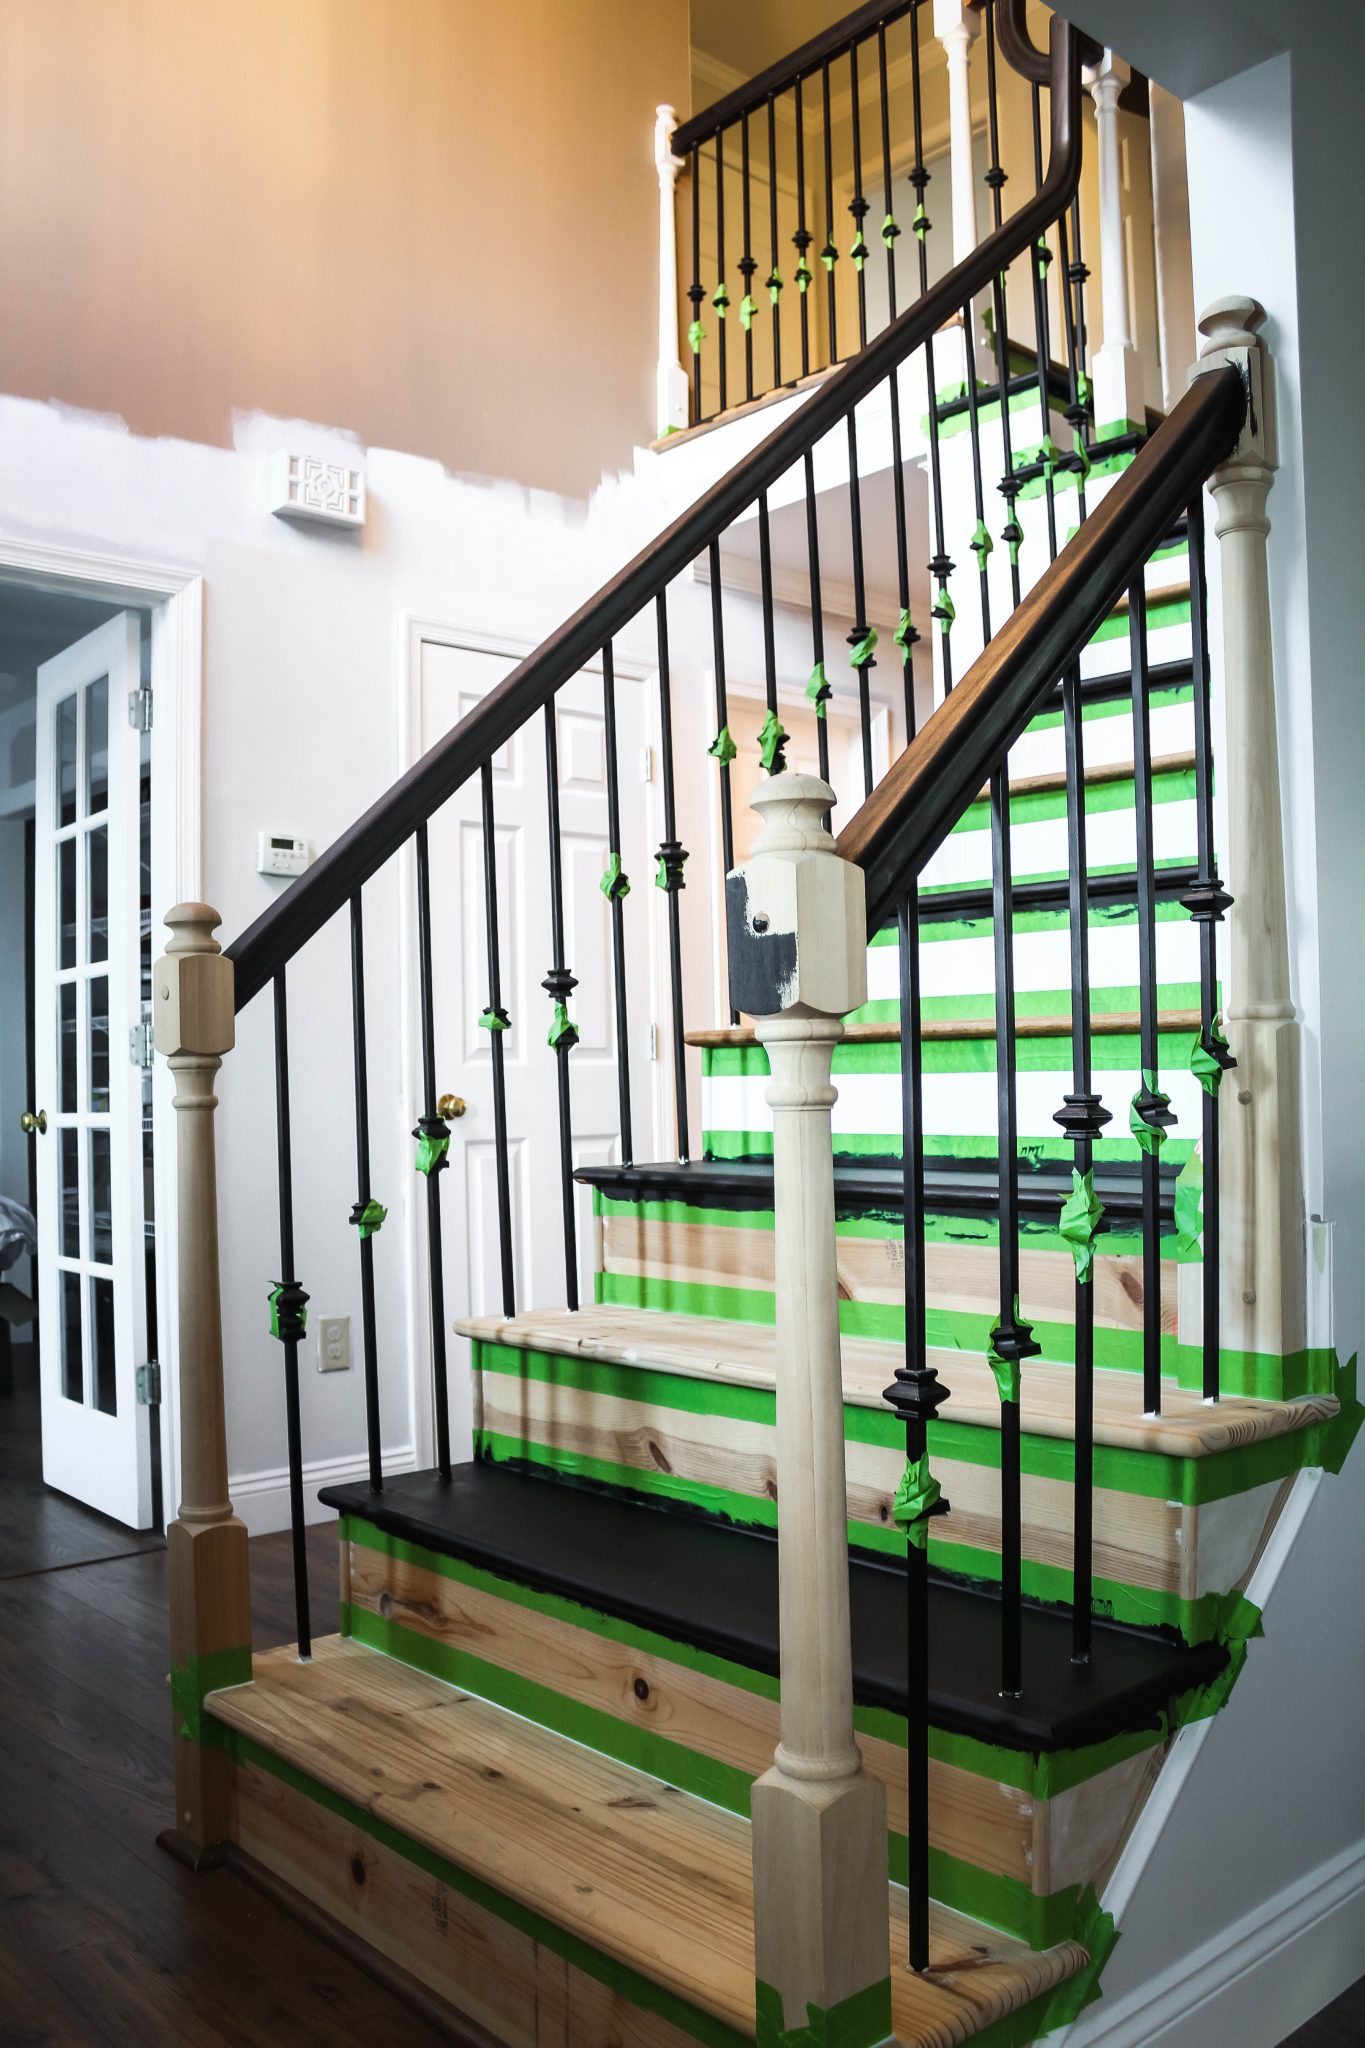
Accidentally started painting the newels black – forgot to explain my “vision” to the hubs (oopsies)
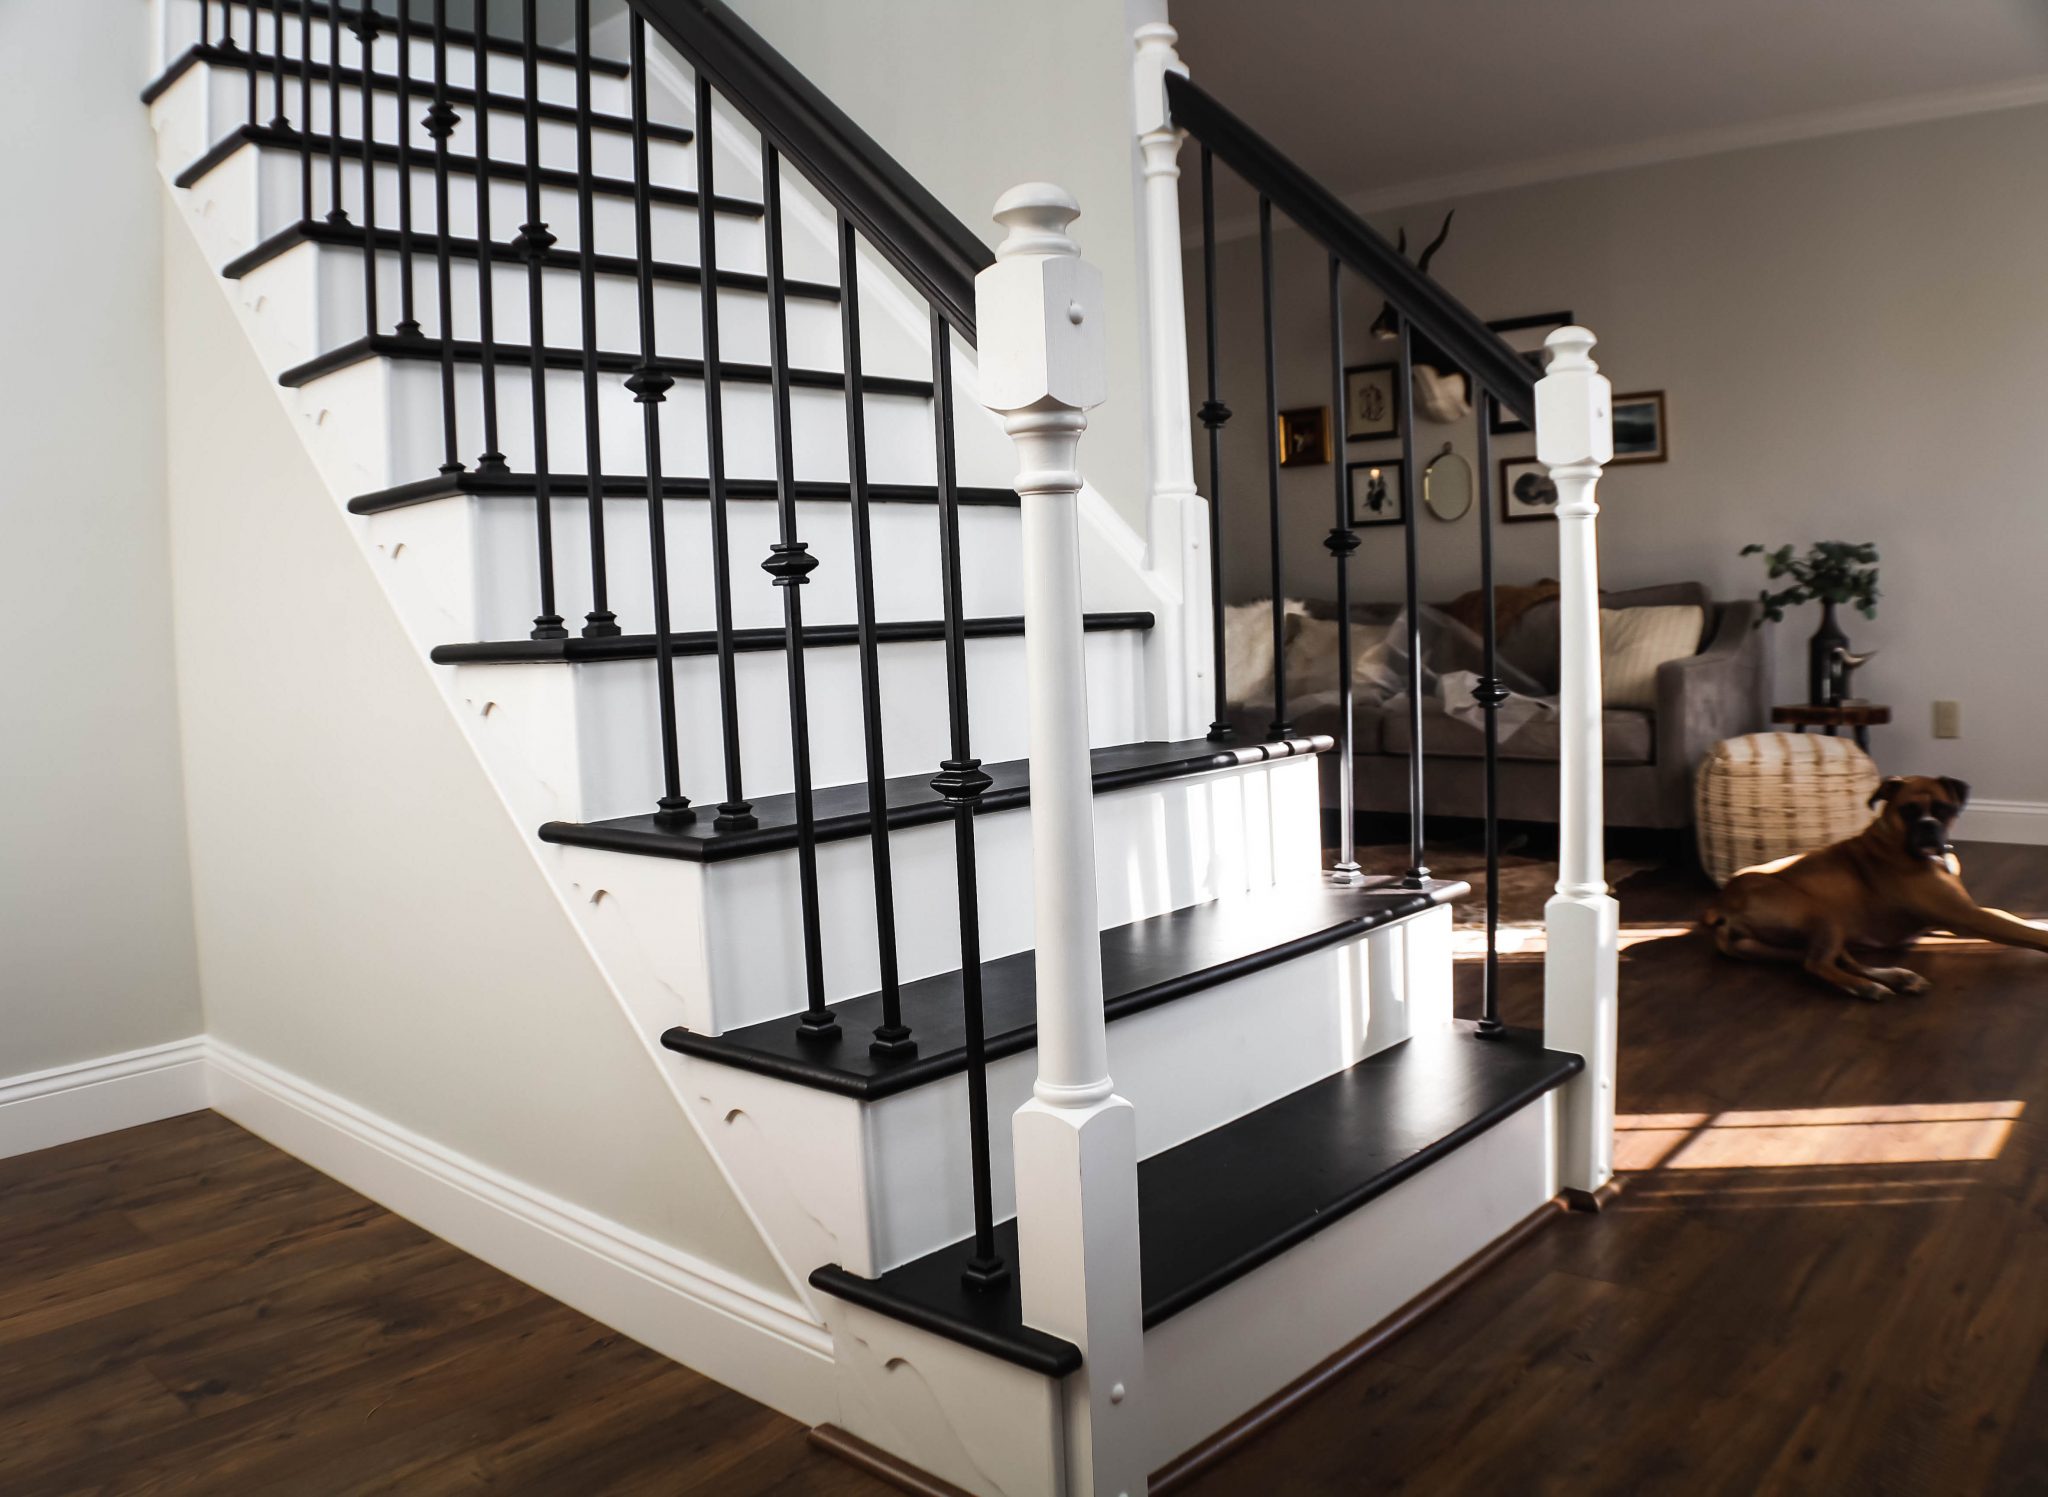
06. Touch Up (or add) Contrasting Paint
We already had white kicks and newels before we started this project, and we wanted to stick with that look. However, our kicks were BEAT with scuffs and dirt from over the years, and we also had the last 4 steps that were new from our wall opening project and step rebuild, so we had a decent amount of accent paint to do.
We did this last and had to reverse our tape. Once all the black was dry, we taped off for the white and did some quick coats over the scuffs and 2-3 coats over the raw wood on the new steps and newels. Painting the newels is another tedious job, but the kicks are pretty fast.
Conclusion
As I mentioned in the intro, we slapped on our last coat of white paint 2 hours before the office Christmas party. The stairs were our last project on the list during what we called, “the big push” leading up to all the fun, festivities, guests and family coming for Christmas. We busted out butts to get them done, but it was all so worth it!
Again, the skill level required for this DIY isn’t anything crazy. It’s more about having the time and patience to get it all done.
If you go with a more affordable paint, the cost/time vs. result in this one speaks for itself!
 We are a couple of DIY-ers who
Wow! That is just beautiful, Chris! So elegant. Great job!!!
Thank you, Jan!
Love this – looking to do the same for our stairs. How complex and expensive is it to replace spindles? Did you do this yourself of hire a contractor?
Not complex or expensive! We did this ourselves and I would say it’s a beginner/mid-level DIY project…you can do it! We outlined all the steps in this post (https://renovationstory.com/changing-wood-stair-balusters-iron-8-steps-video/) and you can see some details in our video on that page as well. The total coast was only about $140!
Thank you so much for posting this! You did such an amazing job; it looks lovely. Just wondering what color black you went with? Thanks much!
Hey! Thank you so much 🙂 So on our stairs we used Caviar Black by Sherwin Williams. We also used their 2 part floor epoxy, but you don’t have to do that! Just chat with them about recommended paints for your application. Elsewhere in our house (in most places actually), we used their Tricorn Black. They are both a “true black”, but caviar is made with a “red” undertone and tricorn has more of a “blue” one. In our rooms there isn’t much around to make this obvious, but just be aware of the tricks paint can play on you! For example, when we used Tricorn (with its blue base) on our outdoor shutters, it looked PURPLE because our siding had yellow/warm undertones. So we had to repaint them with Caviar and they look rich and black. Just a little side info for you to help in your decision.
Hi Chris!
I have been reading the entire internet (well, sort of) and keep coming back to your post! Thank you! We have an almost identical staircase and are planning the same color scheme.
We are planning to use the same epoxy paint and process to paint every other step. How long did each coat take to dry? Could we get a couple of coats on per day? How many days did it take you to finish all the treads and be able to walk on it?
Thank you again for sharing your project!
Susan
Hi! So it dries to the touch in an hour, but recoat in about 6 hours (at 70 degree temps). So yes, I would plan a coat early in the day and then another in the evening on the first set of steps…and then repeat with the other steps the following day. Foot traffic is ok in 18 hours – So as long as you set the time aside you can have this done in two days 🙂 More details here: ArmorSeal Specs. So glad you found this helpful…good luck!