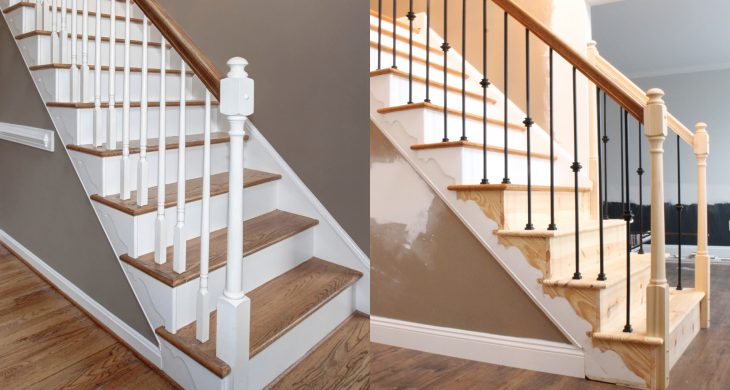


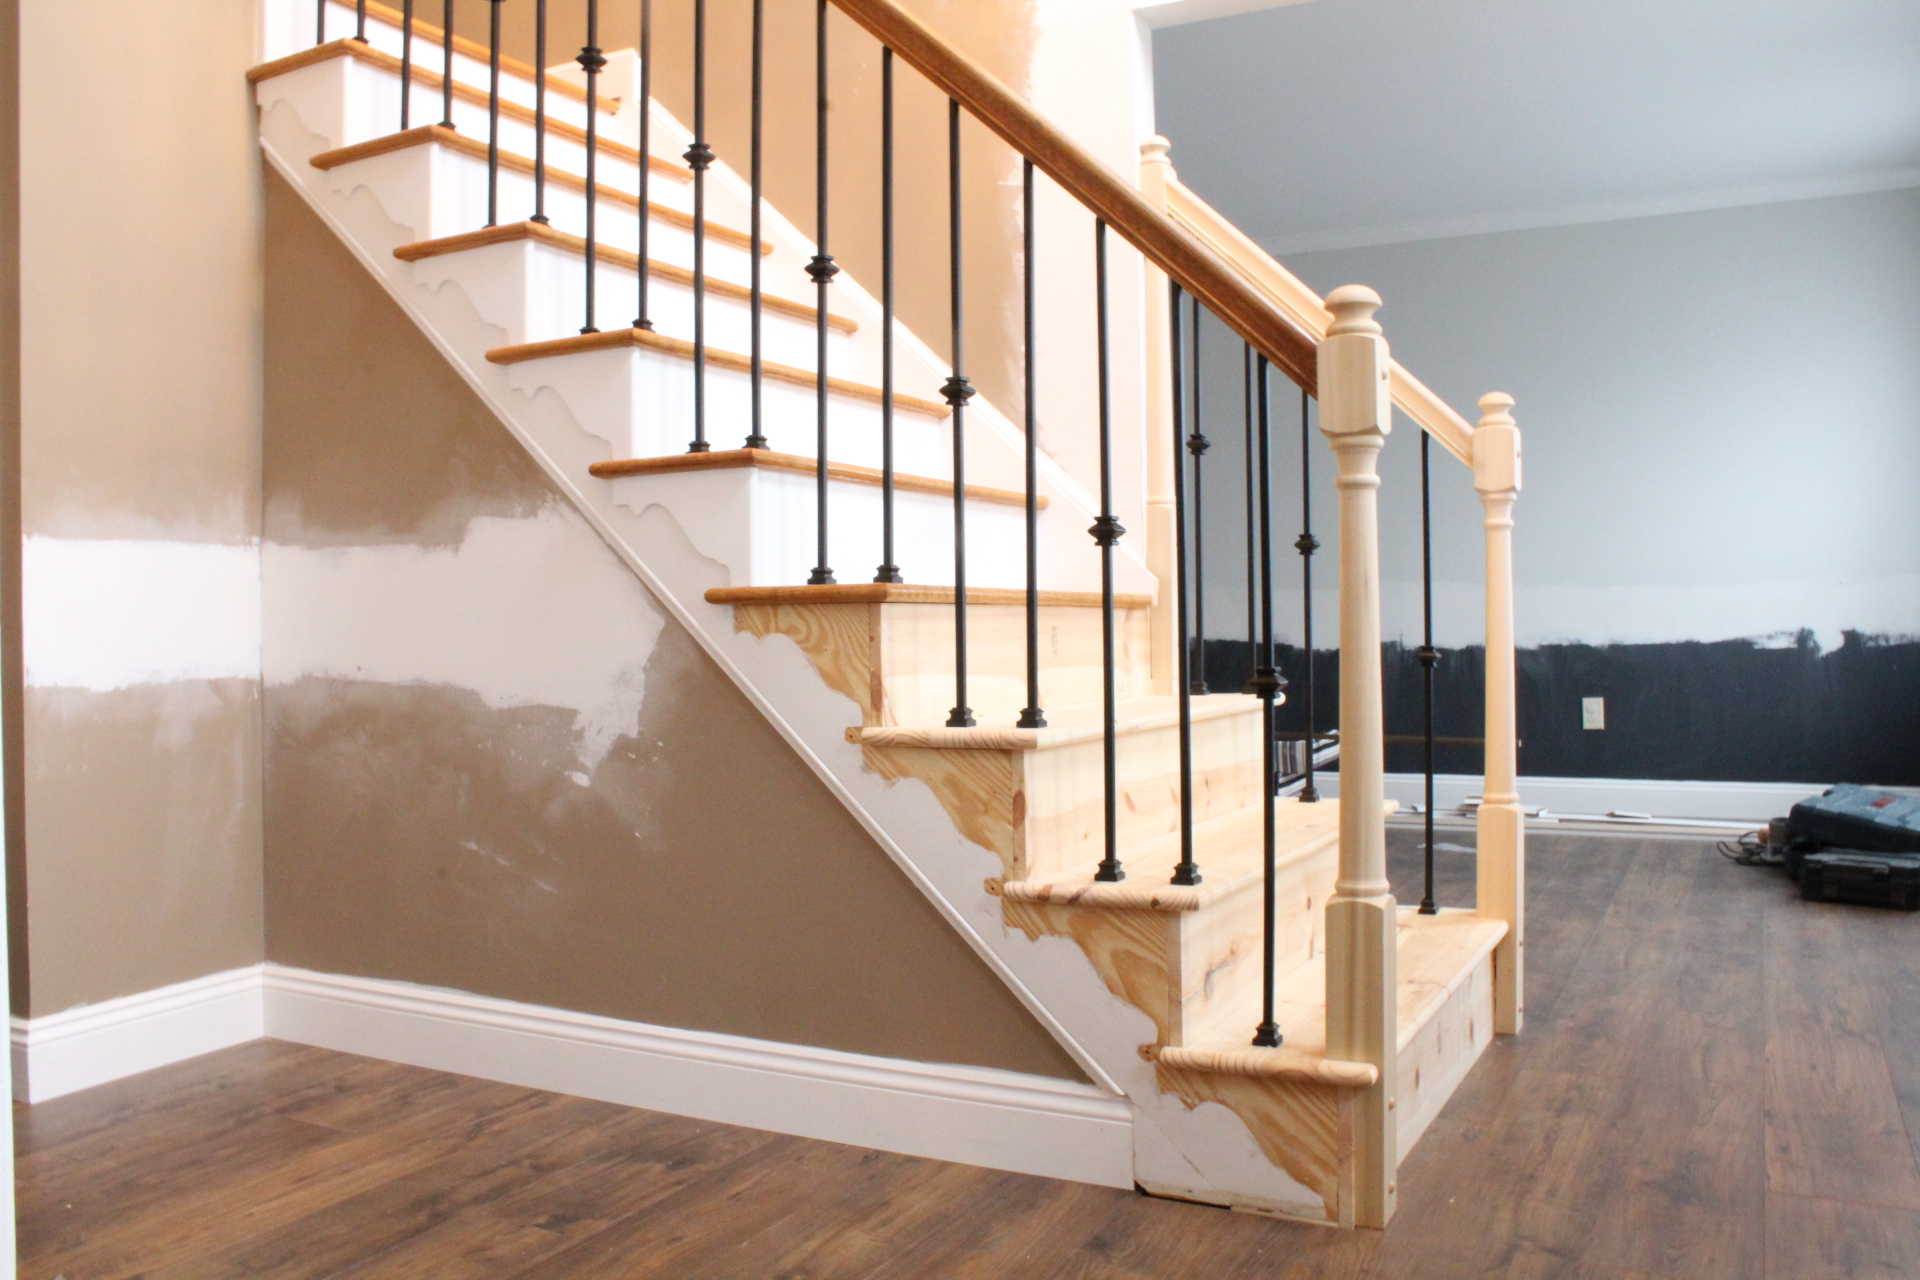
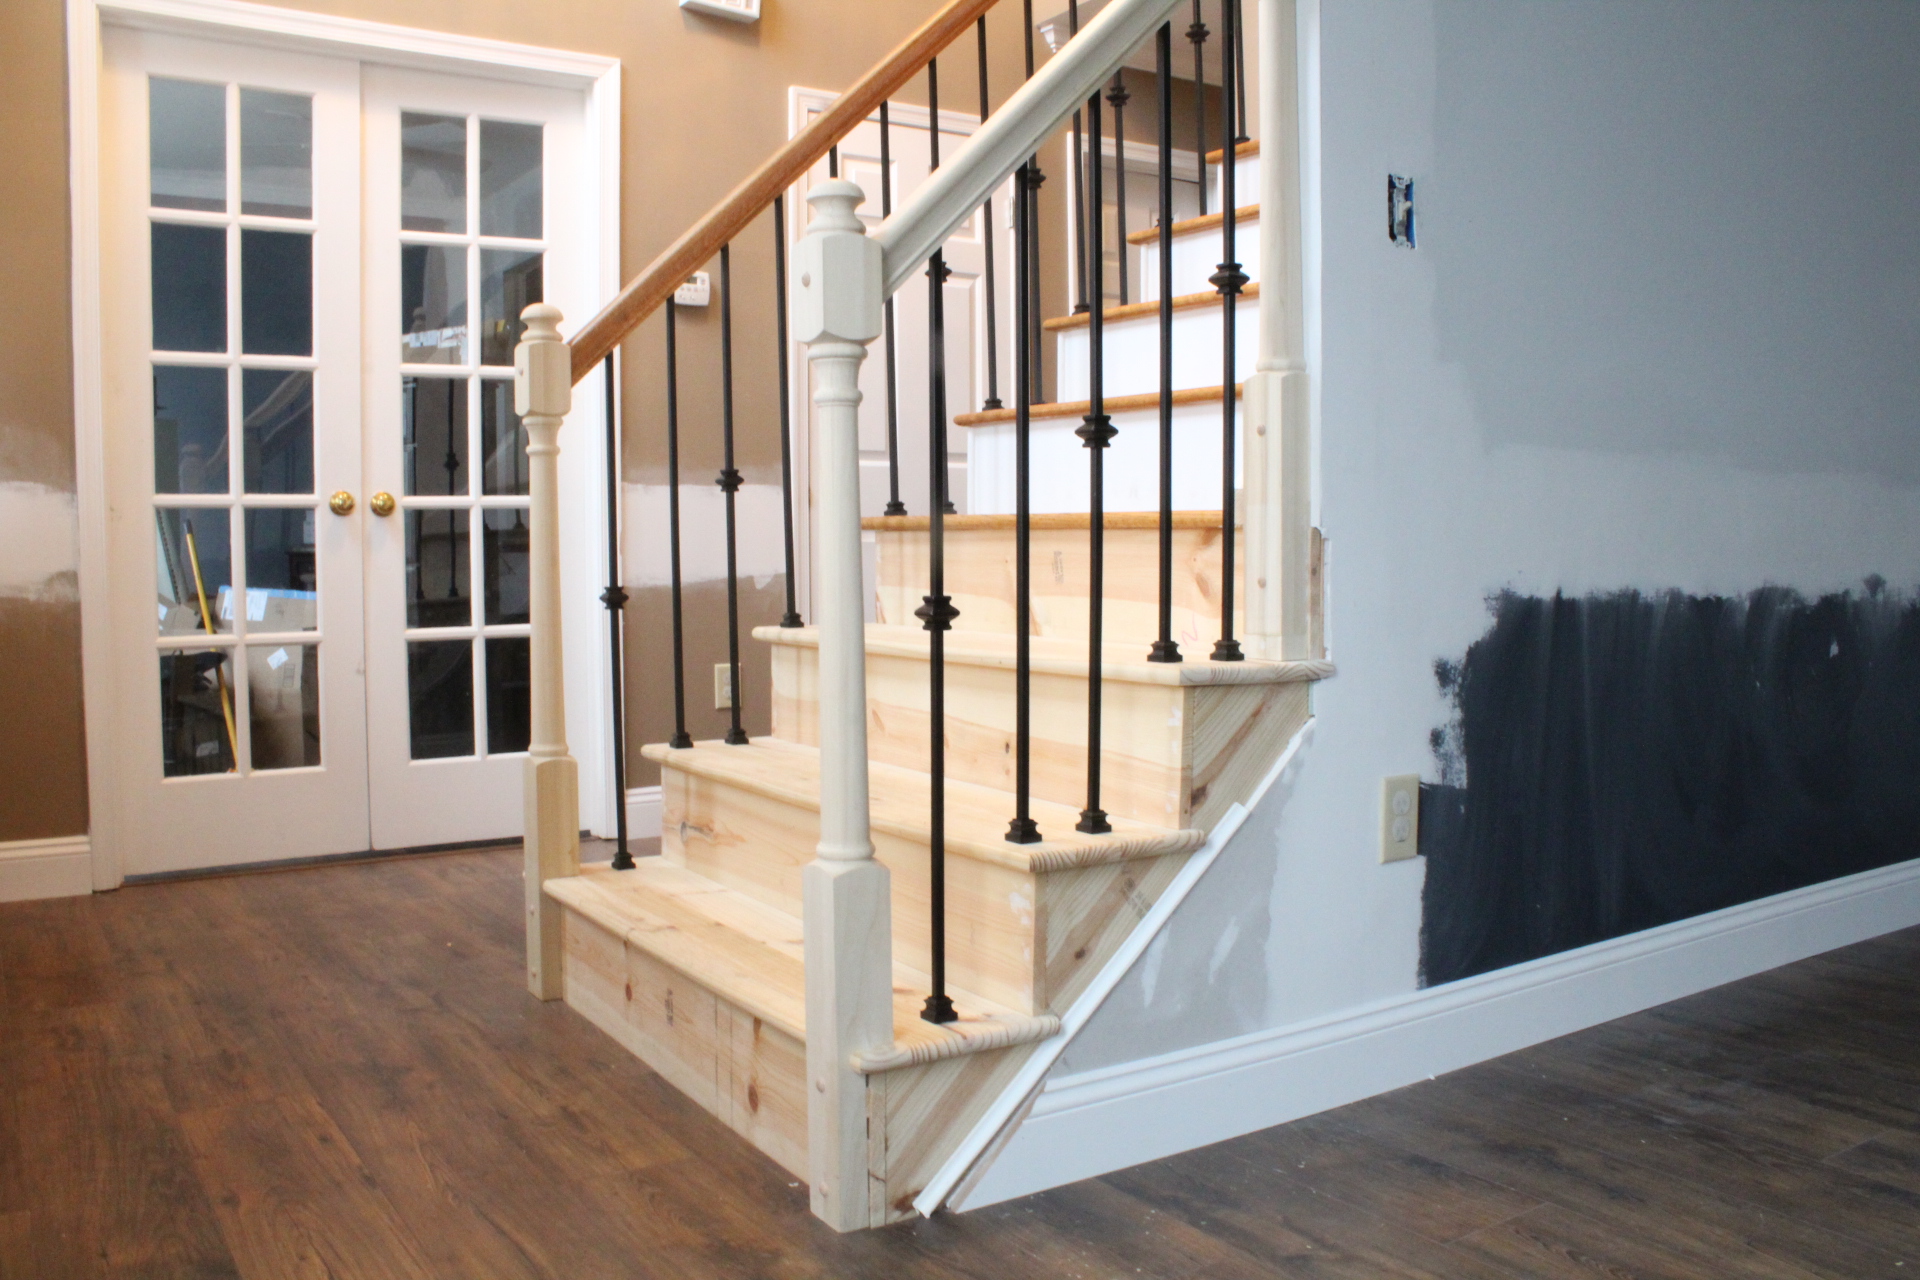
Changing out your old wooden stair balusters is an easy (and relatively inexpensive) way to update the look of your home. Often the staircase is at the home’s entry, so it’s also a great update to give a little bit of “wow” when you first step inside.
We really wanted to do this during our renovation at Hampton House, but it was not a top priority item and was put in the “maybe” pile of items we would do if our budget had surplus. We were also a bit intimidated by the amount of work it was going to be…that is UNTIL we looked into it! We were shocked at both how inexpensive it could be and how easy it was!
Below I will outline the planning it takes to purchase the right pieces, where you can find great deals on the parts you need, as well as a simple eight step tutorial (including a video) on how you can do this yourself!
Planning Your Staircase Baluster Design
Start with pictures! The best thing to do is figure out exactly what you want by looking at what other people are doing. My two favorite resources for interior design inspiration are Houzz and Pinterest. Save some ideas, narrow down what style you like and then start your hunt for parts.
The design I chose was a mix of straight and knuckled iron balusters. Once I had that, I drew up a rough sketch of the pattern, which was a simple “every other” design (straight spindle, knuckled spindle, straight spindle…) and then counted out how many I would need of each kind. Here is what I came up with:

By restarting my pattern at the top of the stairs, I was able to keep within the bulk counts for my baluster order!
There were a few good resources for stair parts that I came across. We ultimately ordered from the Lowe’s website, but cheapstairparts.com also has a HUGE selection. Want to save a lot of money on stair balusters? Order in bulk! We chose Lowe’s because their bulk stair part prices could not be beat.
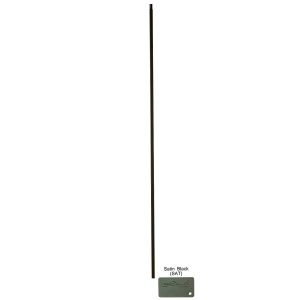
Straight balusters (15 count) – $2.88/each
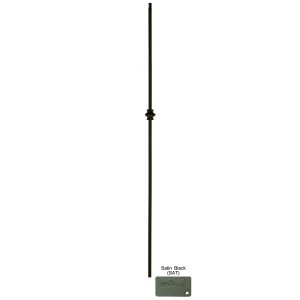
Knuckled baluster (10 count) – $5.49/each
I had to get a little creative in order to make their counts work, what I ended up doing was restarting my pattern (knuckle first) at the top of the stairs after the last post…that way I came out with exactly 15 straight balusters needed, and 19 knucked. Drew said I had a lot of faith in him (which I do!) ordering an exact count – haha. But truth be told if you need one or two extra they sell them for a slightly higher price as individual pieces.
Lastly, don’t forget your baluster shoes! Not all balusters come with shoes. I ordered bulk again, and while I got way more than needed, they were still much cheaper that way.
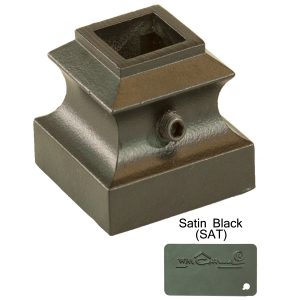
Baluster shoes (50 count) – $0.75/each
Parts found, ordered and shipped for free to our local Lowe’s for pickup!
NOTE: make sure you check your finishes…these particular baluster pieces come in both satin and flat and are easy to mix up on the Lowe’s website.
How to Install Iron Balusters: 8 Steps
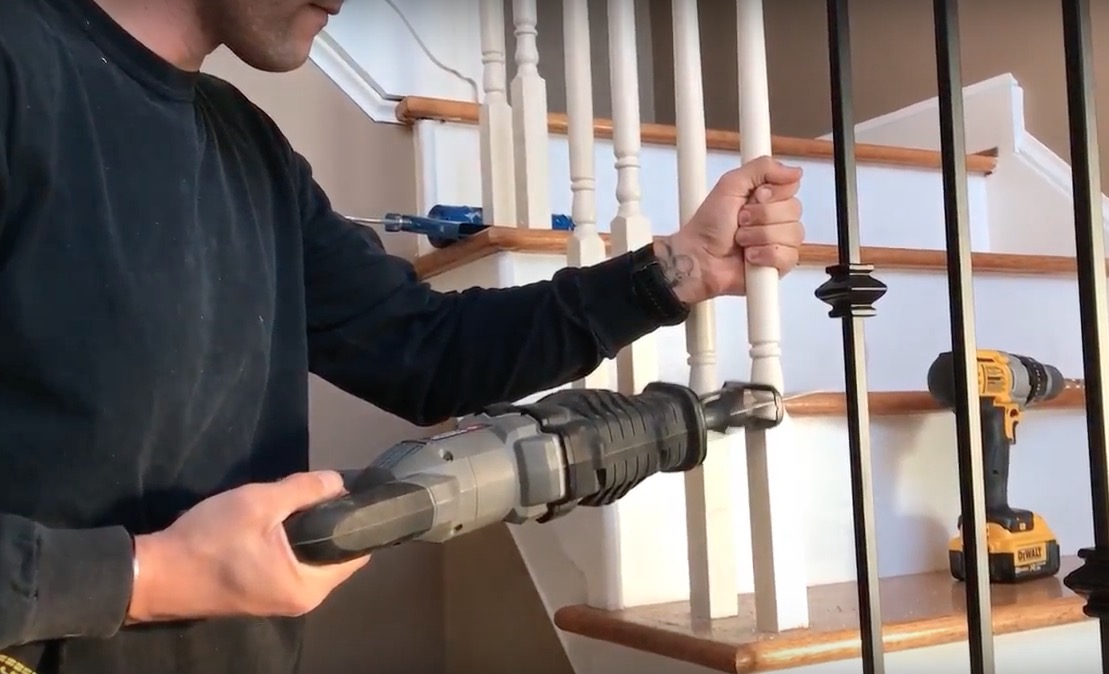
01. Cut and Remove Old Balusters
With a reciprocating saw (you can also use a jigsaw, hacksaw or even garden sheers), cut the old balusters at their narrowest point (saves time). Once the cut is made, you should be able to remove both the top and bottom sections pretty easily. In our case they were just glued in and needed some wiggling…however, I know they can also be secured with a nail/staple so you may need some muscle to get them out.
Cut and remove old balusters
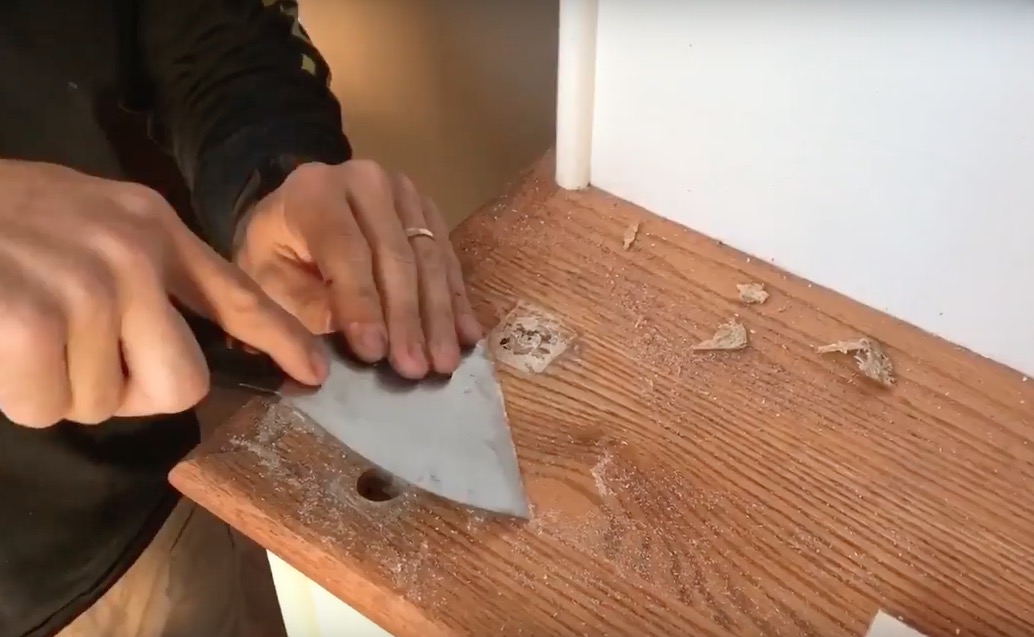
02. Scrape Away Dried Glue
Scrape away any dried glue on the surface of the stair tread with a putty knife.
Scrape away dried glue
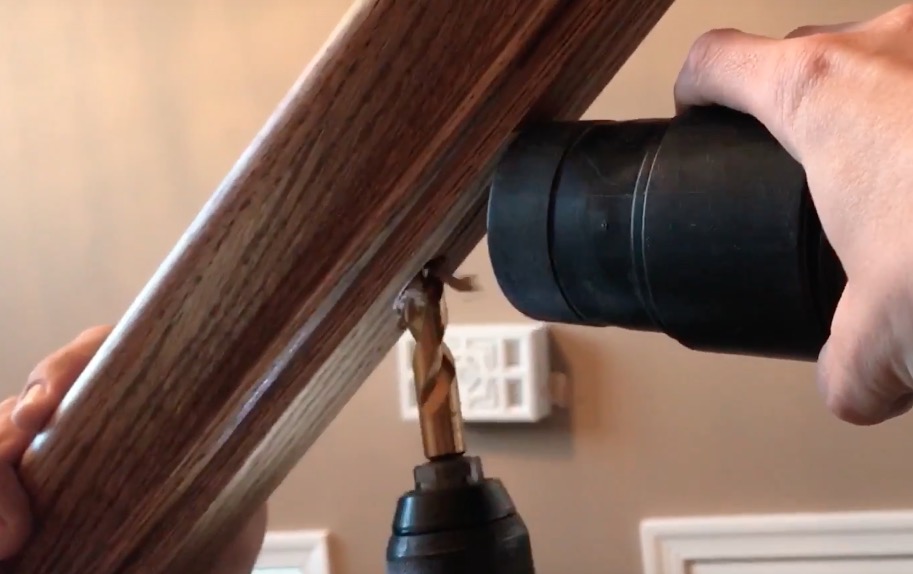
03. Drill Away Dried Glue Obstructing Holes
There will most likely be dried glue blocking both the top and bottom baluster holes. It’s important to remove this so your new balusters have a secure fit. Use a drill with a 1/2″ bit (or larger) to carefully remove the excess glue. Be careful not to cause damage to the tread or railing finished surface.
Drill away dried glue obstructing holes
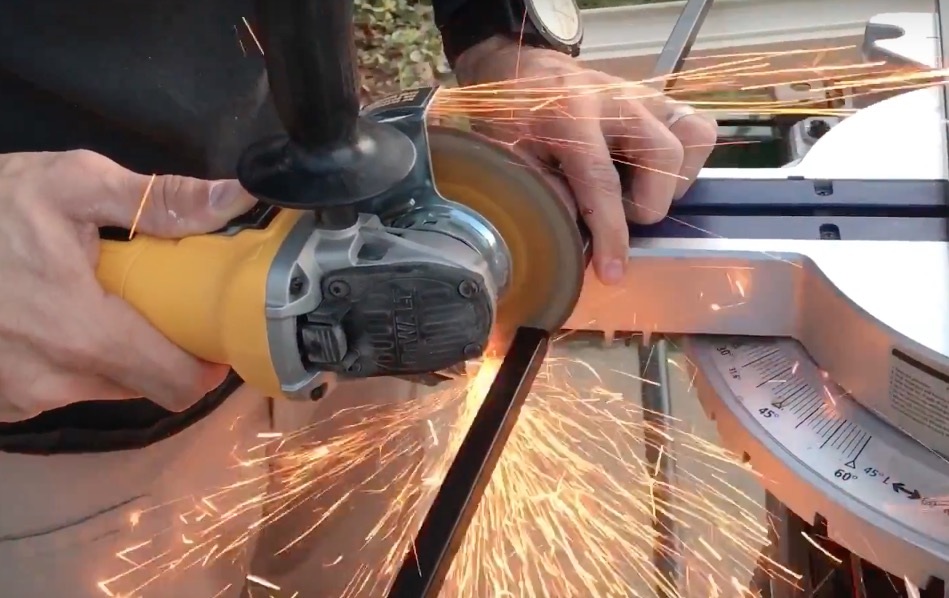
04. Mark and Cut Iron Balusters
Place the top portion of the baluster into the railing hole as far up as it can go. Really use some muscle to get it up there — you want the baluster to be secure without a lot of room to move once it’s placed. Mark the bottom of the baluster at the spot where it’s just meeting the stair tread — this is your cutting line. We used an angle grinder to cut our spindles, but you can use a hack saw or miter saw with metal cutting blade (any saw blade rated for cutting metal will work).

Insert the baluster into the top railing hole as far up as it will go. Where the spindle meets the stair tread is your cutting line.
Mark and cut iron balusters
05. Place Shoe on Baluster and Tighten 80%
After you have your baluster cut to size, place the baluster shoe onto the bottom of the spindle. You will want to tighten the set screw about 80% of the way — it’s much easier to do this now rather than bending over and fumbling around in a tight work space after the baluster is placed.
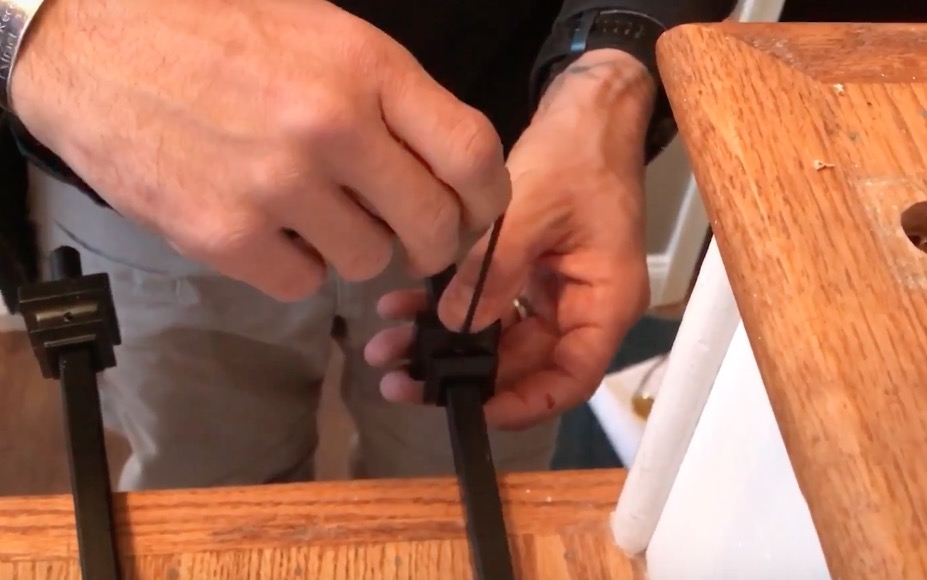
Place shoe on baluster and tighten 80%
06. Inject Adhesive
There are a number of adhesives you can use for installing iron balusters. We used Loctite Power Grab Ultimate Adhesive, but a lot of installers use an epoxy or you could use Gorilla Glue Construction Adhesive. You can talk to your local hardware store about their recommendations too! We chose the Power Grab since it’s thick, so no worries about dripping etc. Inject enough adhesive to fill both the top and bottom spindle holes about 3/4 of the way.
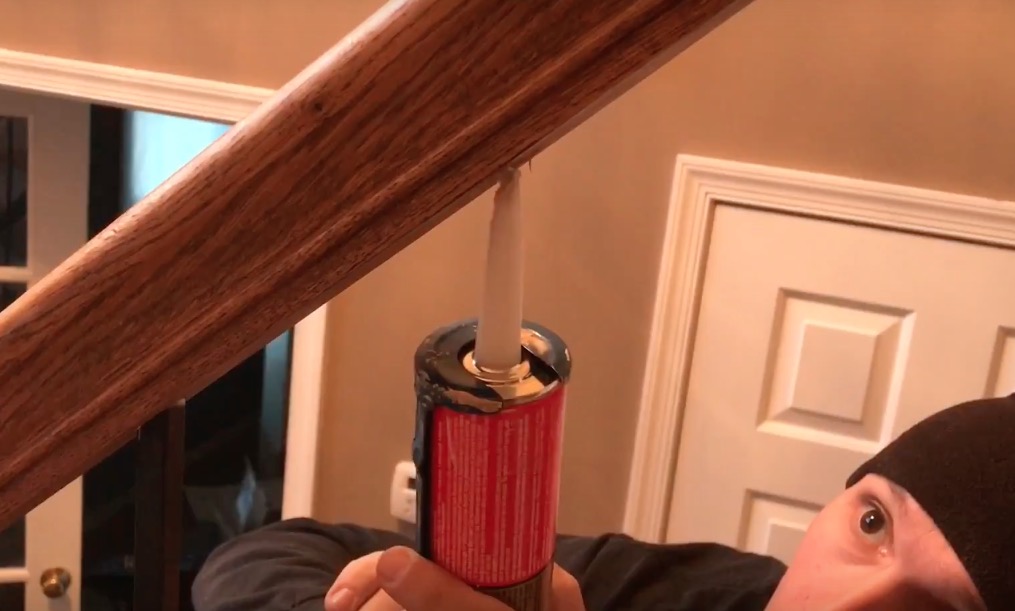
Inject baluster adhesive
07. Set Balusters in Place
Insert the top of your baluster as far into the top railing hole as it will go. Be sure to use muscle in this step too. You will then want to swing the bottom of the baluster into the hole on your stair tread. BE CAREFUL! If you are not planning on refinishing your tread surface, you can easily scratch your finish in this step. If you cannot get the top of the baluster pushed in high enough to avoid scraping at the bottom, you may need to make another hairline cut.
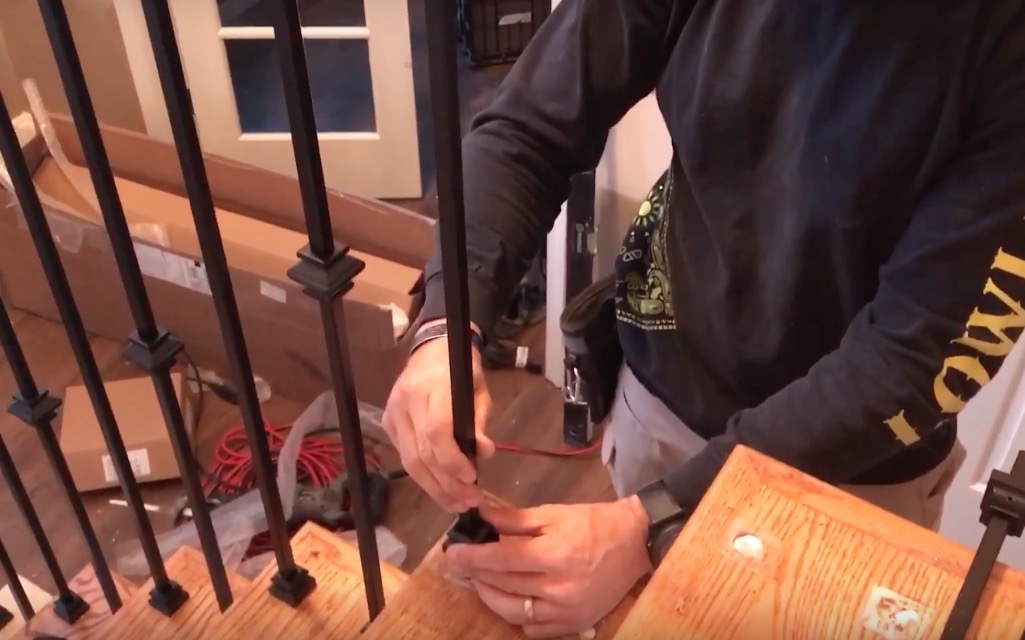
Set balusters in place
08. Adjust Baluster Height and Secure in Place
Now that your baluster in set in place, adjust the height so that it is securely sitting within both the top and bottom holes. For instance, you may need to pull the baluster up a bit so that it cannot accidentally be pulled out of the top hole if your cuts were a bit too short. Once the baluster is sitting at a good, secure height, tighten the baluster shoe the remaining 20% to lock it into its vertical alignment. Finally, check that your baluster design features, as well as the shoes, are all turned and adjusted so they will dry in straight positions. Then don’t touch!!! The glue will take some time to dry, so it’s important that you do not let them move before then.
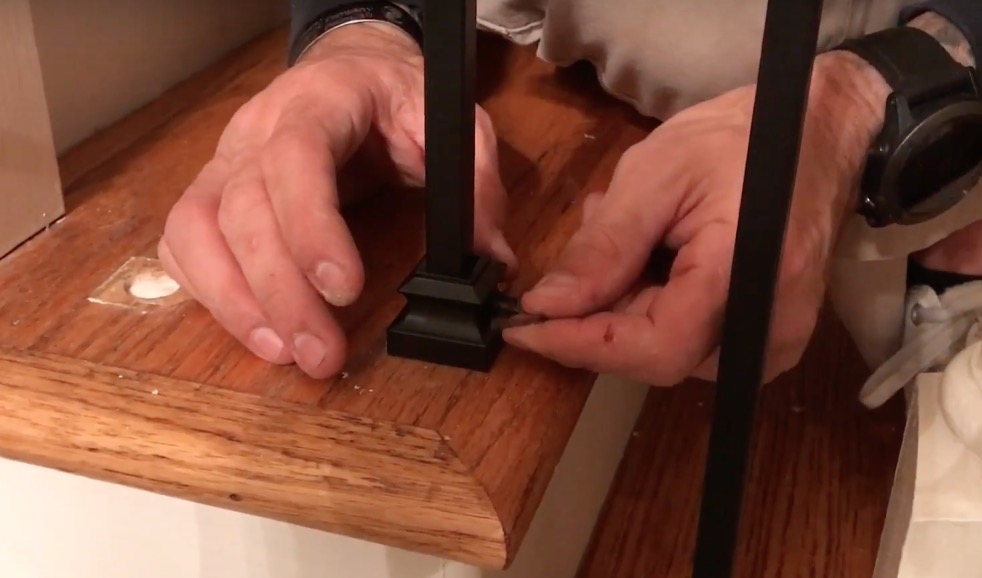
Adjust baluster height and secure in place
Here is Our Video of Installing Iron Balusters in 8 Steps
Conclusion
That’s it! It’s super easy. Although, multiplying these steps by 40 or so balusters does make for a days worth of work, the small investment and simple craftsmanship make for a really great return in my opinion. And holy wow – does it make for a grand entrance! We still have to paint the railing and treads…but I’m already IN LOVE.
Questions or comments? Leave them below 😉
After: Iron baluster installation
After: Iron baluster installation
 We are a couple of DIY-ers who
Did you put new balusters along the railing to the left at the top of the stairs? I would love to see a picture of that, too.
Yes we did! I’ll get a photo of that and add it for you 😉
What was your total cost?
About $140! We still have to pain the steps and finish that part of it…but a pretty affordable upgrade with the products we found.
Did this make the staircase stronger as to side to side movement?
Hey Robert, I cannot say one way or another whether this made the railing stronger/weaker. We had no side to side movement before or after our changes. Most of the structural integrity should be coming from the posts at the top and bottom…so if you are having some movement I would check those first!
[…] with out grand plans for the staircase makeover – next up after the install of the iron balusters was painting the old oak stair treads and railing black. I would file this overall portion of the […]
Was there a reason you didn’t put shoes on the top of the spindles? Was the finished look (adhesive showing?) sufficient?
I just didn’t like the way it looked…wanted it to be cleaner. It’s personal preference. We made sure to wipe adhesive that had dropped down and then I touched up a couple of spots with paint 🙂
I like how you suggest checking pictures to find the design that you would like to get for your stair balusters. My parents told me that they would like to renovate their house because the floors and stairways are old. I will recommend them to think about installing wood balusters so that their house can keep the same feeling.
That’s a great recommendation. Depending on the style of home, staying with something true to the original architecture is a good idea!
did you worry about the four inch max between balusters (code)? Your gaps may be a little bigger than that going by the photo?
Hi! No we didn’t worry about that. You’re right there was probably more spread with the replacement we chose (at the bar, not at the shoe). But we actually just sold this house and they weren’t an issue – while we DID get hit on the balusters on our deck haha. But that deck was original to the house and they were hit when we bought it too, so we knew that was coming.
Did you sand down and refinish stair treads and banister?
Yes…just a rough sand for adhesion, and we used an epoxy paint. You can read the steps for that here: Painting Oak Stairs Black
I would like to do this to my home. Want to replace wood spindles with wrought iron. Do you do this or can you recommend someone who does
Thnx
Where are you located? My husband does take the occasional projects depending on his workload…but we recently moved to the Wilmington, NC area.