We officially moved into Hampton House at the start of the New Year, 2017. Within the first week we had demoed the entire first floor! Destruction is the easy part 😉 We left all of our boxes packed up and lived out of our Holiday suitcases so we weren’t shuffling our stuff around.
We needed to take our finishing work into consideration when deciding the order of things. What it came down to was pretty much a complete gut of the first floor. The thought behind it was essentially:
- Paint can’t be done until the walls are in their “final state” — removal, patching etc.
- Drywall can’t (or shouldn’t) be patched until all of the destruction is done — so that’s tearing out old walls, putting up new walls, removing chair rail throughout, removing kitchen soffit, completing new electrical wiring, installing and removing light fixtures etc.
- Bathroom/plumbing can’t be finished until the floors are in — the floors determine hookup based on their finished, installed height. For example, installing a new toilet or sink before new floors means adding unnecessary work later if the new floors make the plumbing hookups higher/lower.
- Floors can’t be finished until the walls come down — or we would have “open” spots with missing floorboards.
- Kitchen Cabinets can’t be installed until the floors are in and final outcome of wall removal is determined — that way we know what space we have to work with.
So there’s a running theme of “walls” in the list…Demo Day 1, those had to go! The rest of the demo items sort of fall in line, we just tackled them in the order that made most sense for disposal and cleanup.
Since we were tearing out a lot, we rented a dumpster from (I love this) Bin There Dump That. I honestly don’t know how we could have demoed without that…we filled an ENTIRE 14 yard dumpster, and that was just one floor’s worth of debris.
Removing Walls
Let’s jump into it and bust these suckers down! Touching again on our plan from my last article, here is a list of what walls we had wanted to remove, now listed in order of our priority with notes on why.
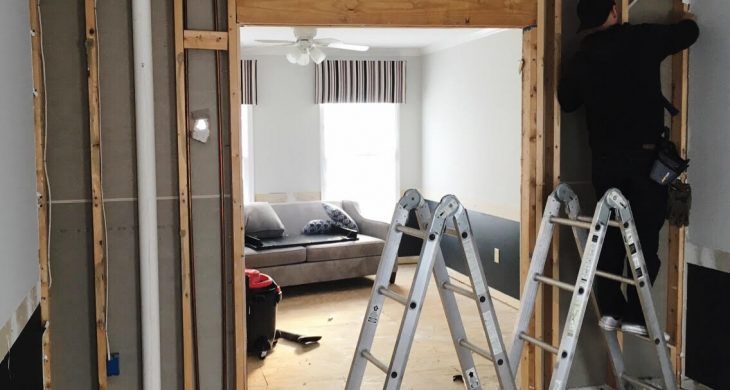
- The Living Room + Dining Room – our concern with this wall is that it was most likely load bearing, we needed a professional assessment of what it would take to remove, therefore it was at the top of our list because it required more homework and potential investment.
- The Kitchen + Family Room – this wall removal was important for opening up the space since it divides the two most used rooms and most occupied side of the house.
- Door from Kitchen to Dining Room – while the opening was a minor change (16″) we really felt this would pull more foot traffic into rooms that would otherwise go unused – think, “out of sight out of mind”.
- The Staircase – this one was potentially messy. Would require re-building 3-4 steps, new railing etc.
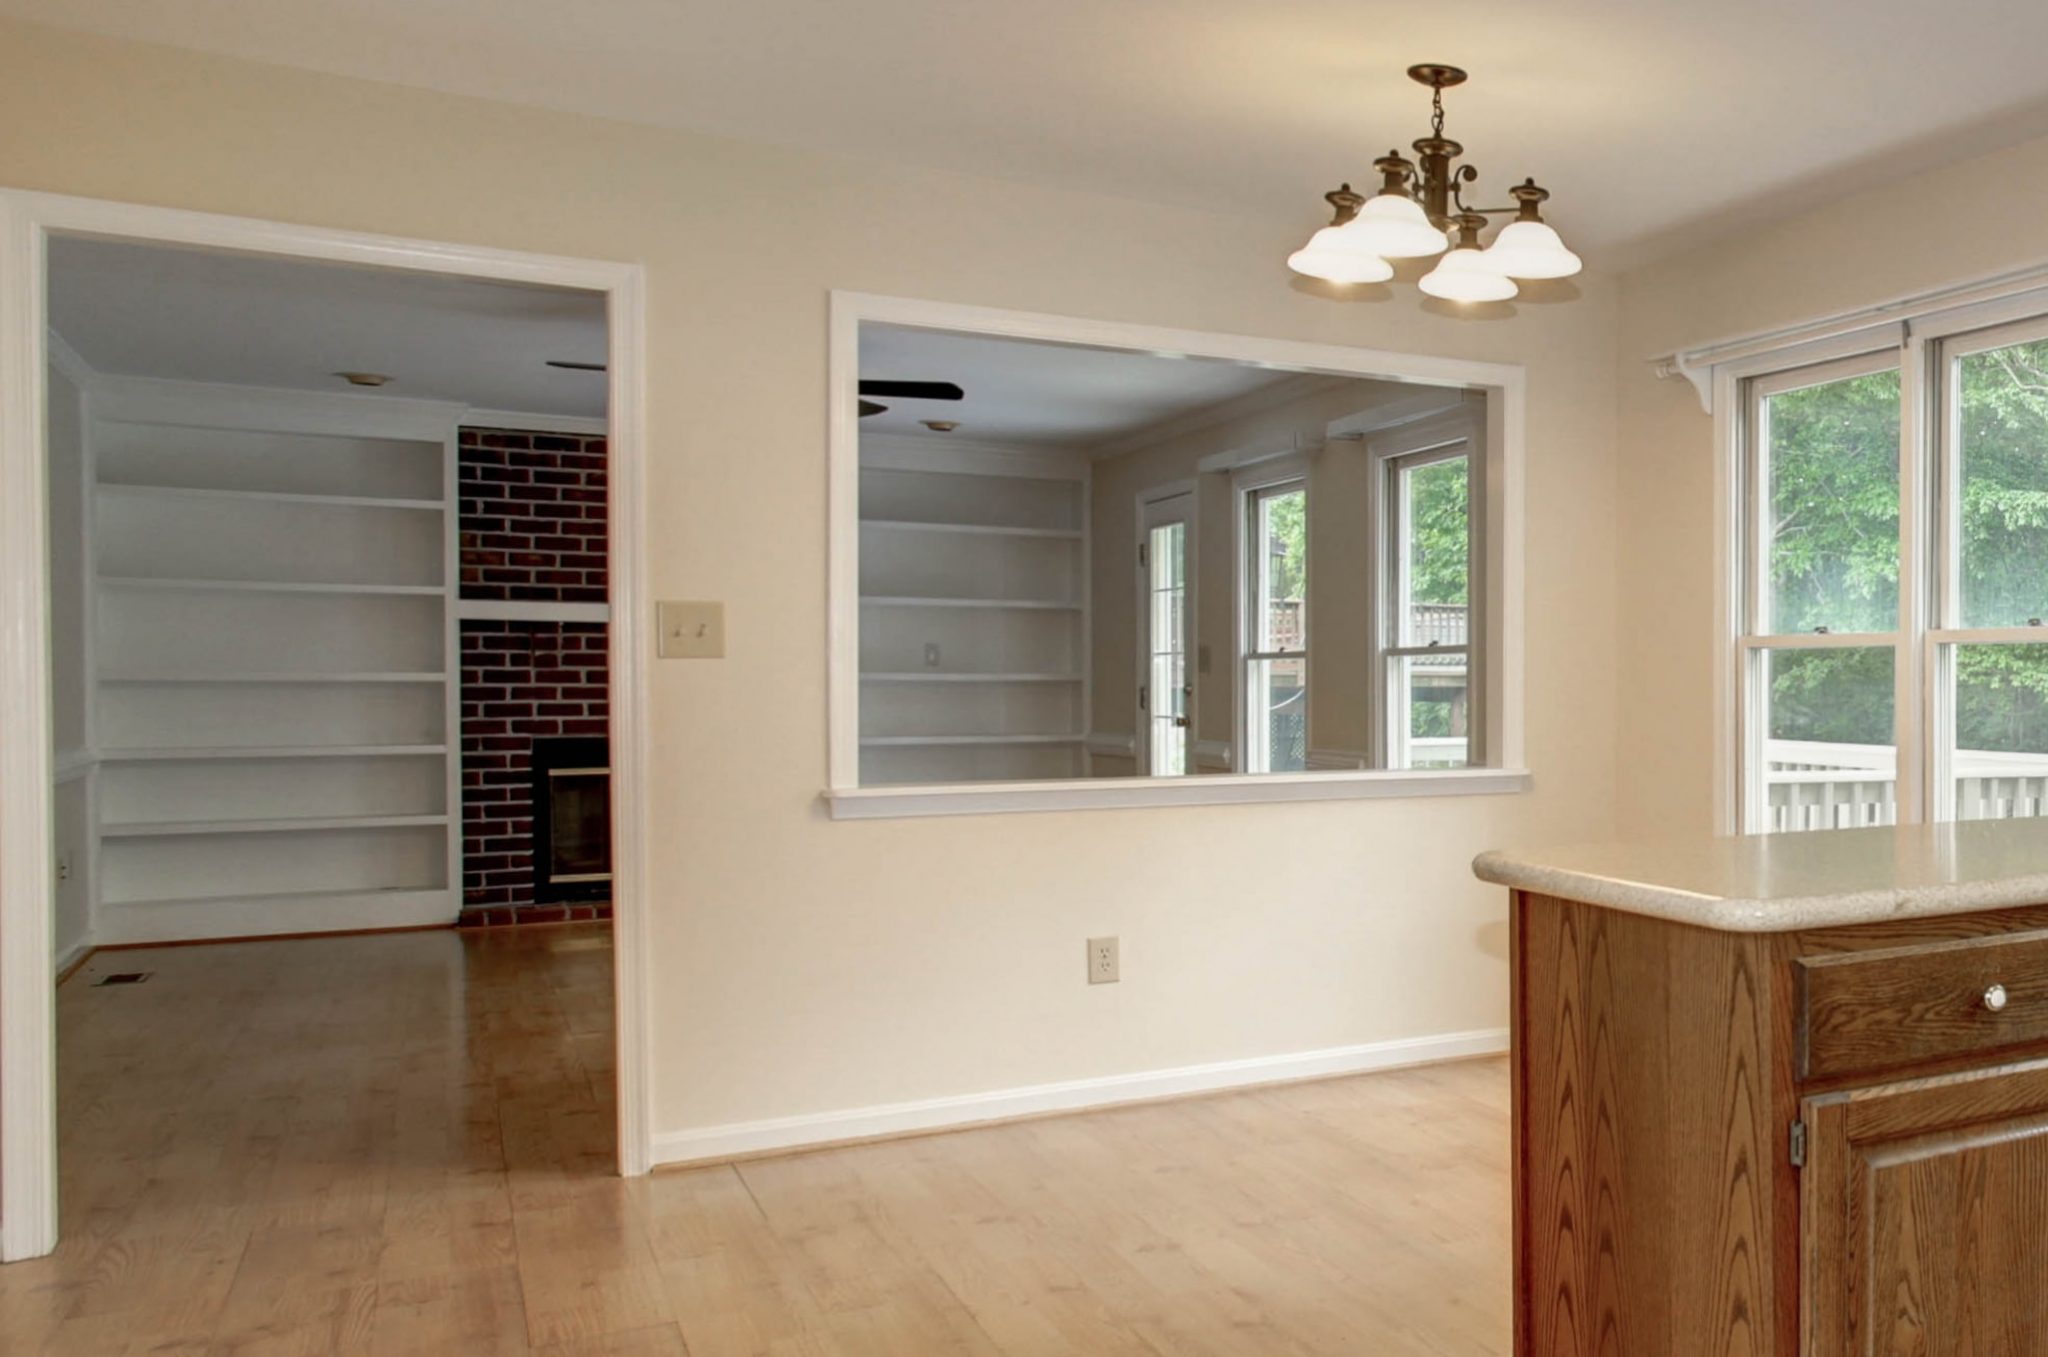
01. Living Room + Dining Room Wall
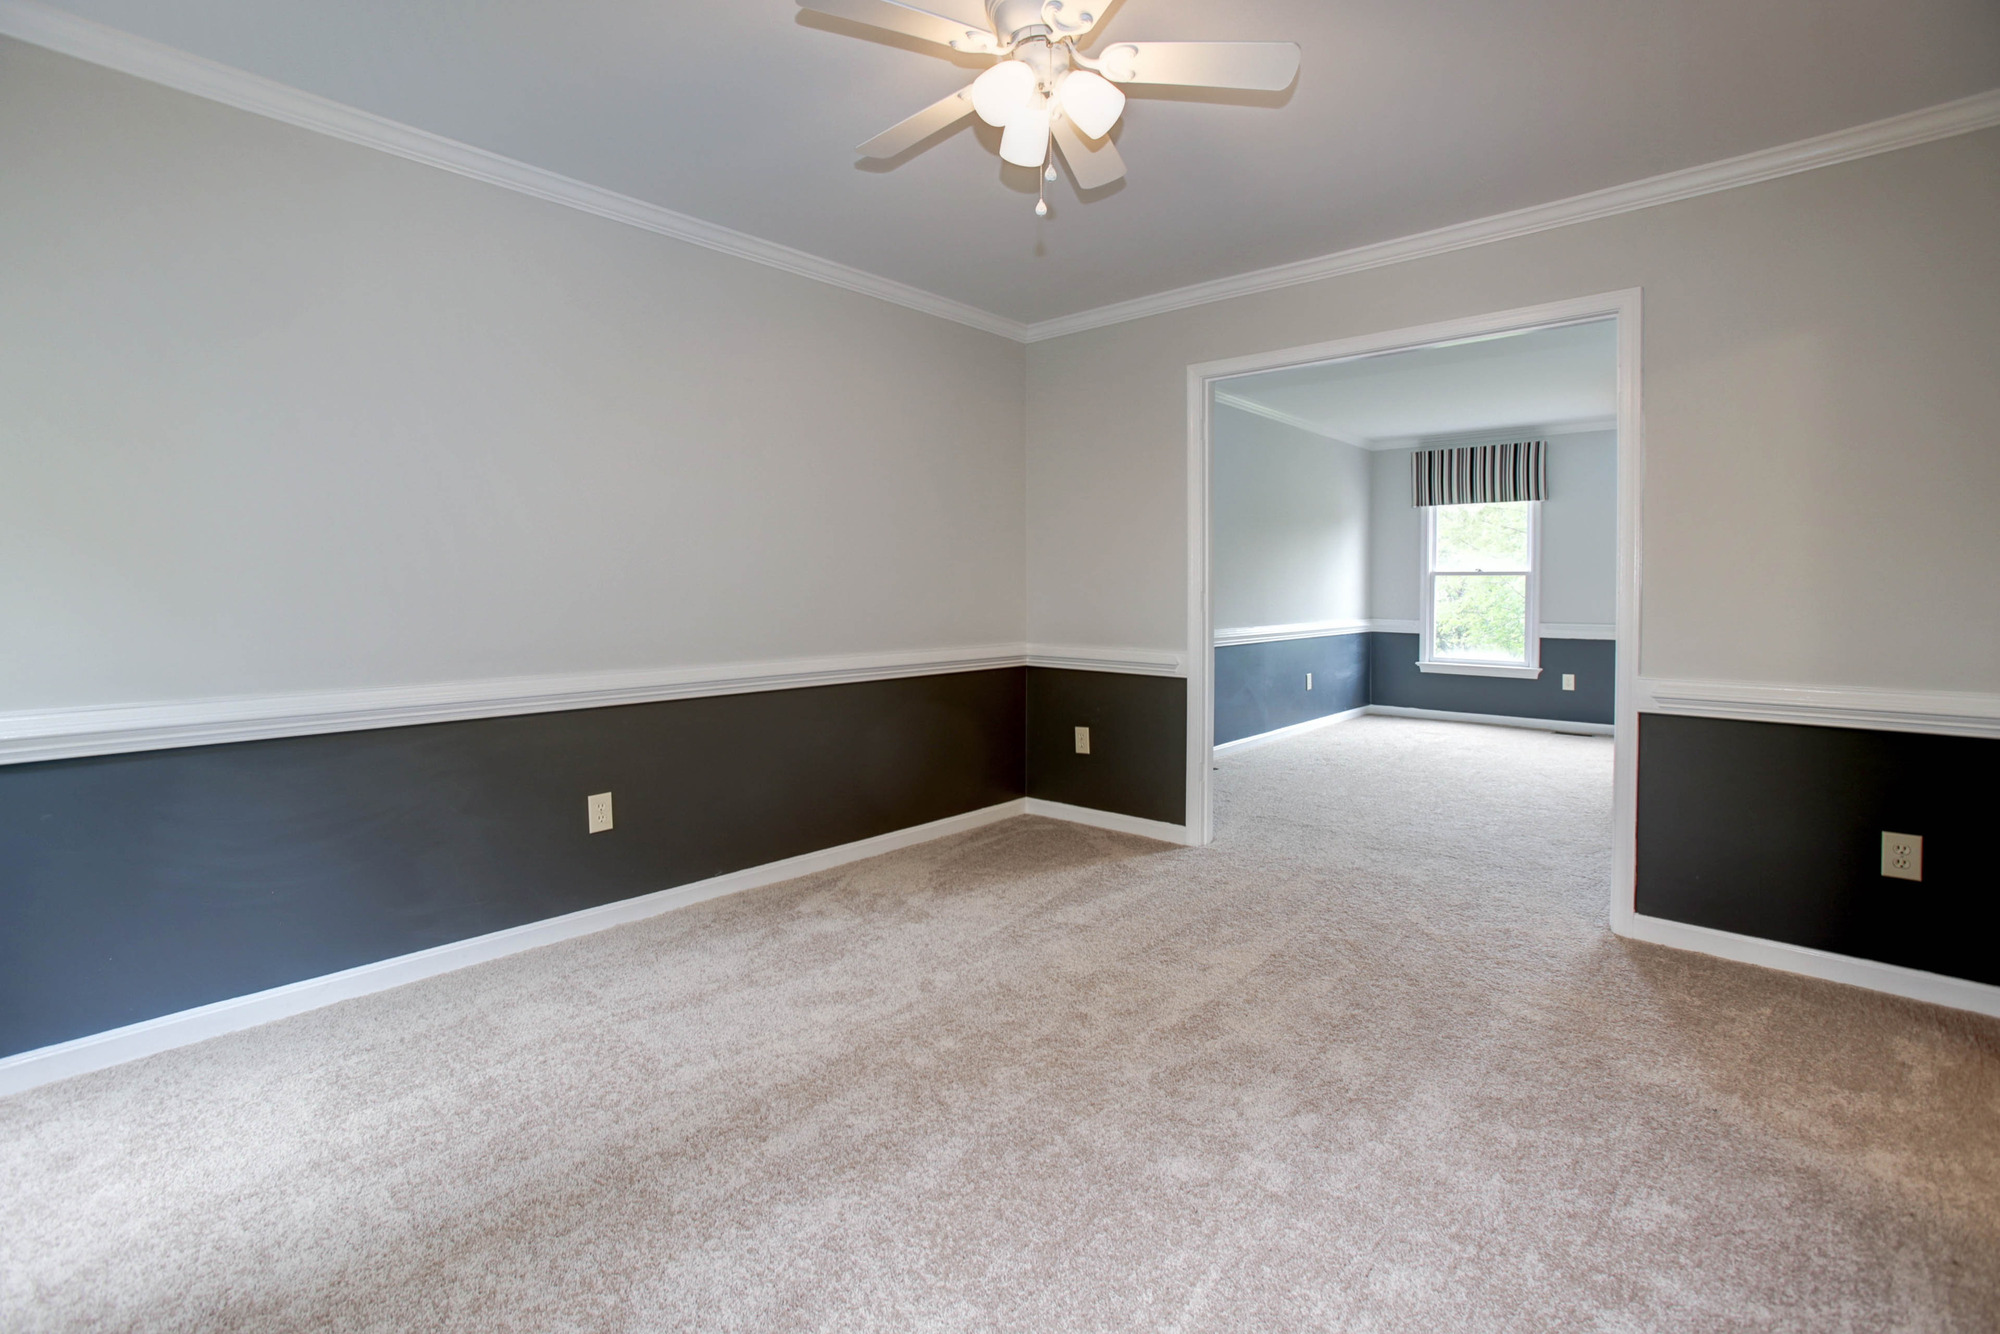
Before: Living Room + Dining Room Wall. Photo credit: HomeVisit.com
Word to the wise: never assume. You’d think we would have learned that lesson by now with all of these projects, but alas. When it comes to walls in your home and what’s potentially behind them, be careful! Fortunately, we came out all right on this…but a couple of close calls!
We knew this wall was (most likely) load bearing. We called a few contractors to come out and look at it, we then decided to remove the drywall to get a better idea of what was going on. All of the contractors agreed the wall was load bearing, all of them had roughly the same assessment on what it would take to remove, none of them foresaw…PIPES…AND POOP!

After: Living Room + Dining Room Wall. Pipes were unknown until we removed the drywall.
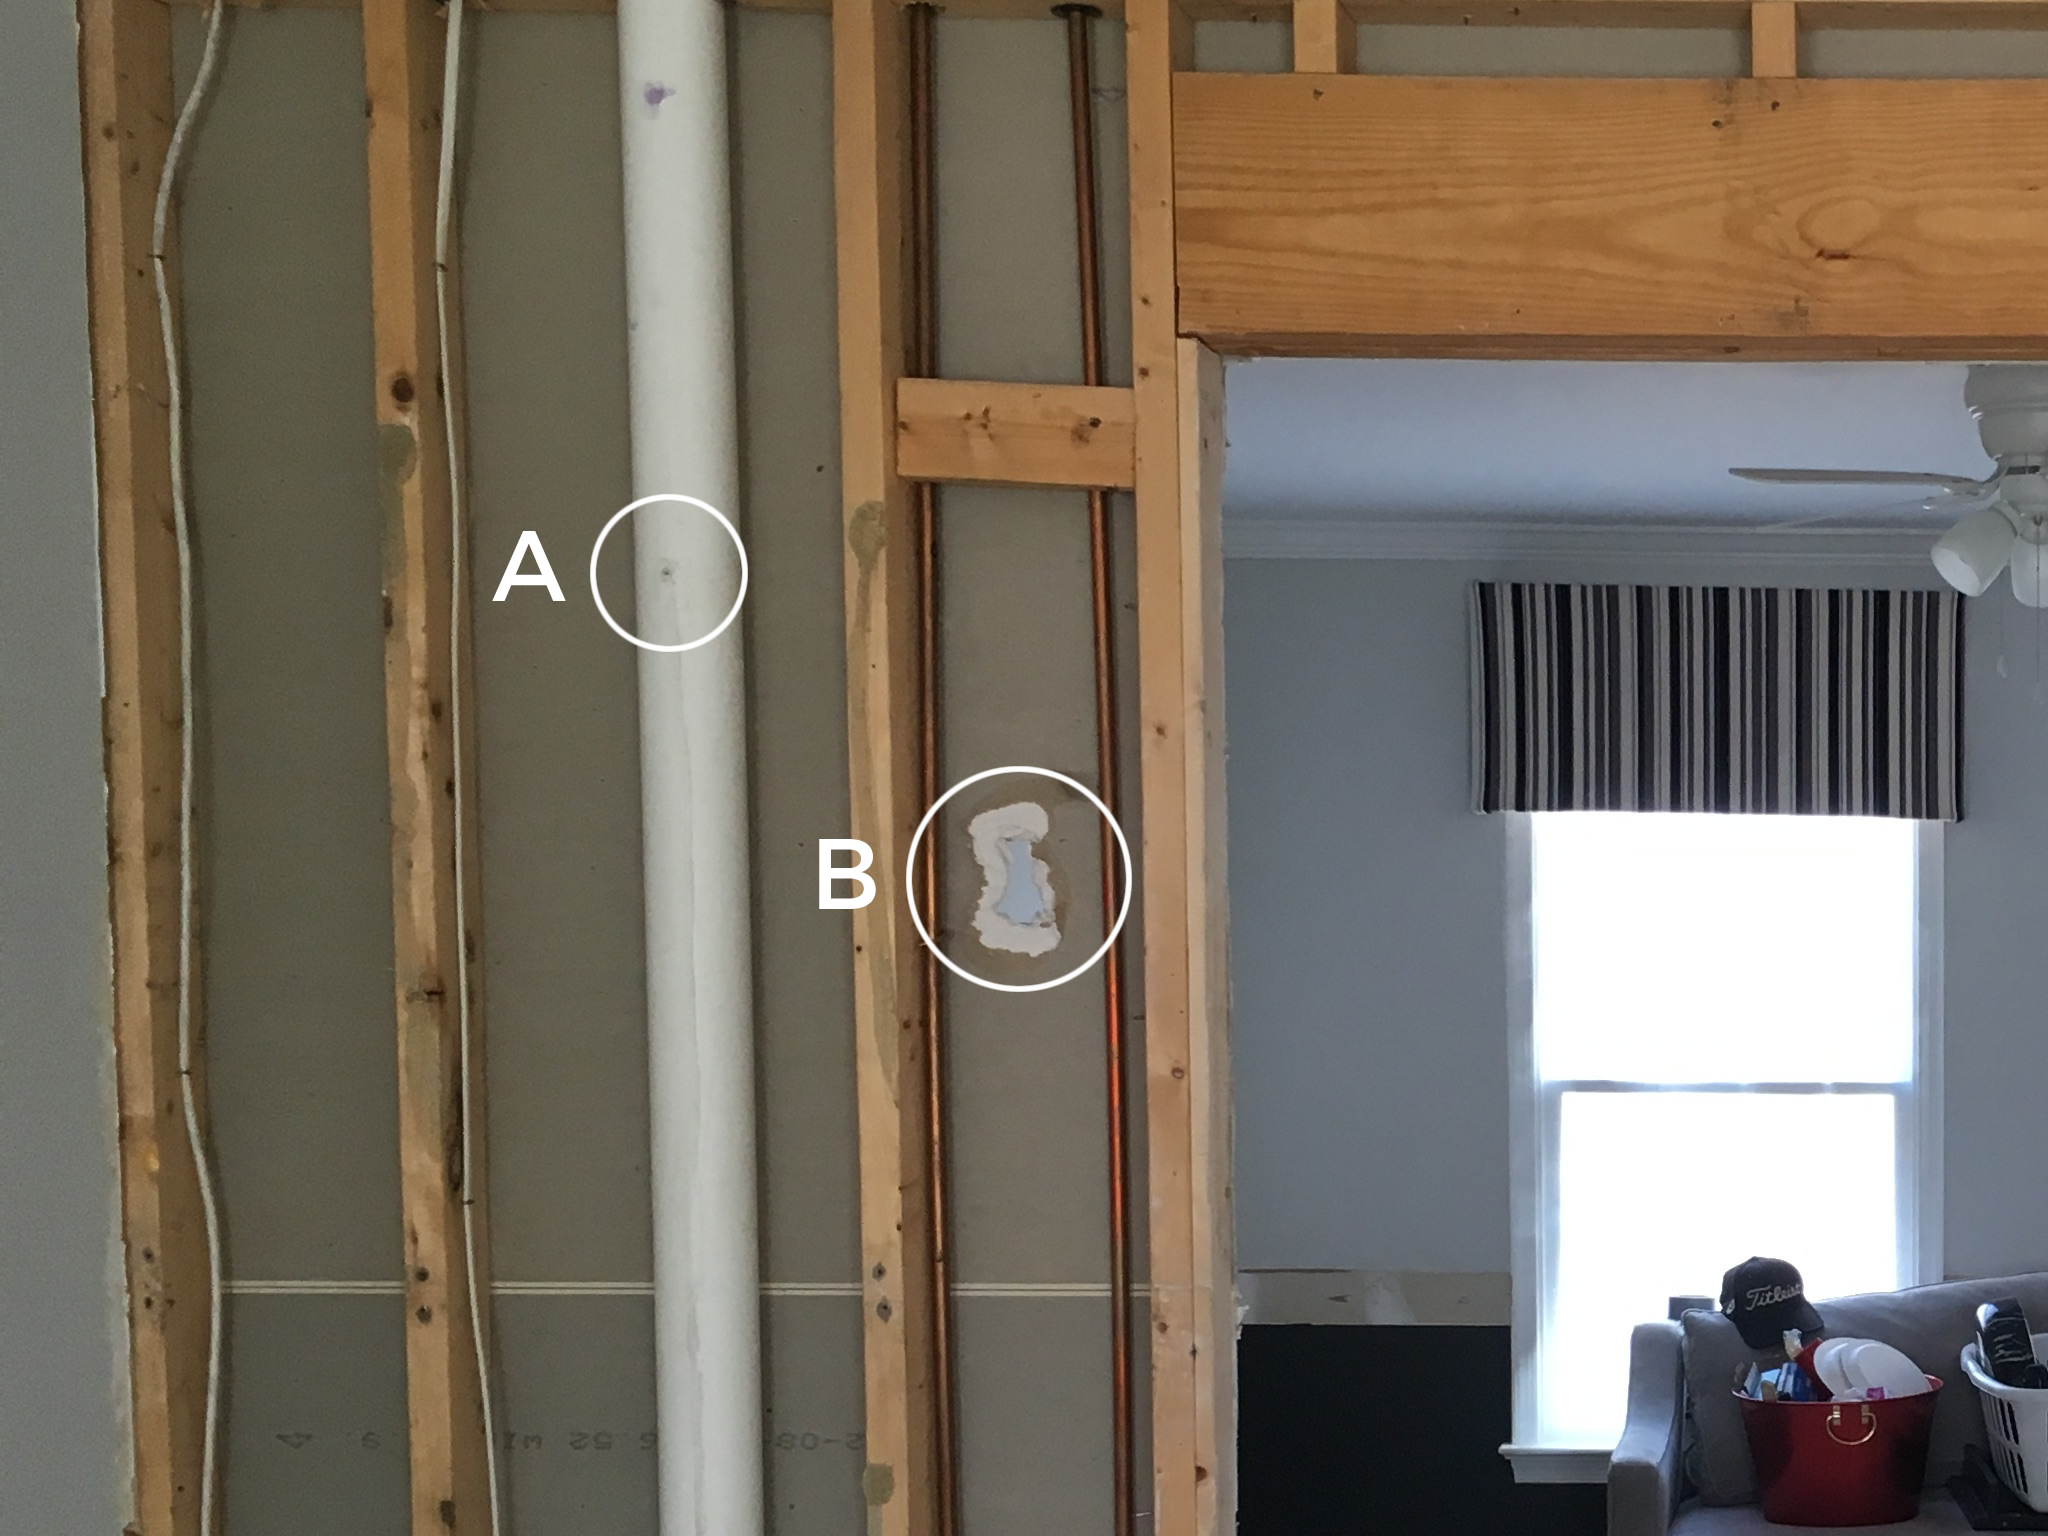
A) Nail hole into the poop pipe. B) Nearly a disaster inaugrual hammer strike.
Holy, crap. Literal crap. Someone previously tried to hang a picture on this “poop pipe” and there was an active, open hole…thankfully not an active leak, just crusty remnants. Ew. But an even bigger mess would have been if this oh-so-luckily-placed-inaugrual-hammer-strike would have been 2 inches in the other direction – GAH!
Assume not, lest your home be flooded.
The cost of moving a load wall is pretty hefty. If you’re going to do it right and have it assessed by an engineer you’re already into the thousands. Throw re-routing plumbing into that and you’re now in the major league ballpark. Sorry dreams. Maybe another time!
That’s a no go for the Living Room + Dining Room wall. This is now a pocket change drywall repair and some poop pipe silicone, rather than 1/4 of our budget in professional services.
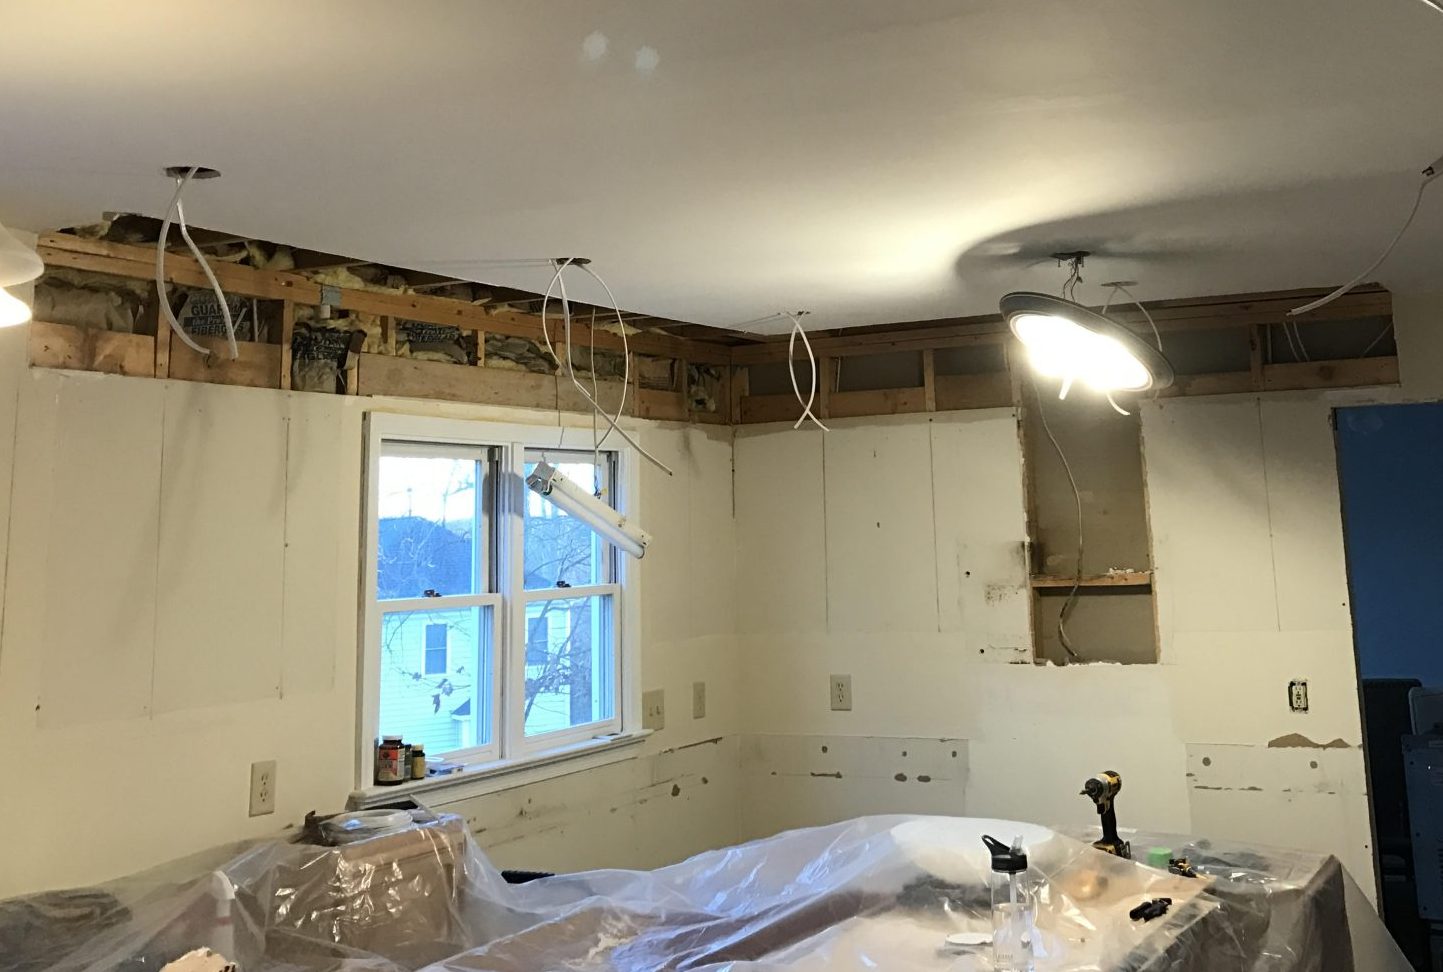
02. Kitchen + Family Room Wall
Before: Kitchen + Family Room Wall. Photo credit: HomeVisit.com
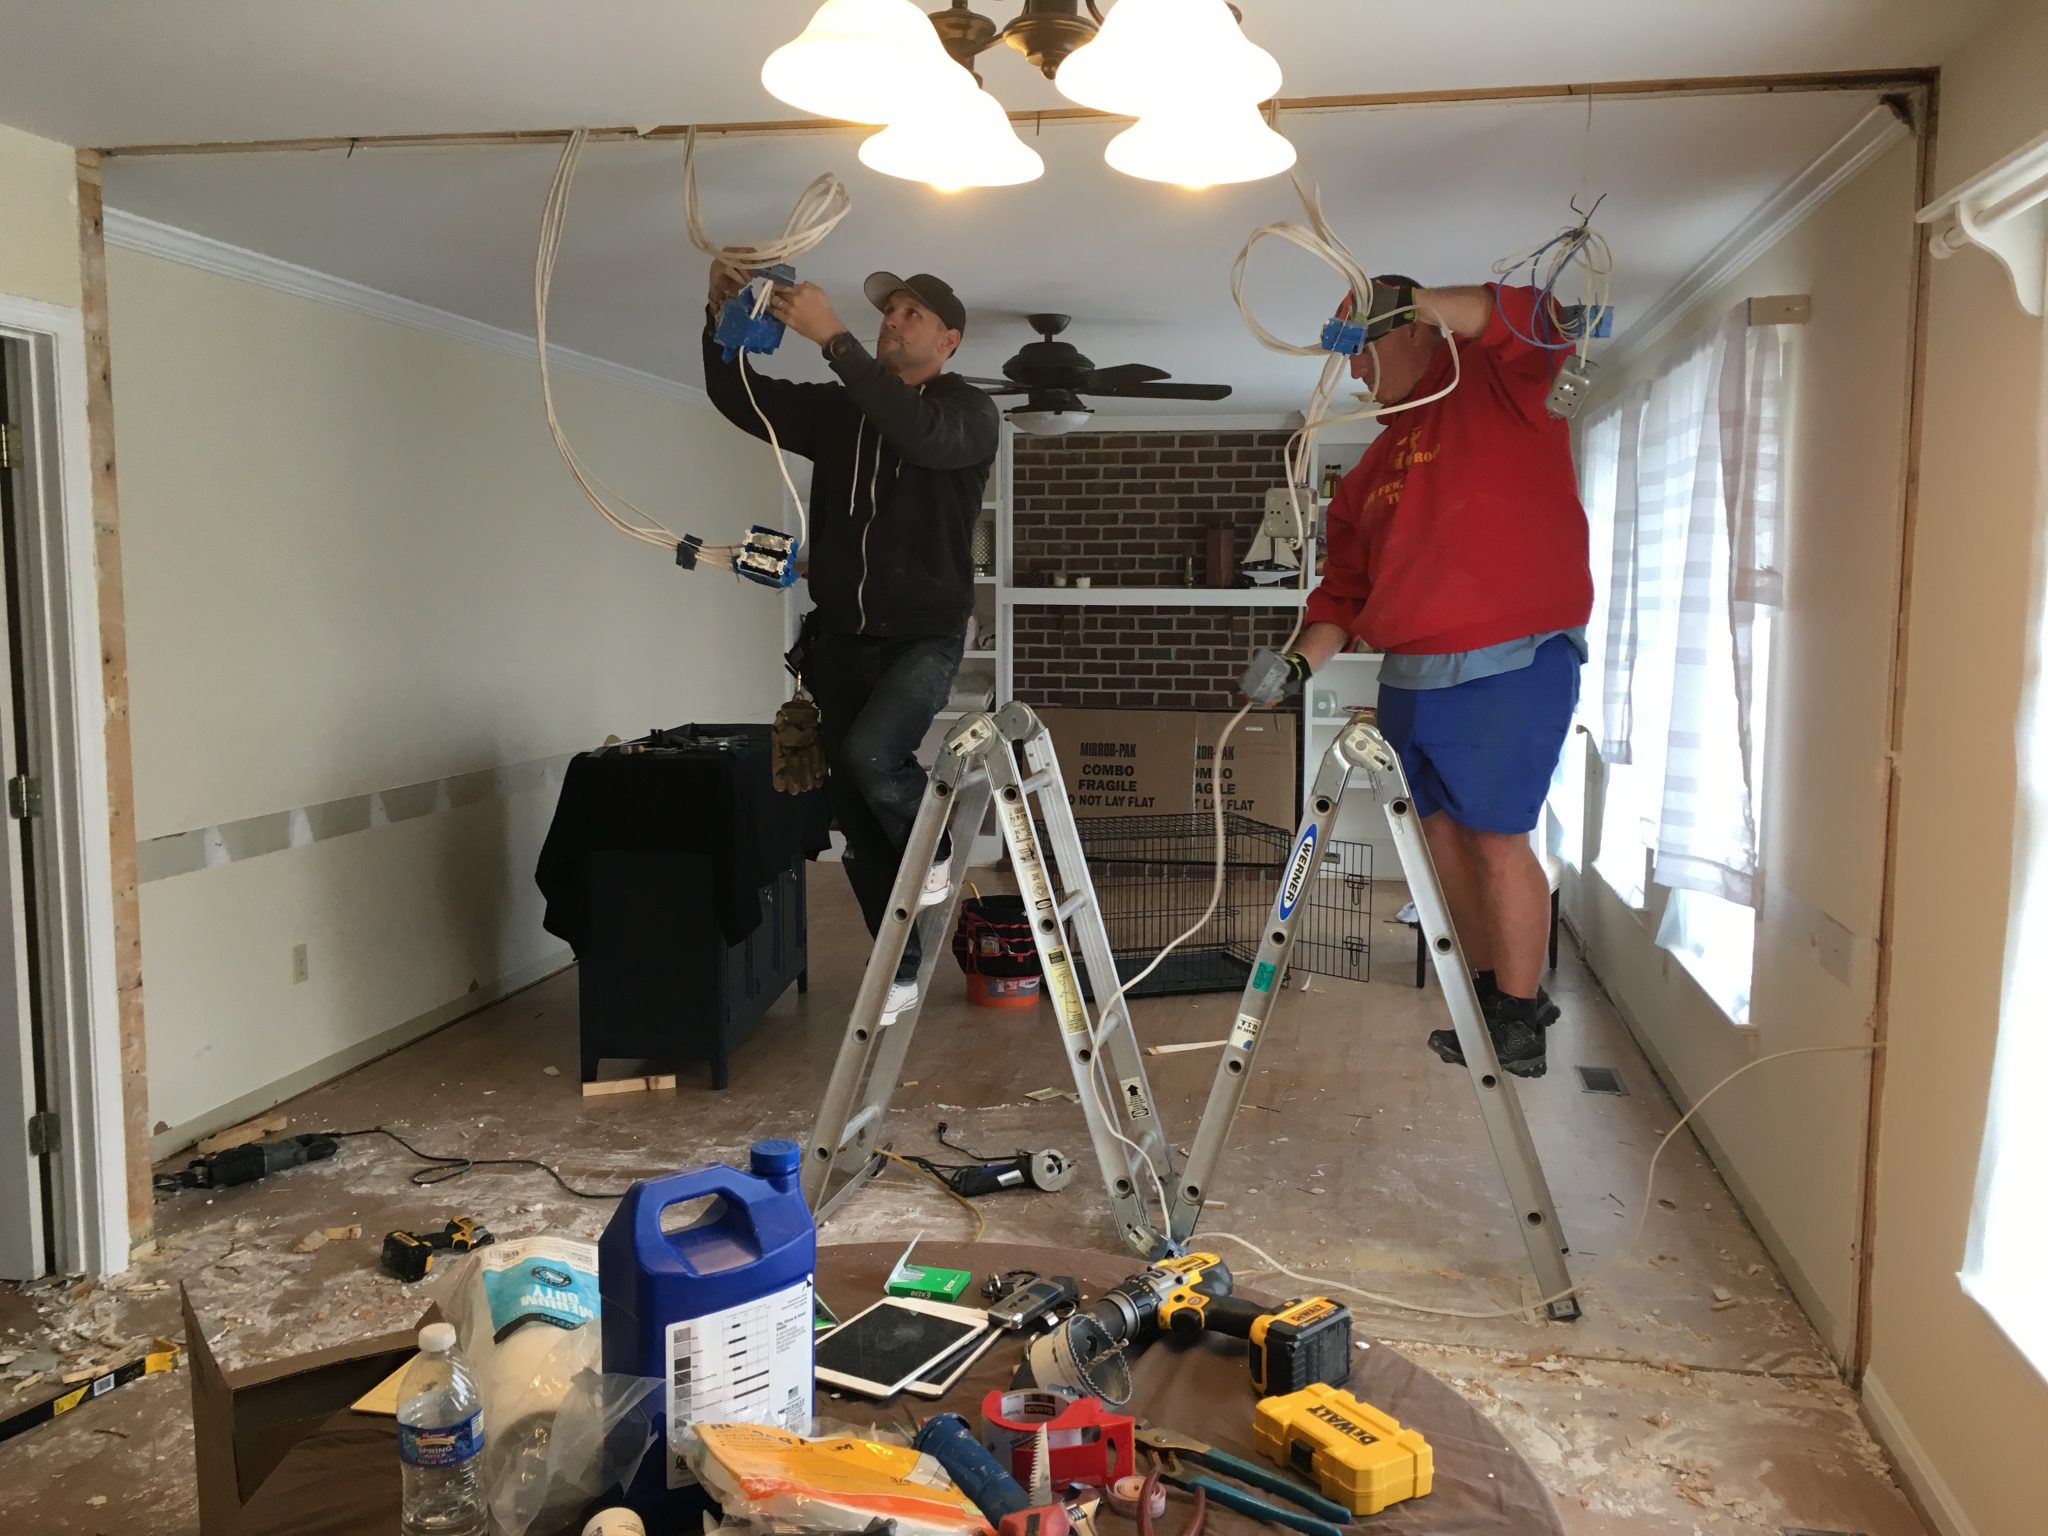
This wall was less of an unknown…still some fun easter eggs in there though. There were two outlets and two switch panels in this wall…
Step 1) Shut off the power.
Step 2) Destroy.
Step 3) SURPRISE! Three hidden junction boxes!
For those reading who don’t know – electrical junction boxes CANNOT be hidden behind closed walls (code violation). That’s why you see those phantom plates around that resemble light switches and/or outlets without the switches or receptacles — they are concealing electrical wire connections, but leaving them accessible if there is a future issue.
Not a huge deal for us…we found them so we will correct them. However, it does mean a bit of a hassle trying to figure out where we can move/junction them based on the length of wire we have to work with. We don’t want a bunch of plates in the ceiling! That part rests in the hands of an electrician – the wall is gone 😉
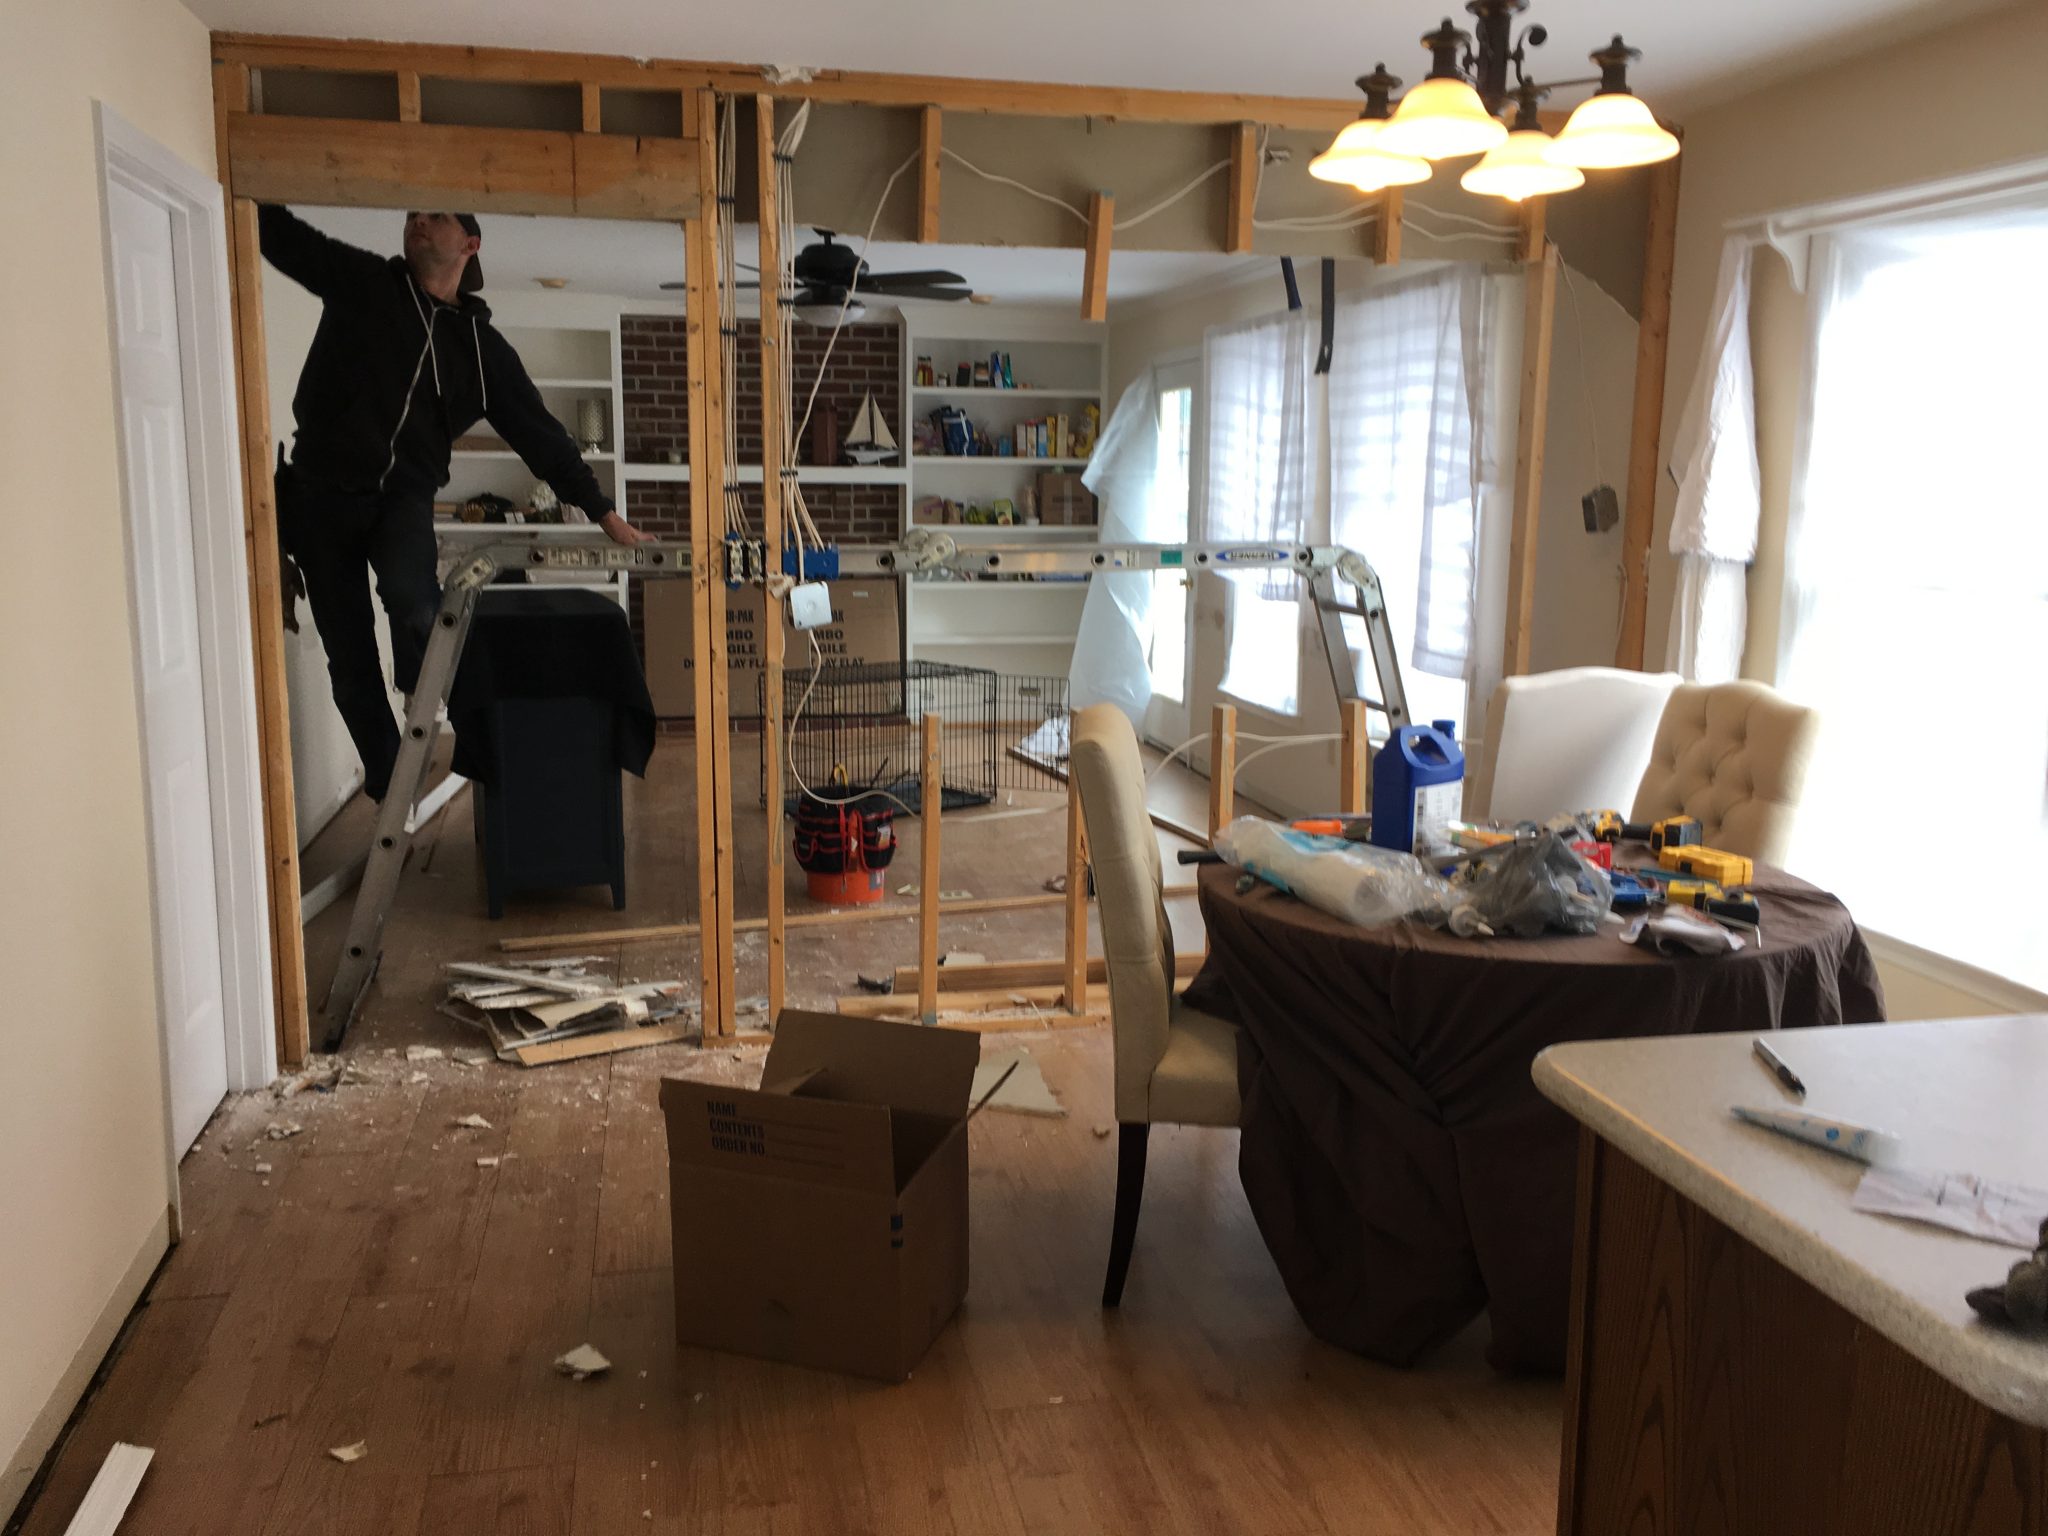
Mid-Demo: Kitchen + Family Room Wall
After: Kitchen + Family Room Wall
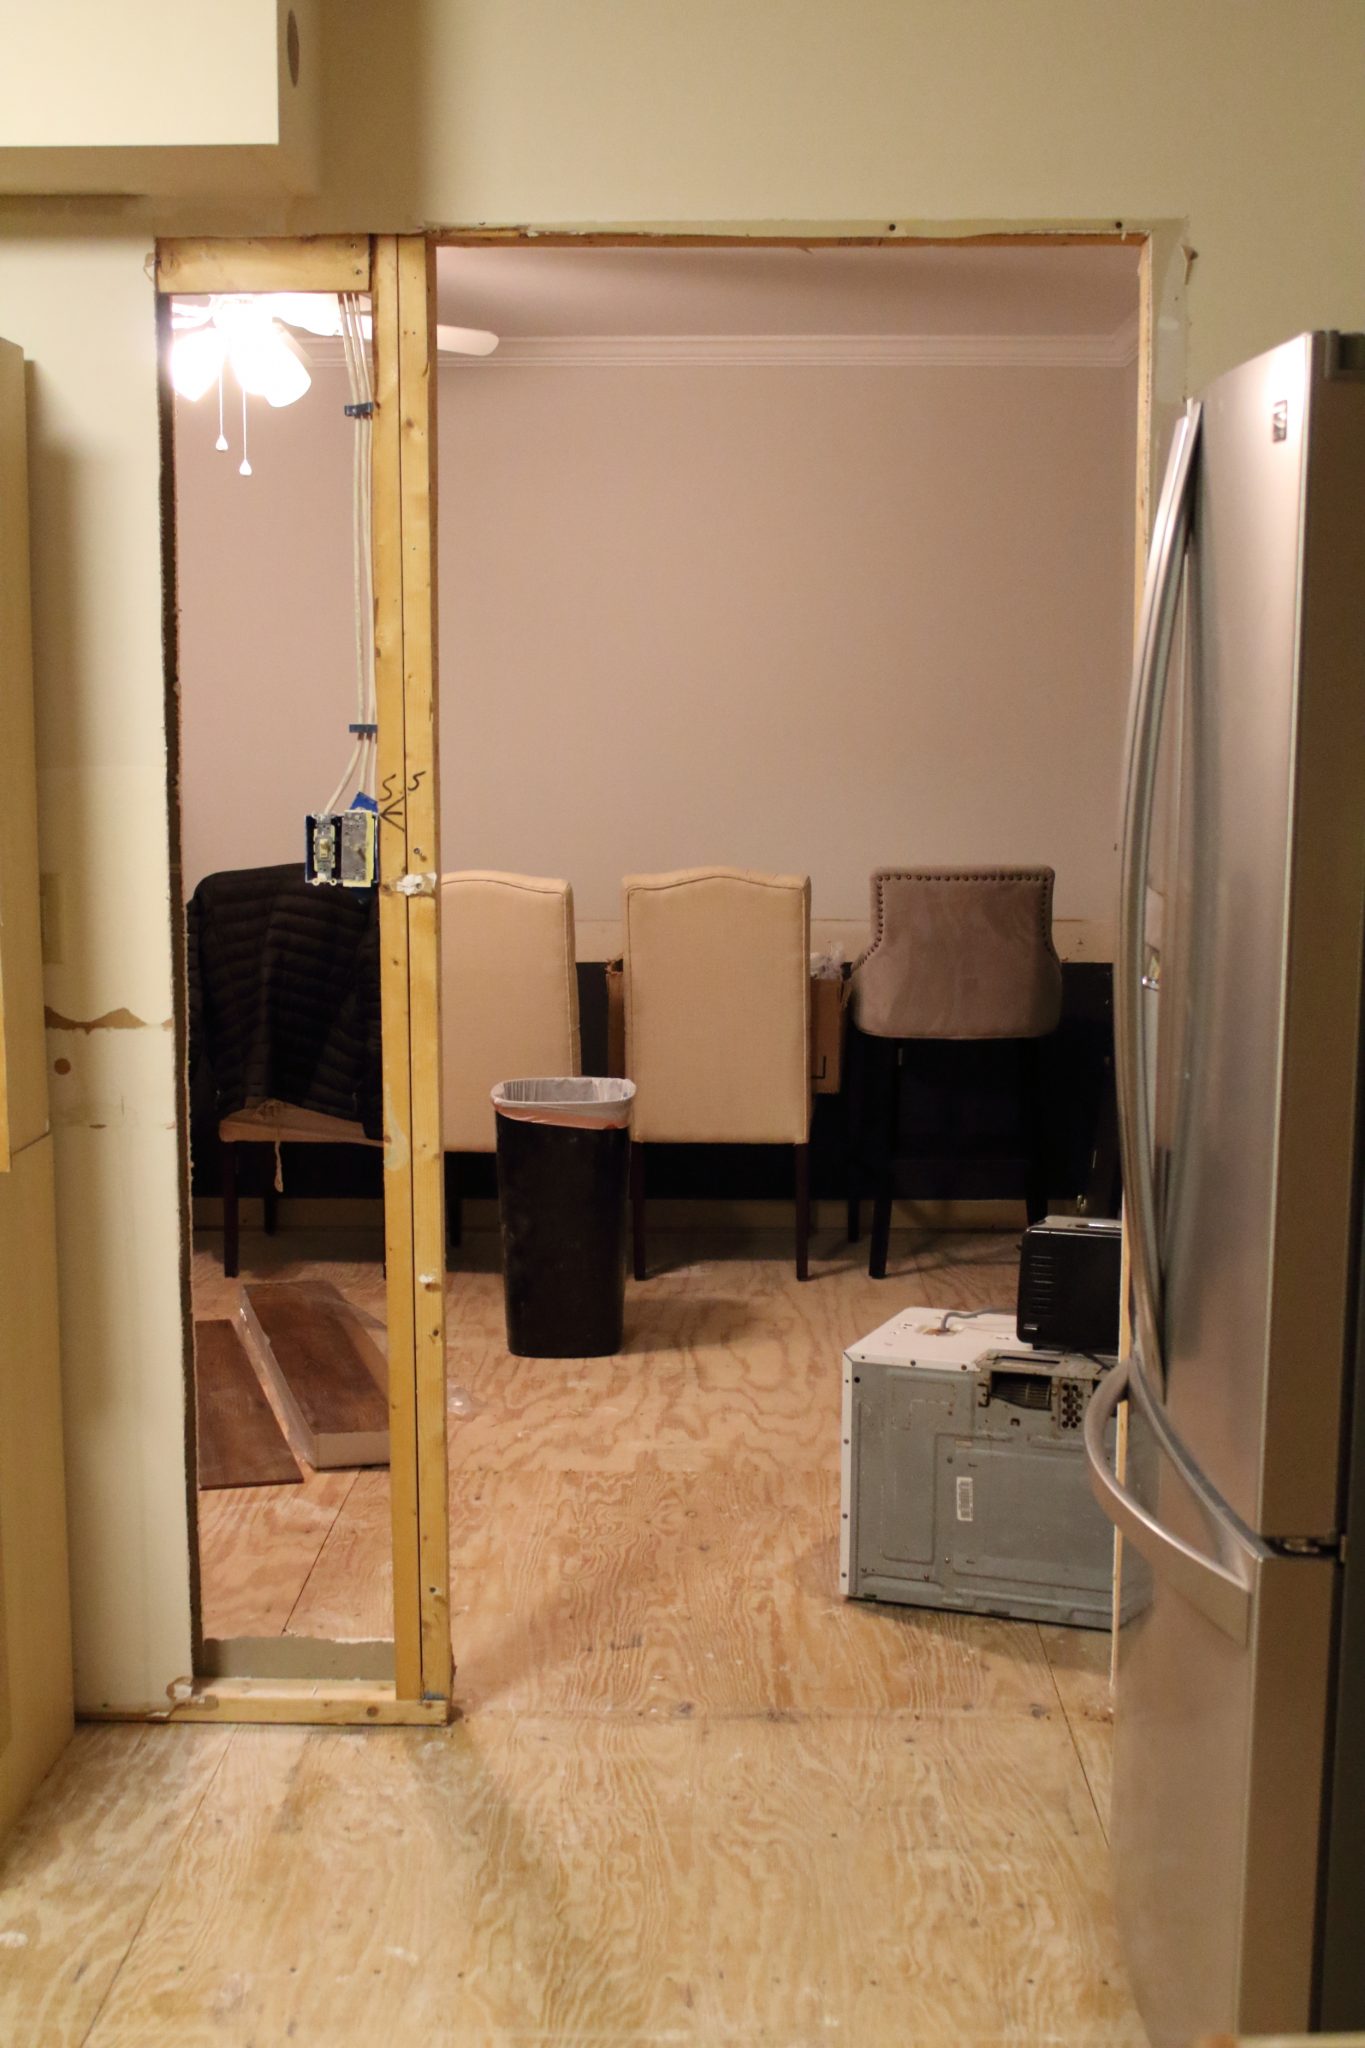
03. Kitchen to Dining Room Door
Before: Kitchen + Dining Room Door. Photo credit: HomeVisit.com
We went back and forth on this one. Almost didn’t do it. It wasn’t a ton of work, but it was more work added to an already long (and ever growing) list. Opening this wall would also mean losing a bit of potential cabinet space, and needing an electrician to relocate another outlet (more hours/cost).
In then end we went for it – so glad we did! Drew and I have had numerous conversations about how this one (seemingly small) change has made the most substantial difference. It’s completely changed the flow of the first floor space. And while we lost a bit of cabinet space, it makes the kitchen feel WAY bigger. So worth it!
Mid-Demo: Kitchen + Dining Room Door
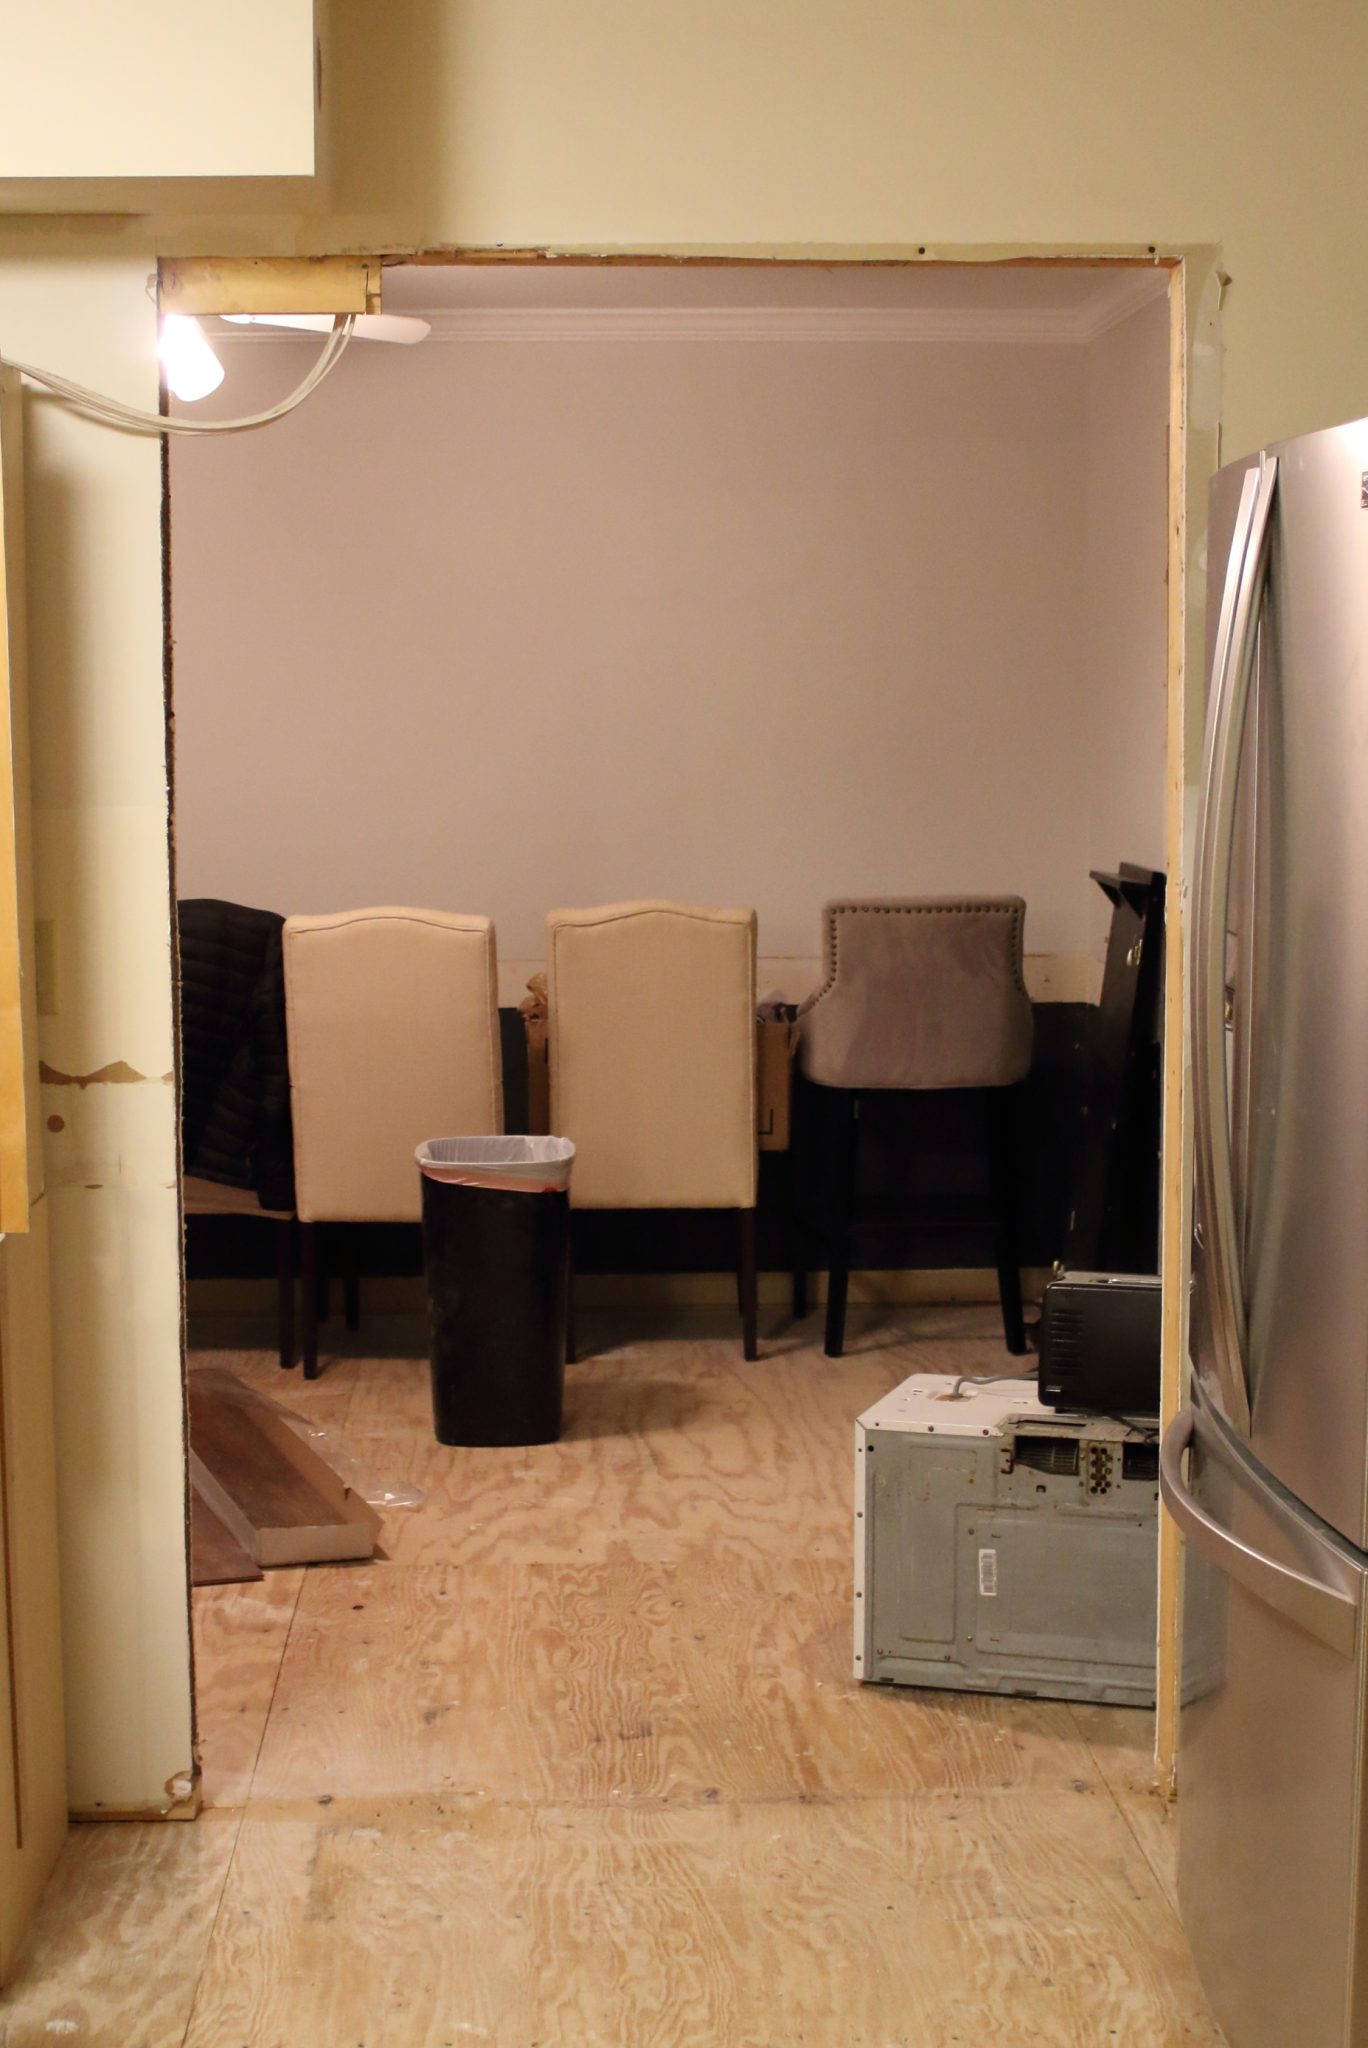
After: Kitchen + Dining Room Door
04. Staircase Wall
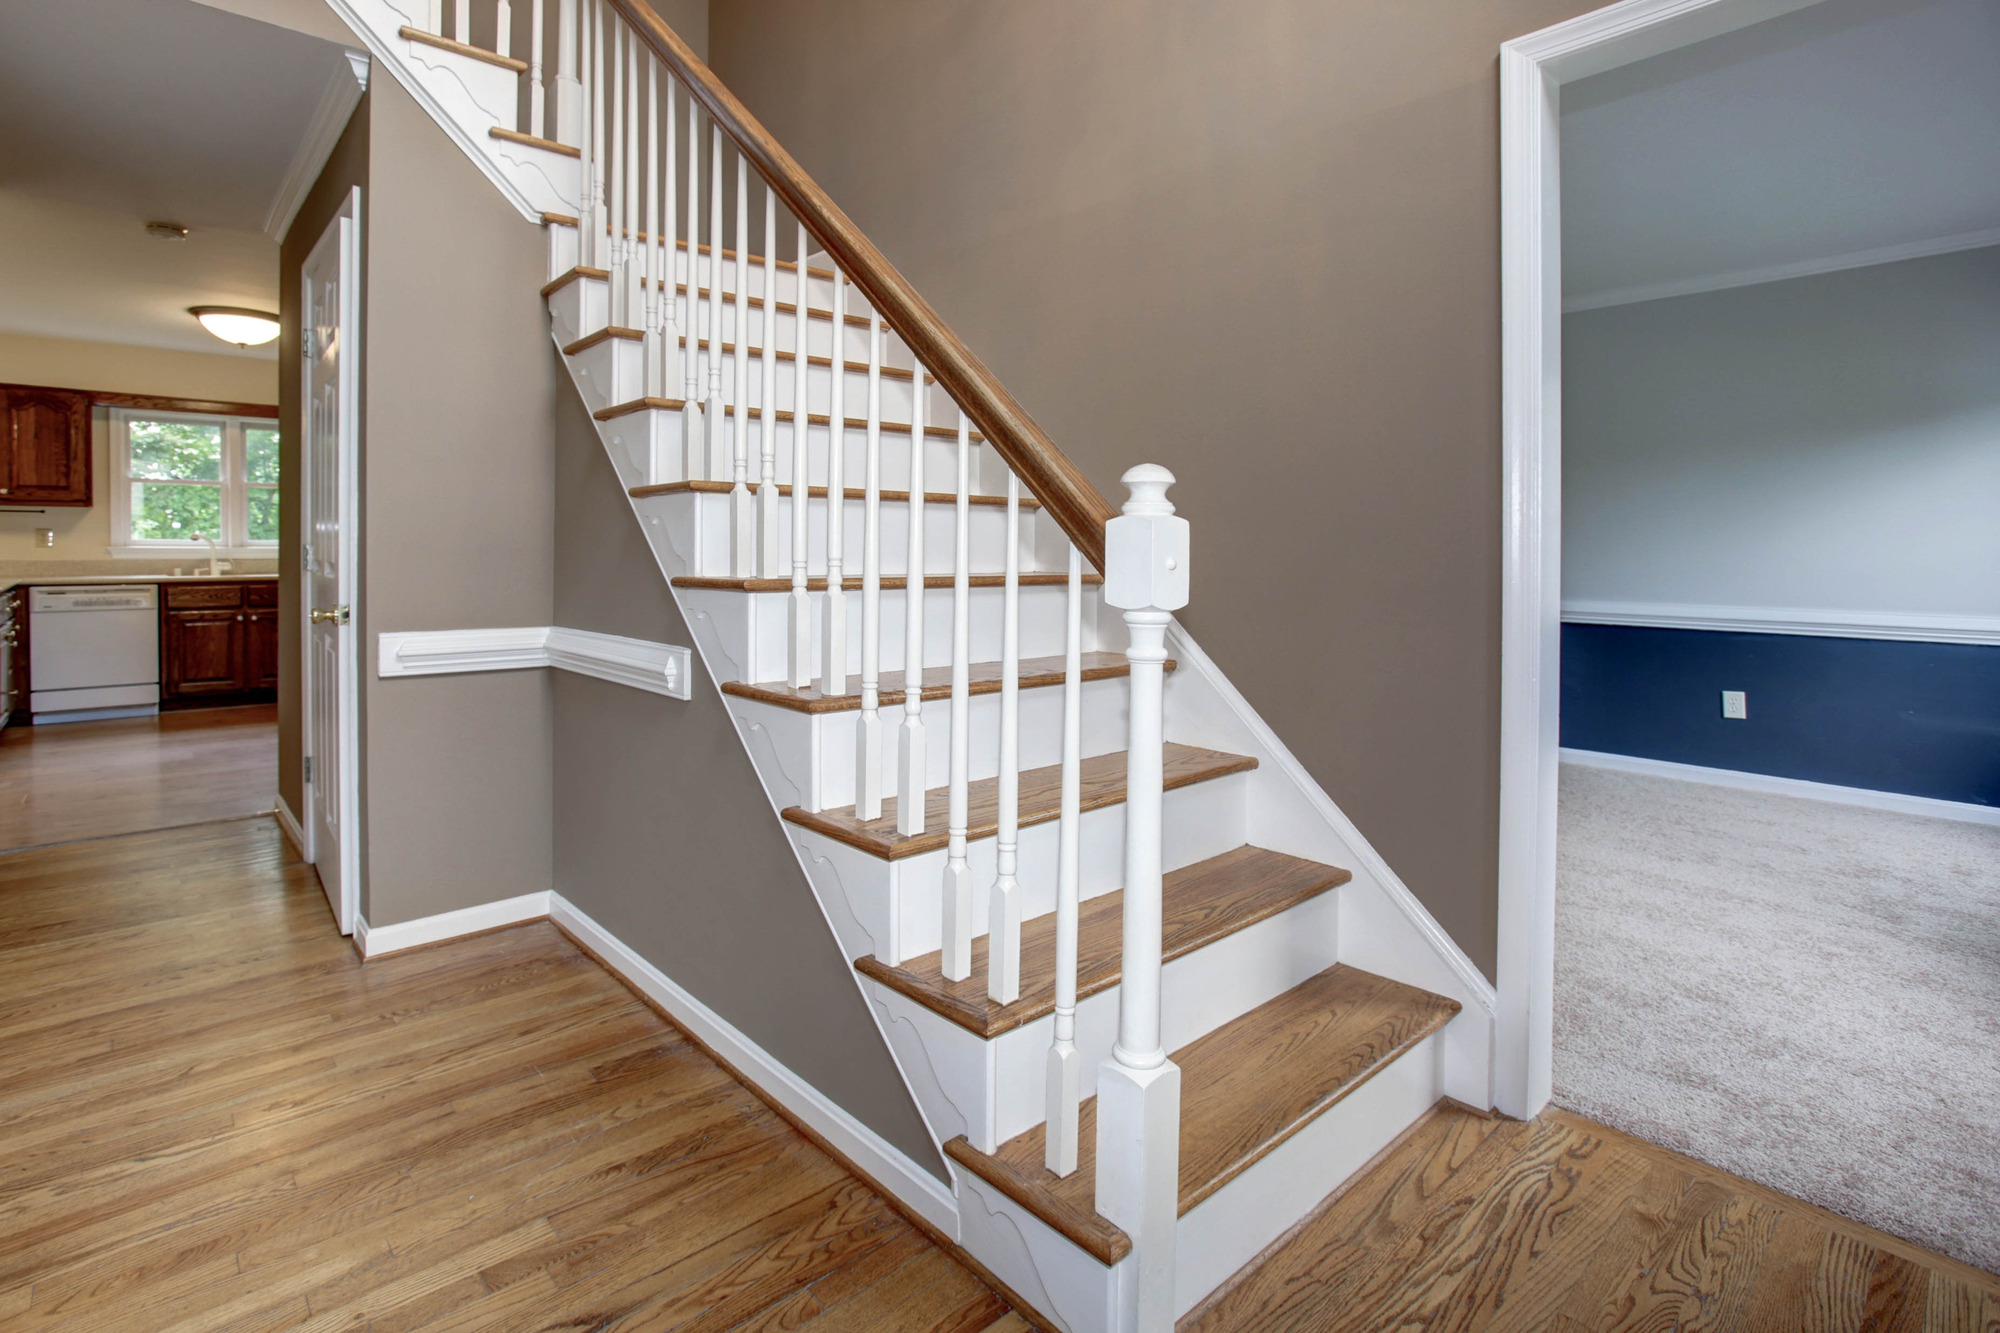
Before: Staircase Wall. Photo Credit: HomeVisit.com
We were on a roll at this point…what’s one more wall? The “staircase project” is going to need a whole article to itself, but here is where we got with demo.
We debated how far to make the opening, finally concluding to use the fourth step as our stopping point. One of the reasons we did this was so that the railing would end at the wall, and not meet the ceiling (which would have been the case if we would have gone further up).
This was another small change that made a big difference. The whole front entry feels huge! We love seeing into the living room more, we can even see far enough to catch glimpses of the dining room.
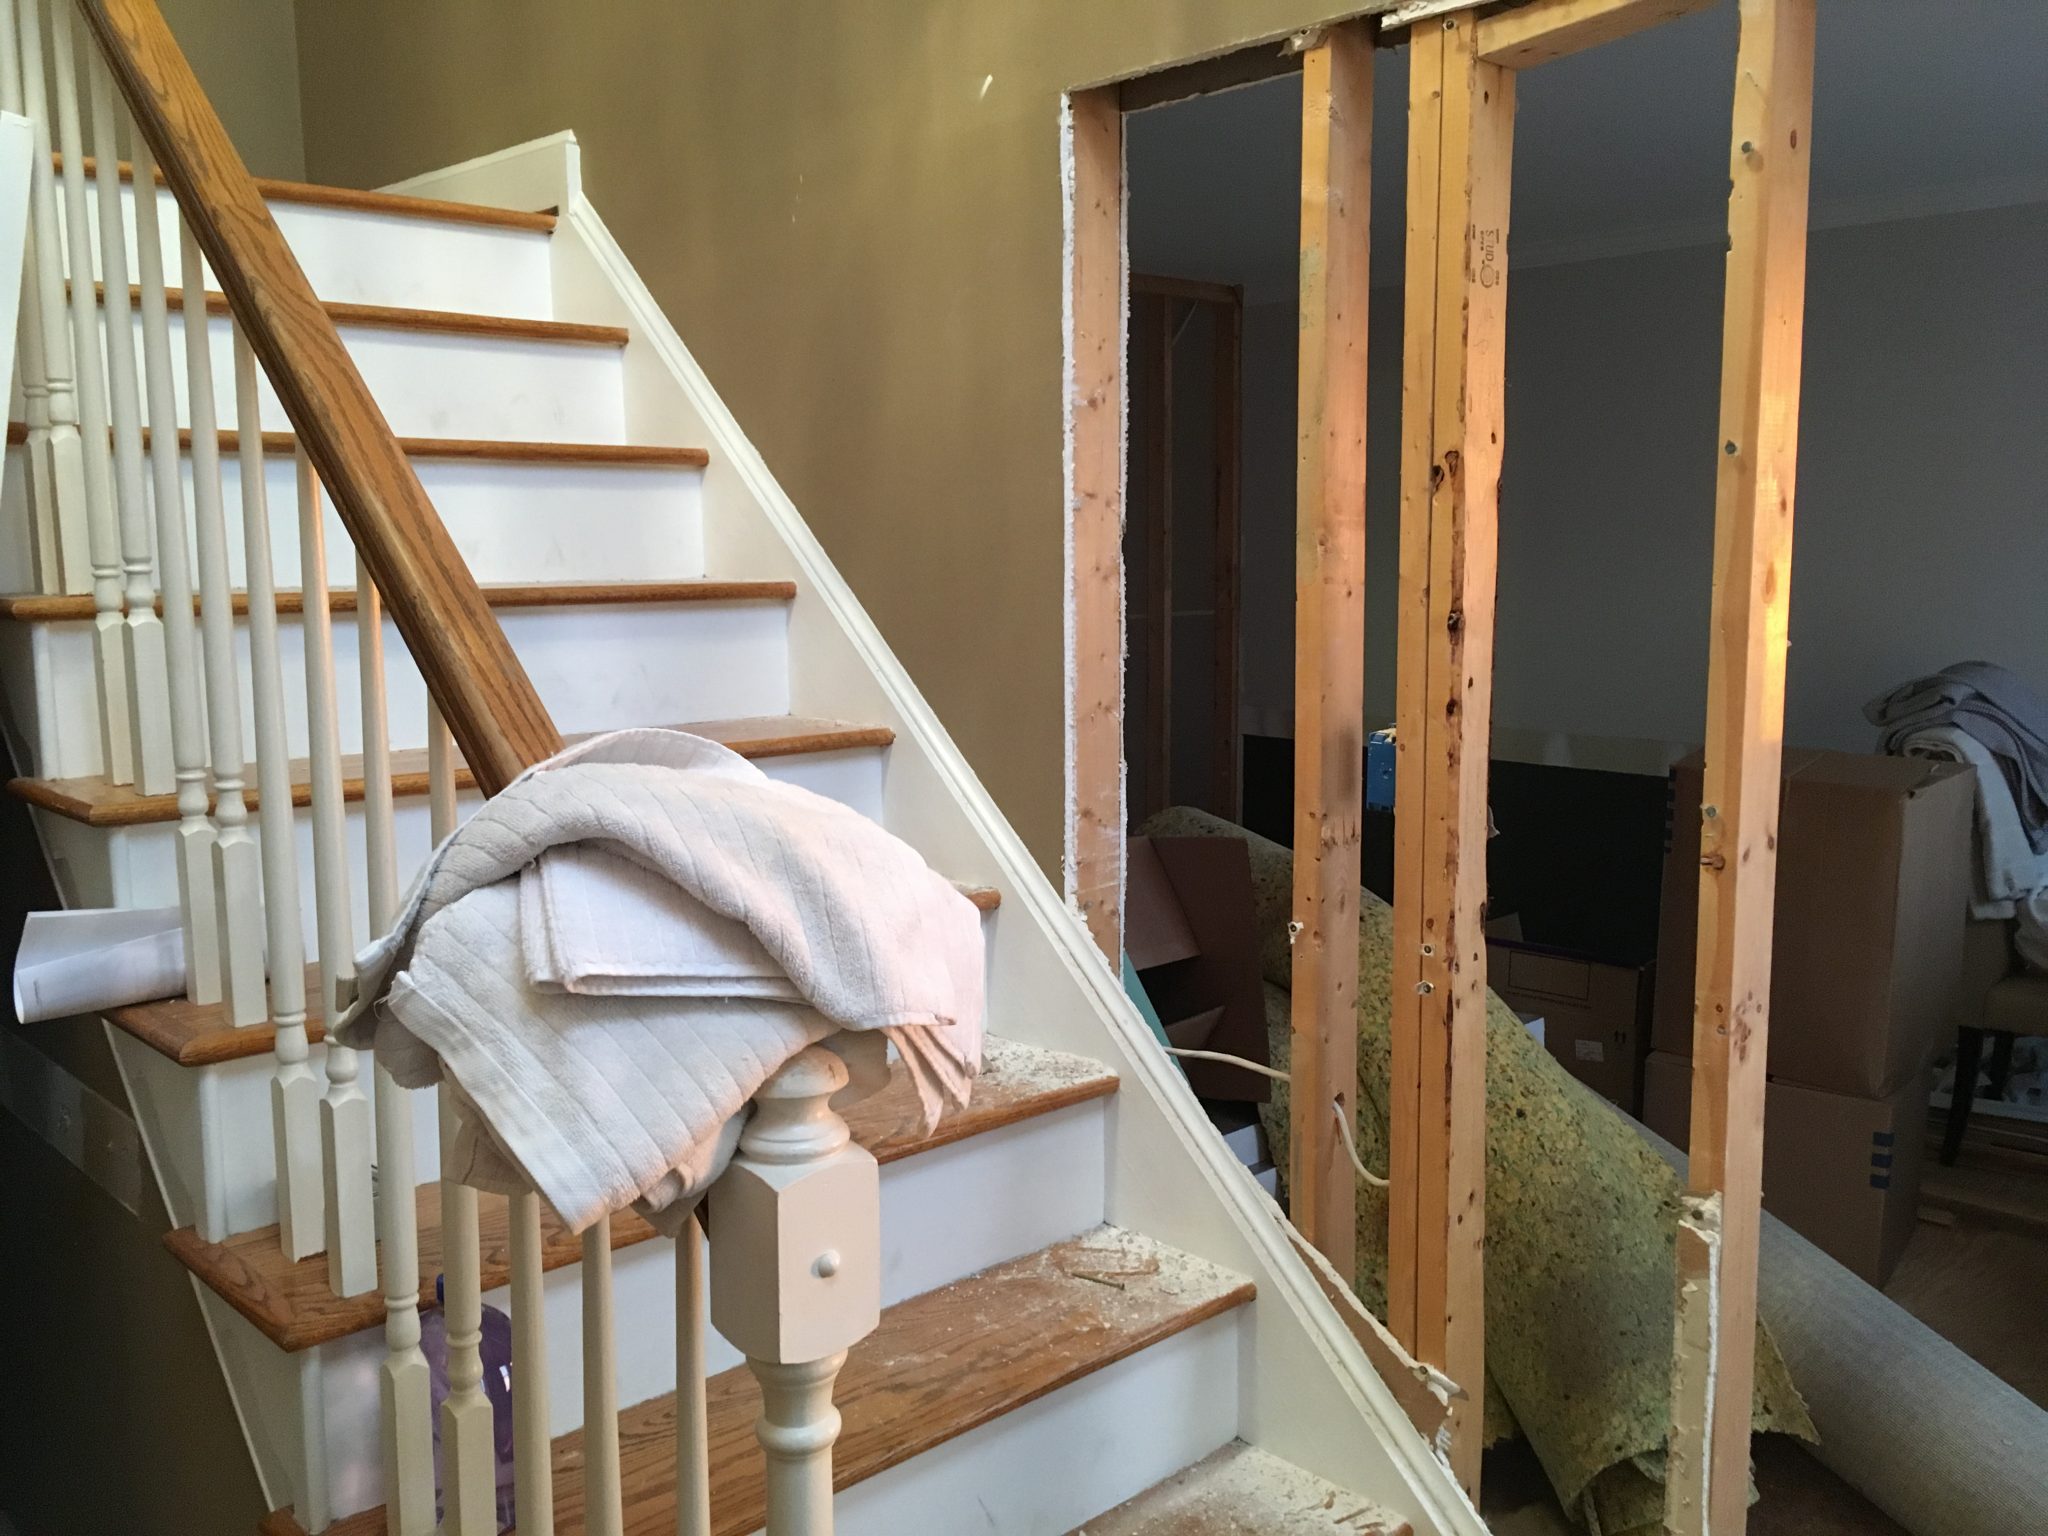
Mid-Demo: Staircase Wall
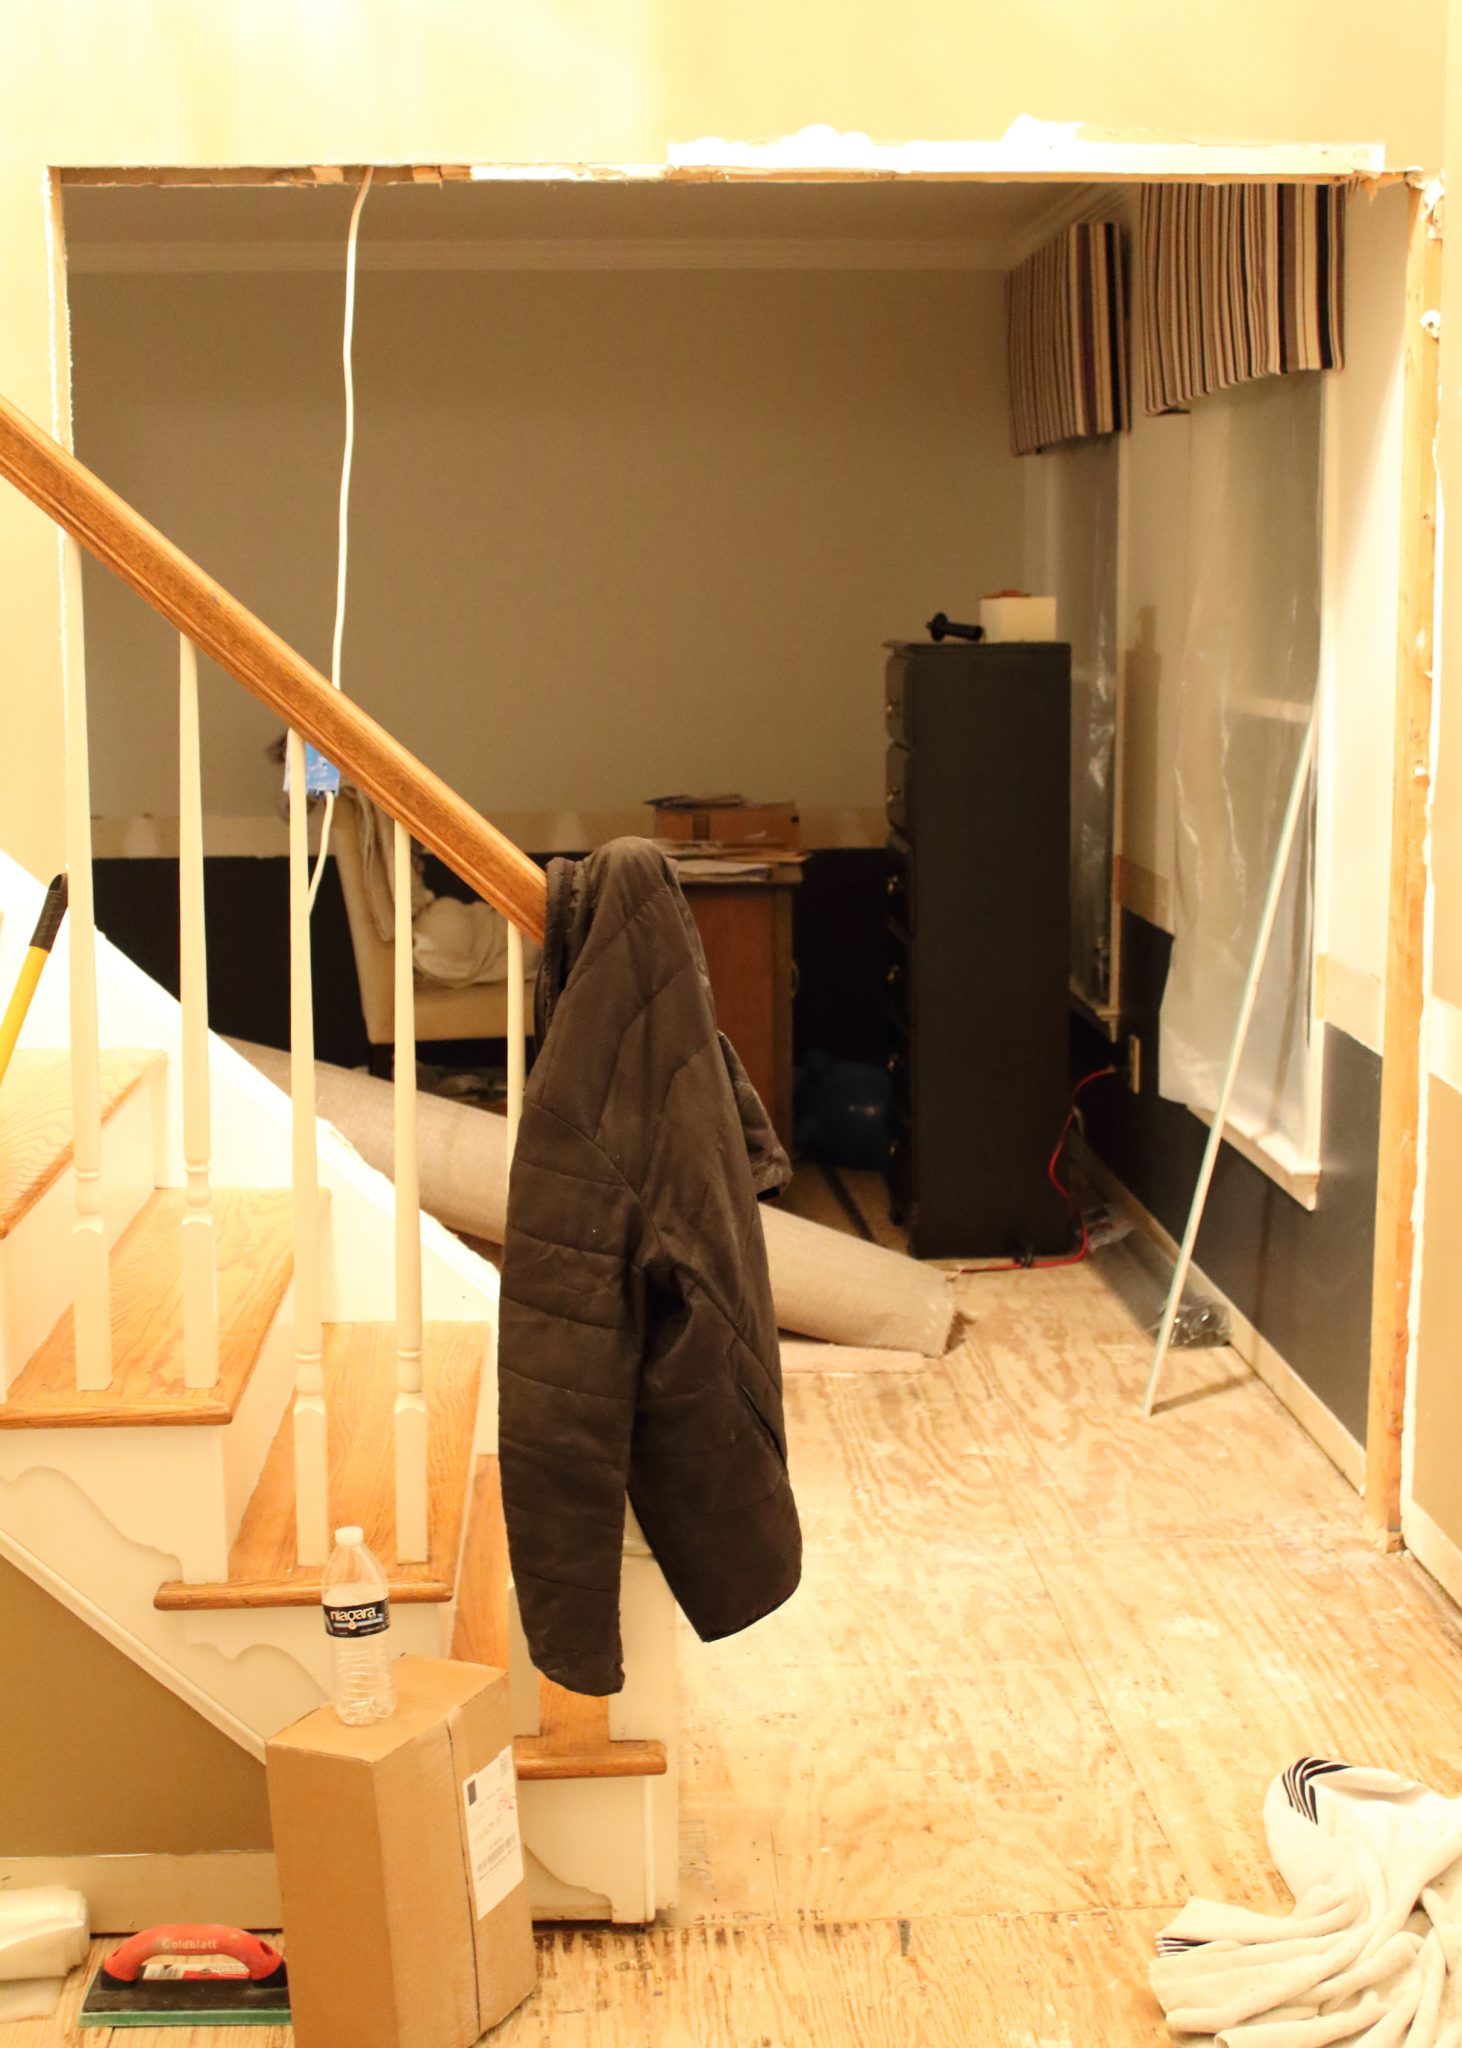
After: Staircase Wall
Kitchen Teardown
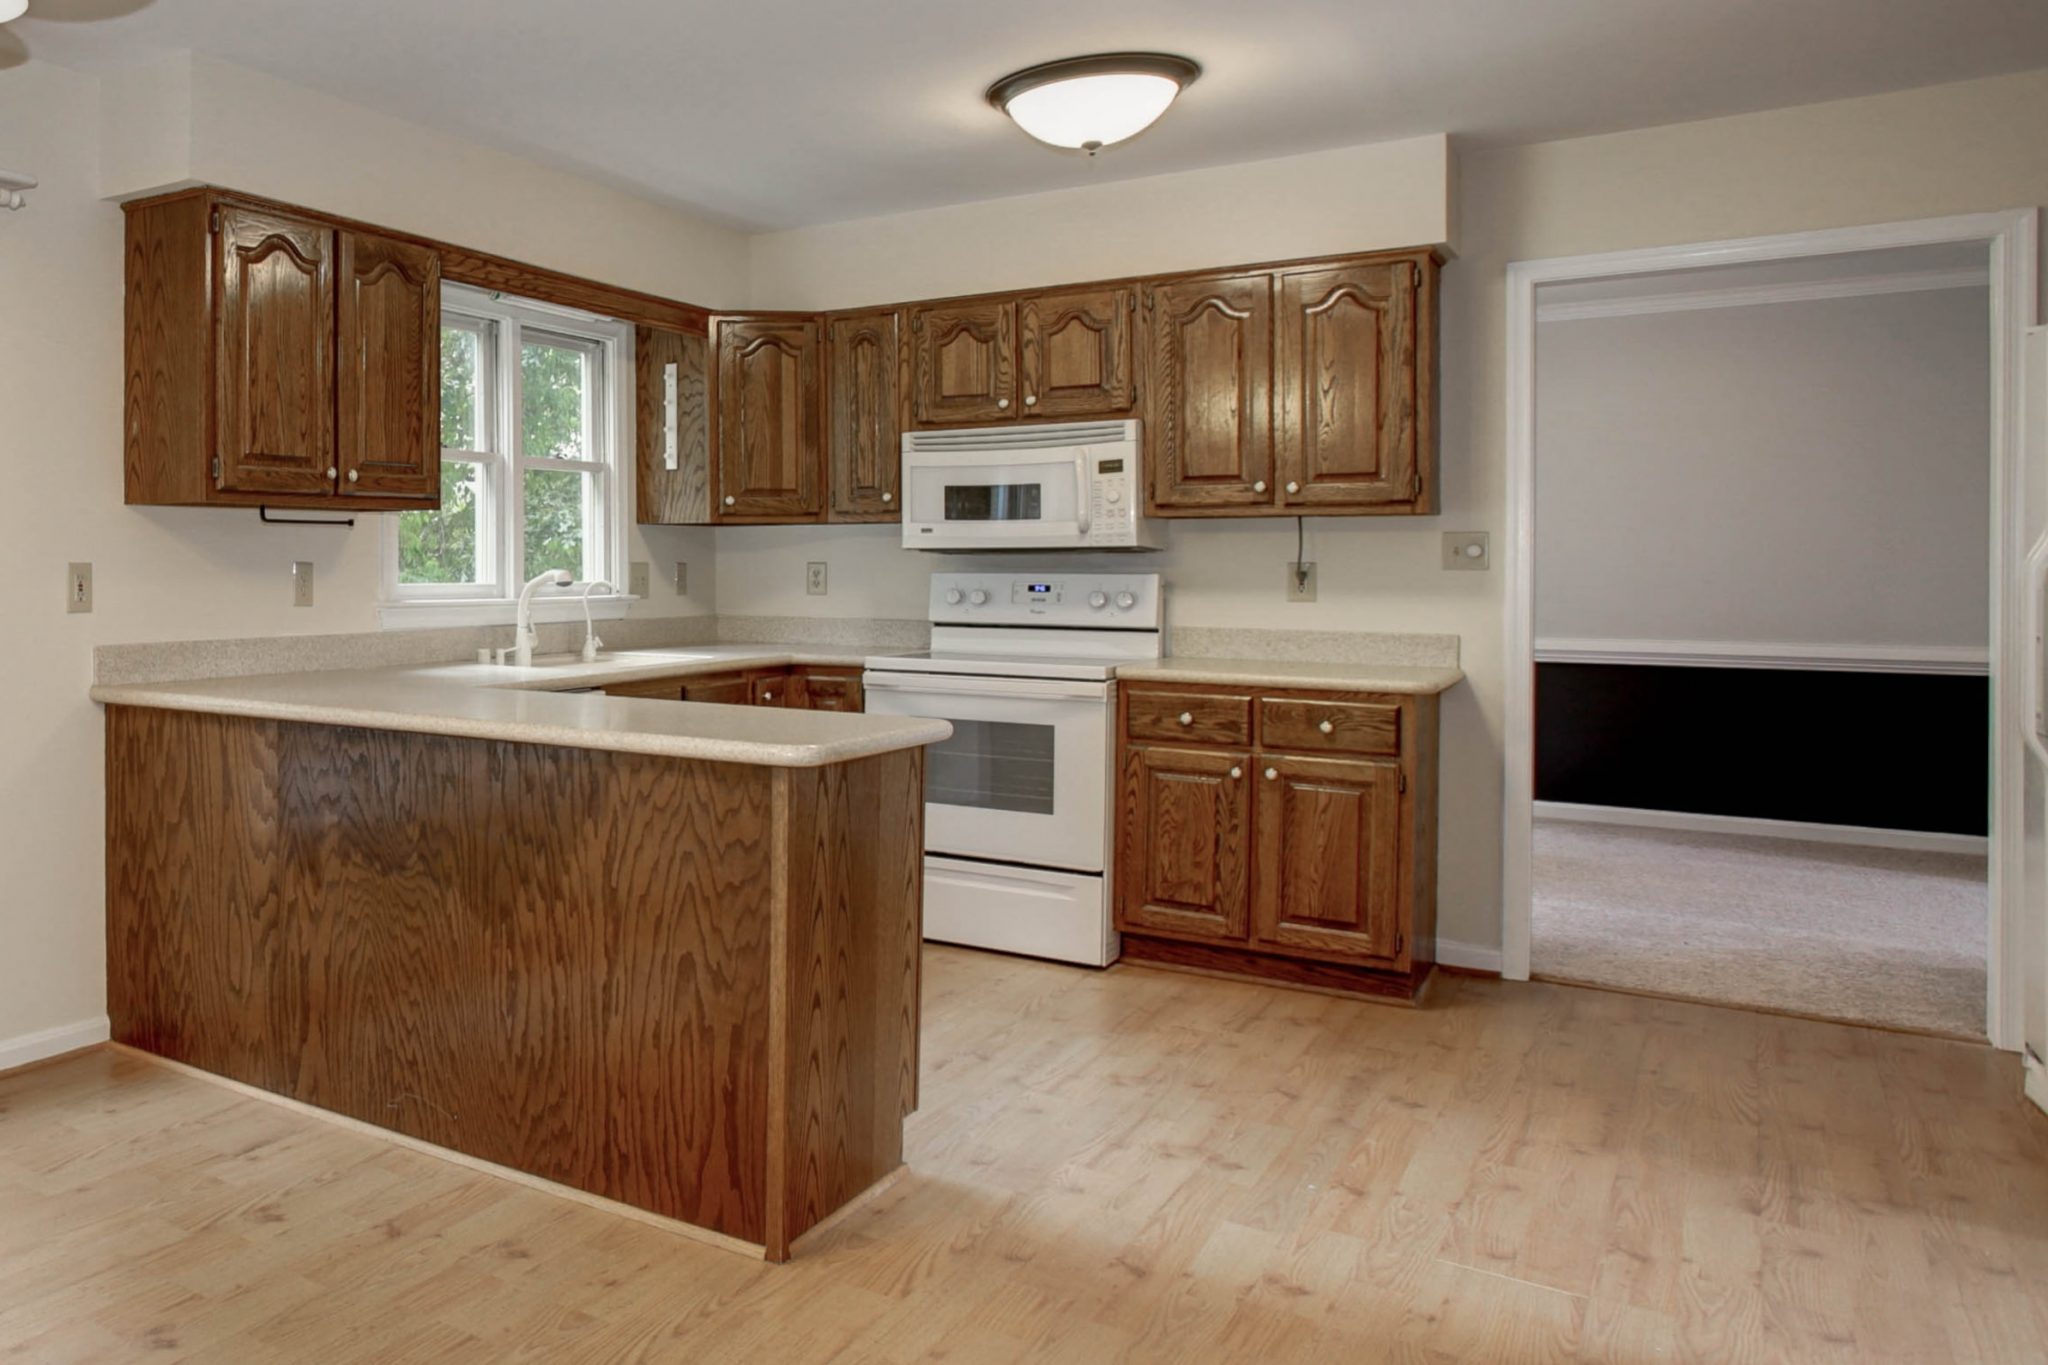
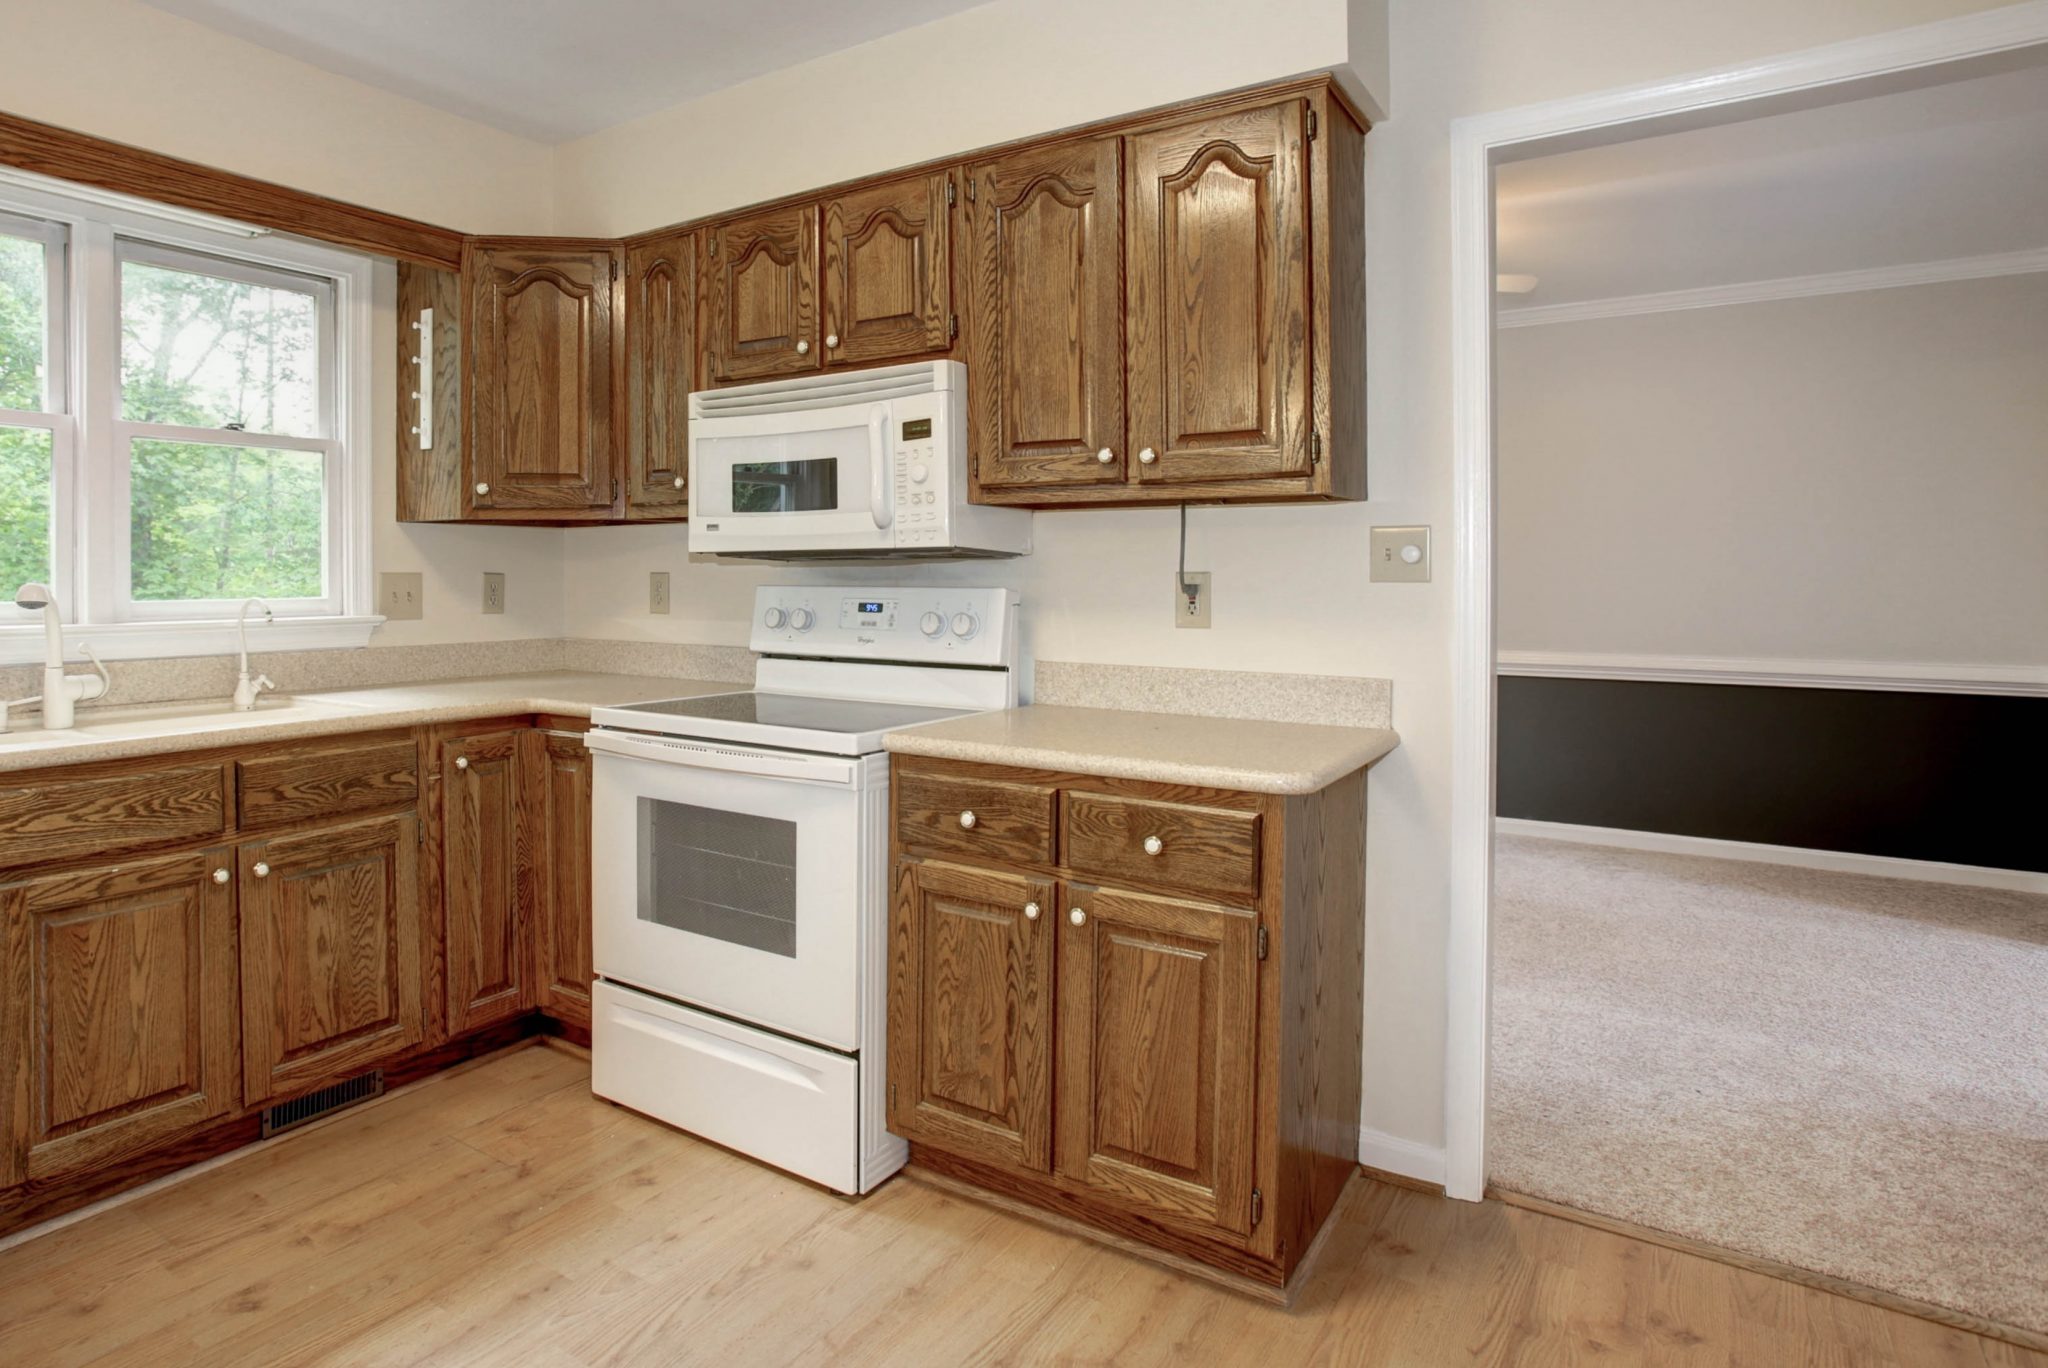
Before: Kitchen
The kitchen is one of our bigger projects. We are starting from scratch with new cabinets, appliances etc. so all the existing items had to go. We didn’t want to trash anything, ideally we wanted to sell what we were able to salvaged, or donate to our local Habitat ReStore if no buyers were interested.
01. Removing Existing Cabinets, Countertops & Appliances
One man’s trash is another man’s treasure.
We took extra care removing the cabinets and counters. Removing the countertop was tricky, we really thought it would break! But with some muscle and extra help from Drew’s dad, we got it out in one piece. The cabinets were simple to remove and while they weren’t in the greatest shape, with a bit of TLC they will be a great addition to another kitchen.
We posted all of the kitchen items on Craigslist. The appliances went right away, the counter and cabinets only brought in spam for the first few days so we dropped them at Habitat. Of course, a few days later I got 3 serious inquiries…oh well, ha.
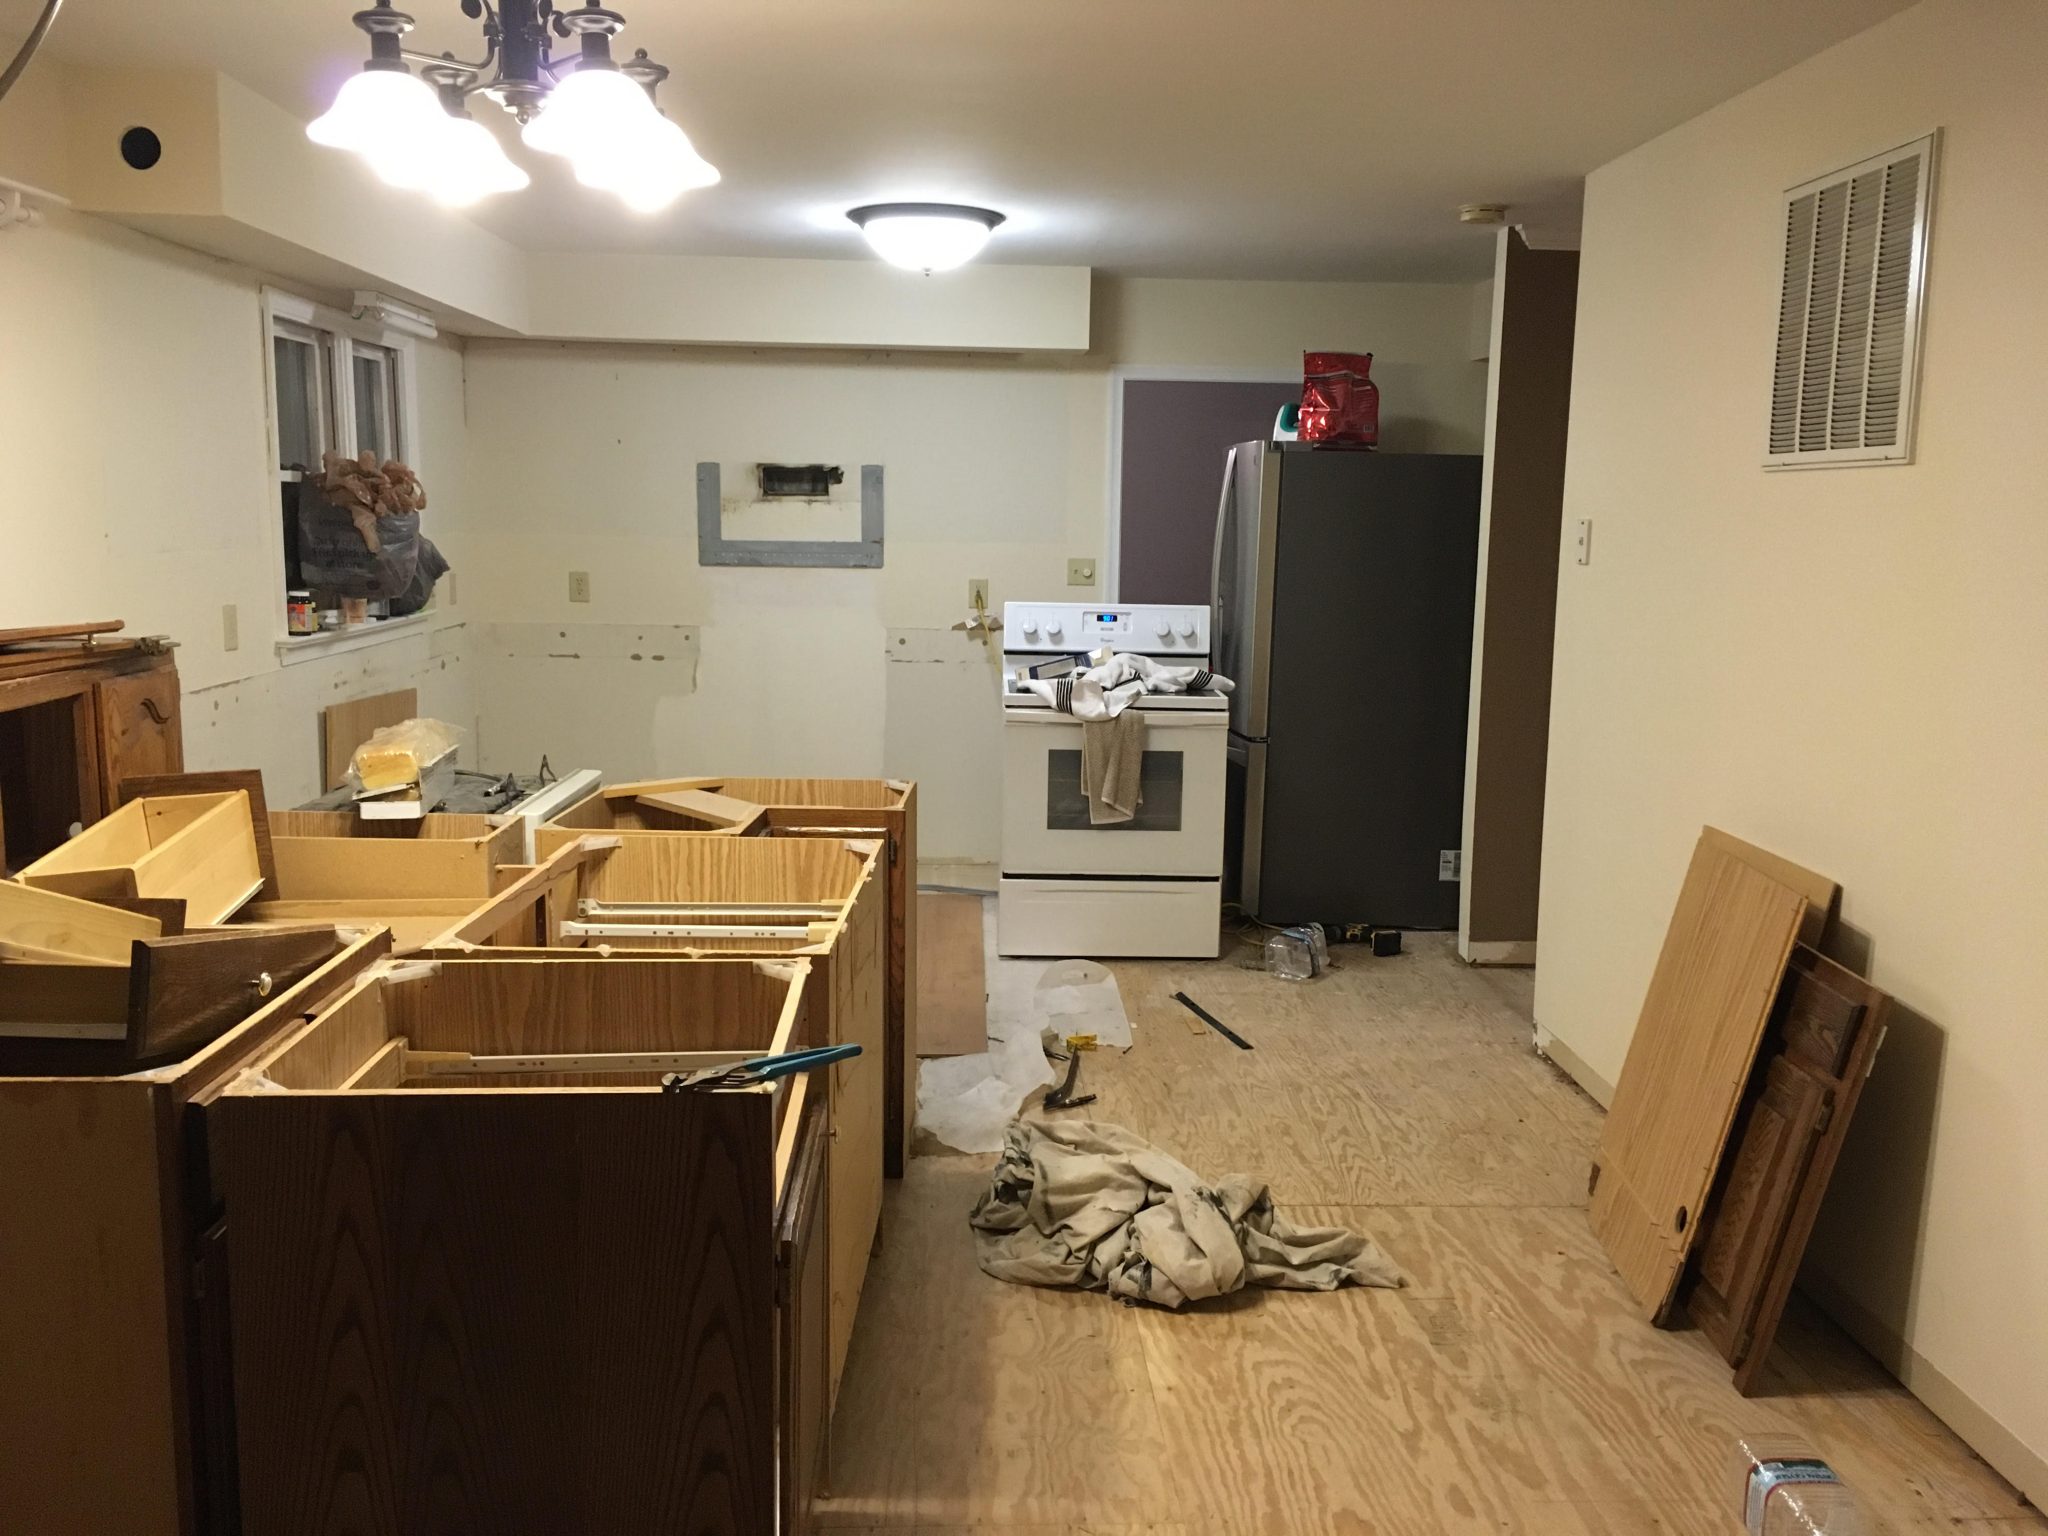
After: Kitchen Demo
02. Removing Kitchen Cabinet Soffit (ANOTHER WARNING)
Now that all of the “stuff” was out of the way, we were ready to bust out the kitchen soffit. We learned from one of our contractors that a lot of times, builders will hide piping up there. That was news to us! Turns out that more often than not, they drop the second floor bathroom plumbing down through the ceiling and then conceal it inside of the drop. Ew! If that was the case, our kitchen remodel was about to cost another five figures 🙁
Of course, as soon as that contractor left I had to climb up there and find out! I drilled two holes in the drywall on either end and snapped some photos with my camera flash.
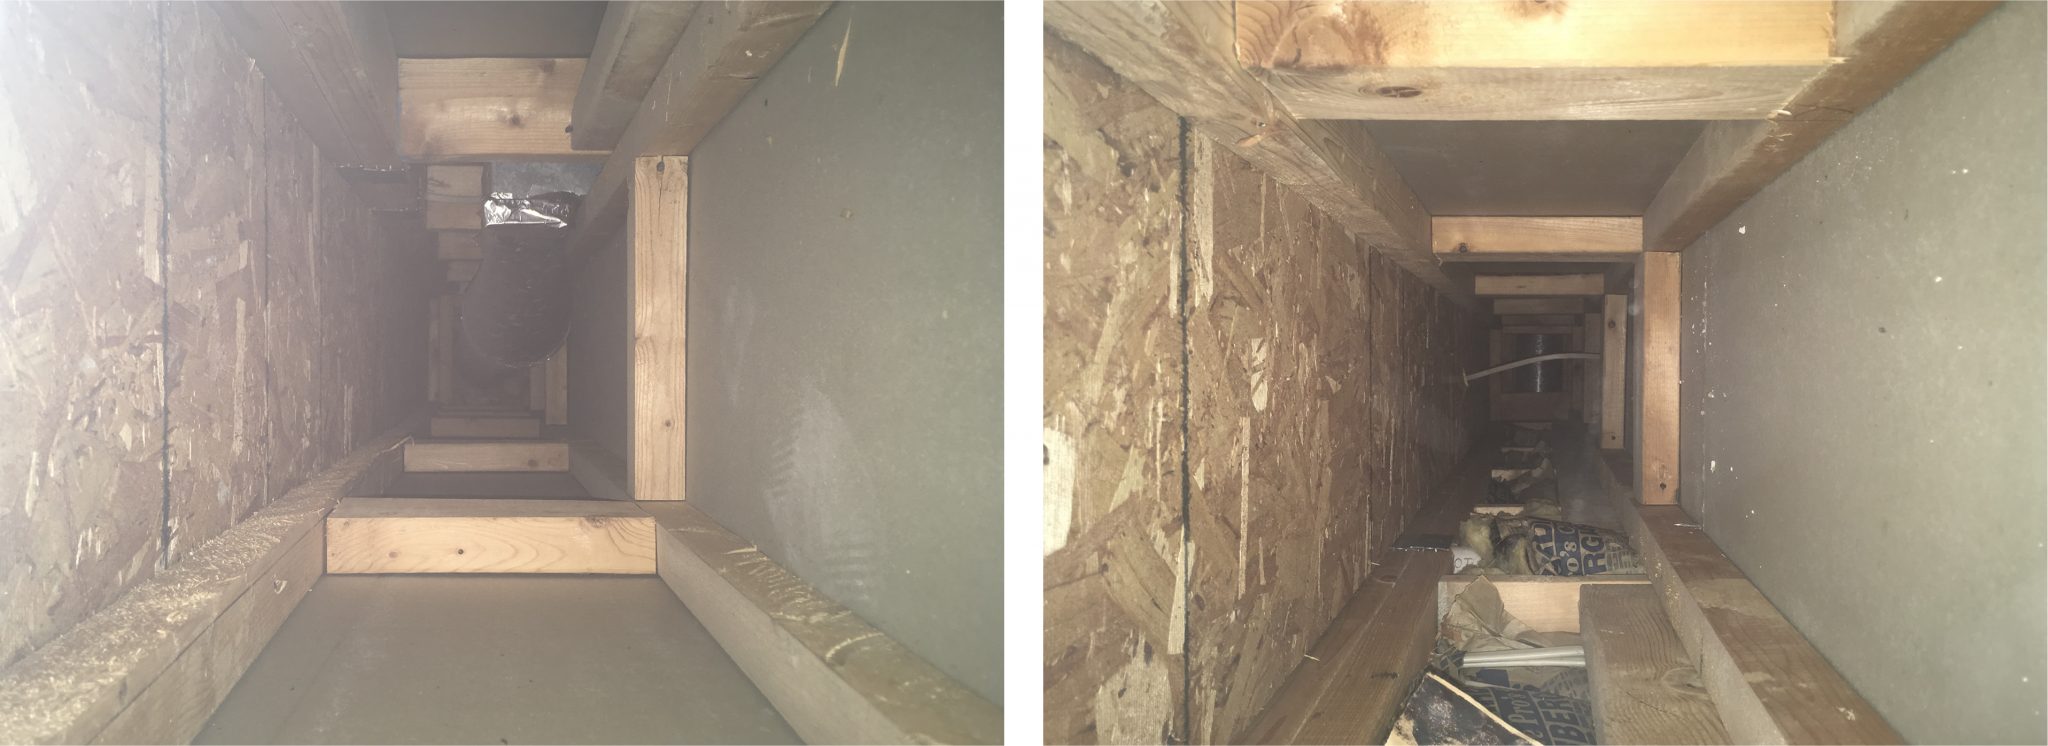
What’s Inside Kitchen Soffit?
Woop! Woop! Demolition is on! The only thing up there was one electrical wire to the current above sink light fixture, which we knew about and also needed for the new design. Additionally we checked the soffit above the fridge, all good there too.
Absolutely check up there before you plan your kitchen. We had already committed to buying 42″ cabinets, we got SO lucky! Could have been a real mess. Instead, it’s time for a different kind of mess: time to destrooooooy….
After: Kitchen Soffit Removal
Bathroom Demolition
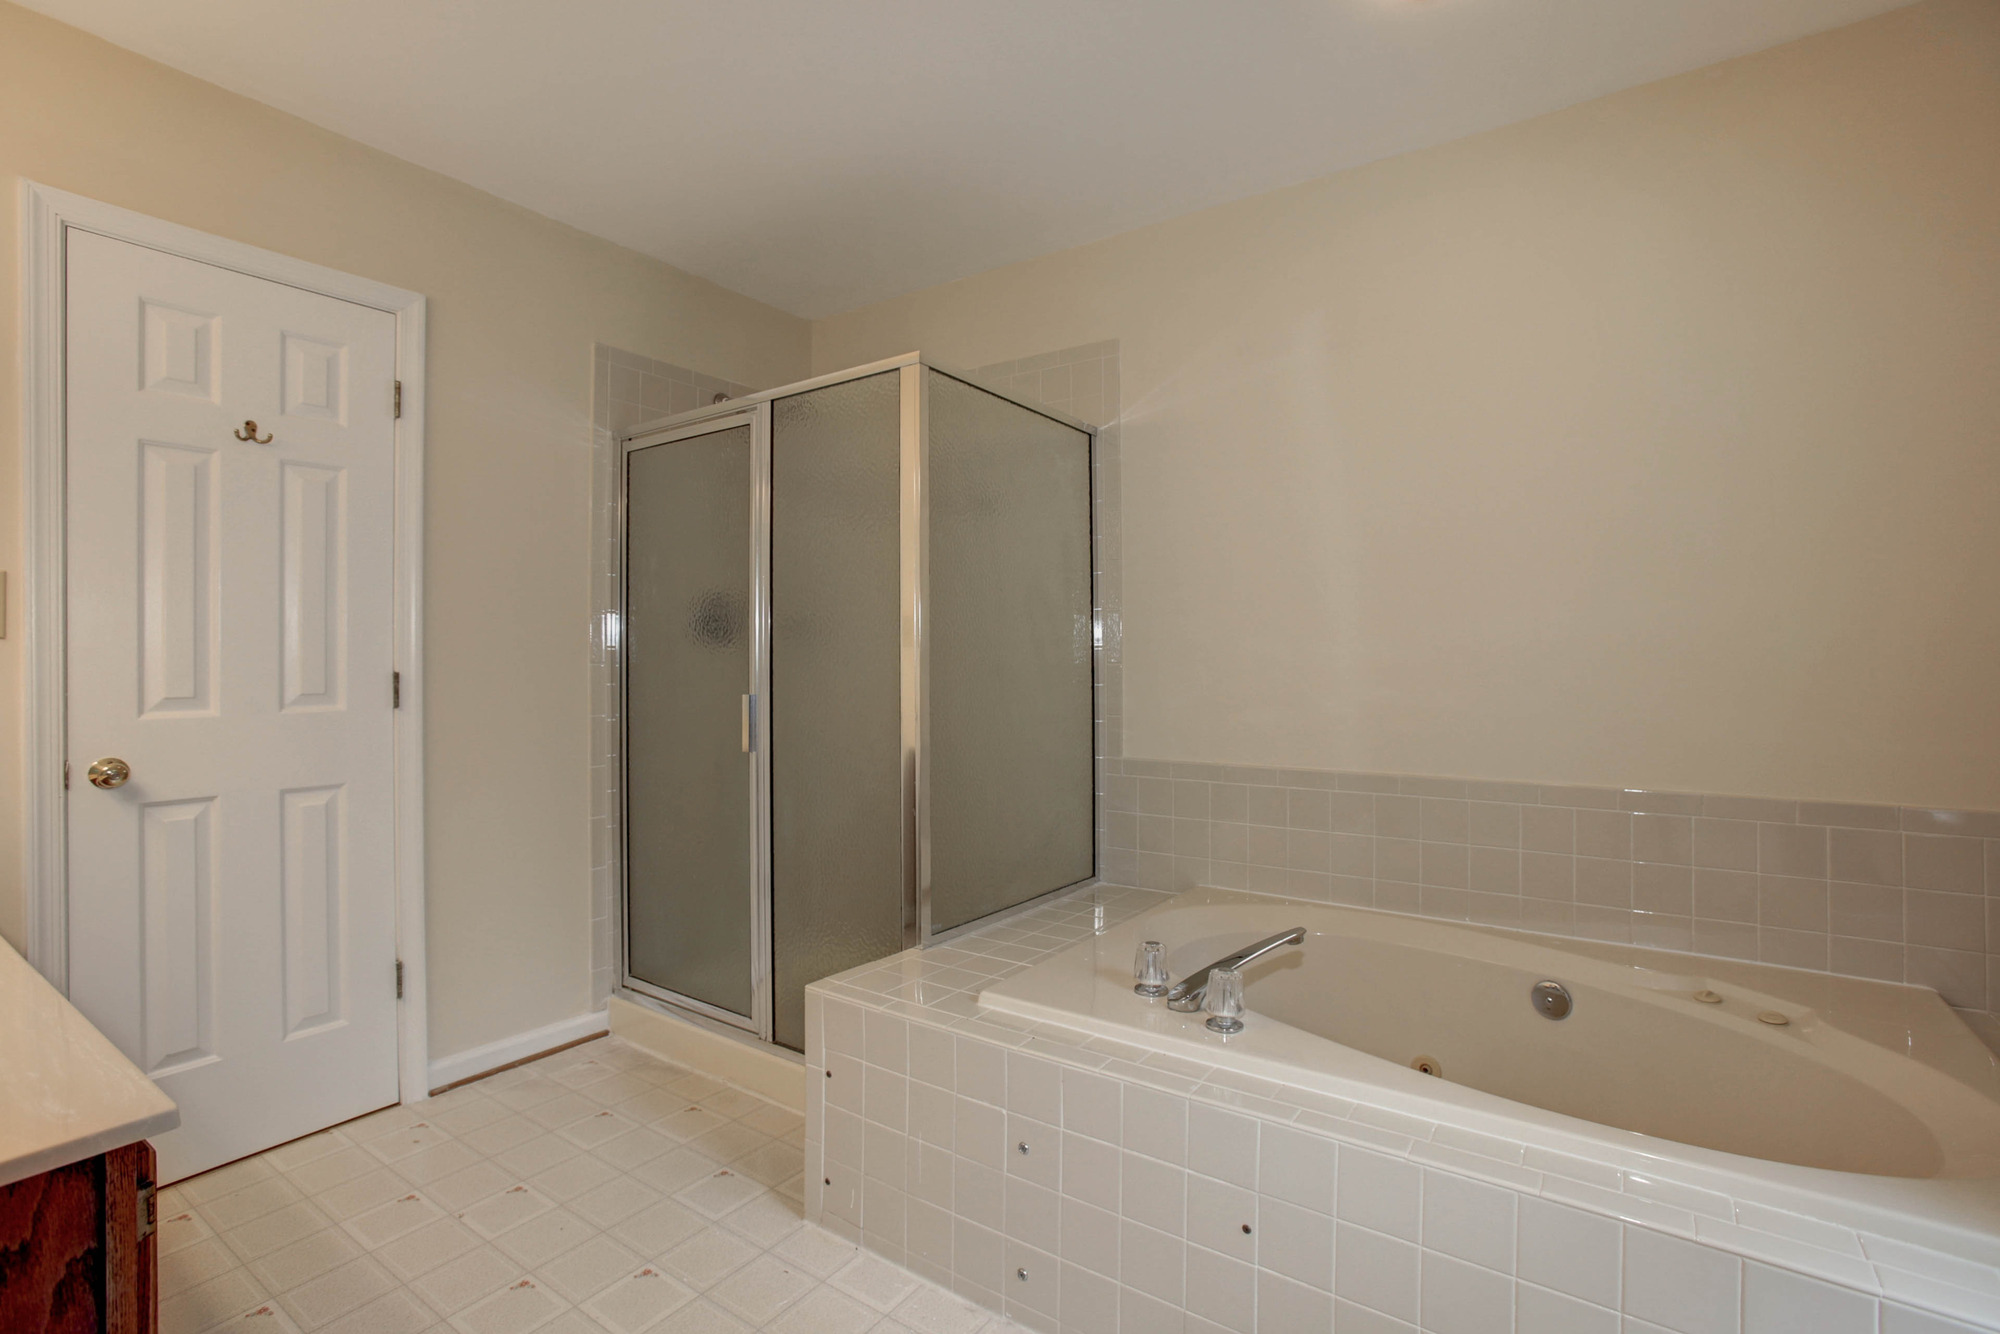
Before: Master Bathroom. Photo credit: HomeVisit.com
We did both the first floor bath (sorry no pictures of that) and the Master. The first floor was necessary in order to install all of the flooring. The Master Bath had nothing to do with any of the other demo, Drew just really wanted it done 😉
The Master is almost a total renovation — we decided to have the jetted tub repainted rather than replaced, but all the rest needed trashed. Drew’s dad did most of the demolition on that while we were out picking up our kitchen cabinets. I’m not sure all what he did and in what order, but I do know he was efficient!
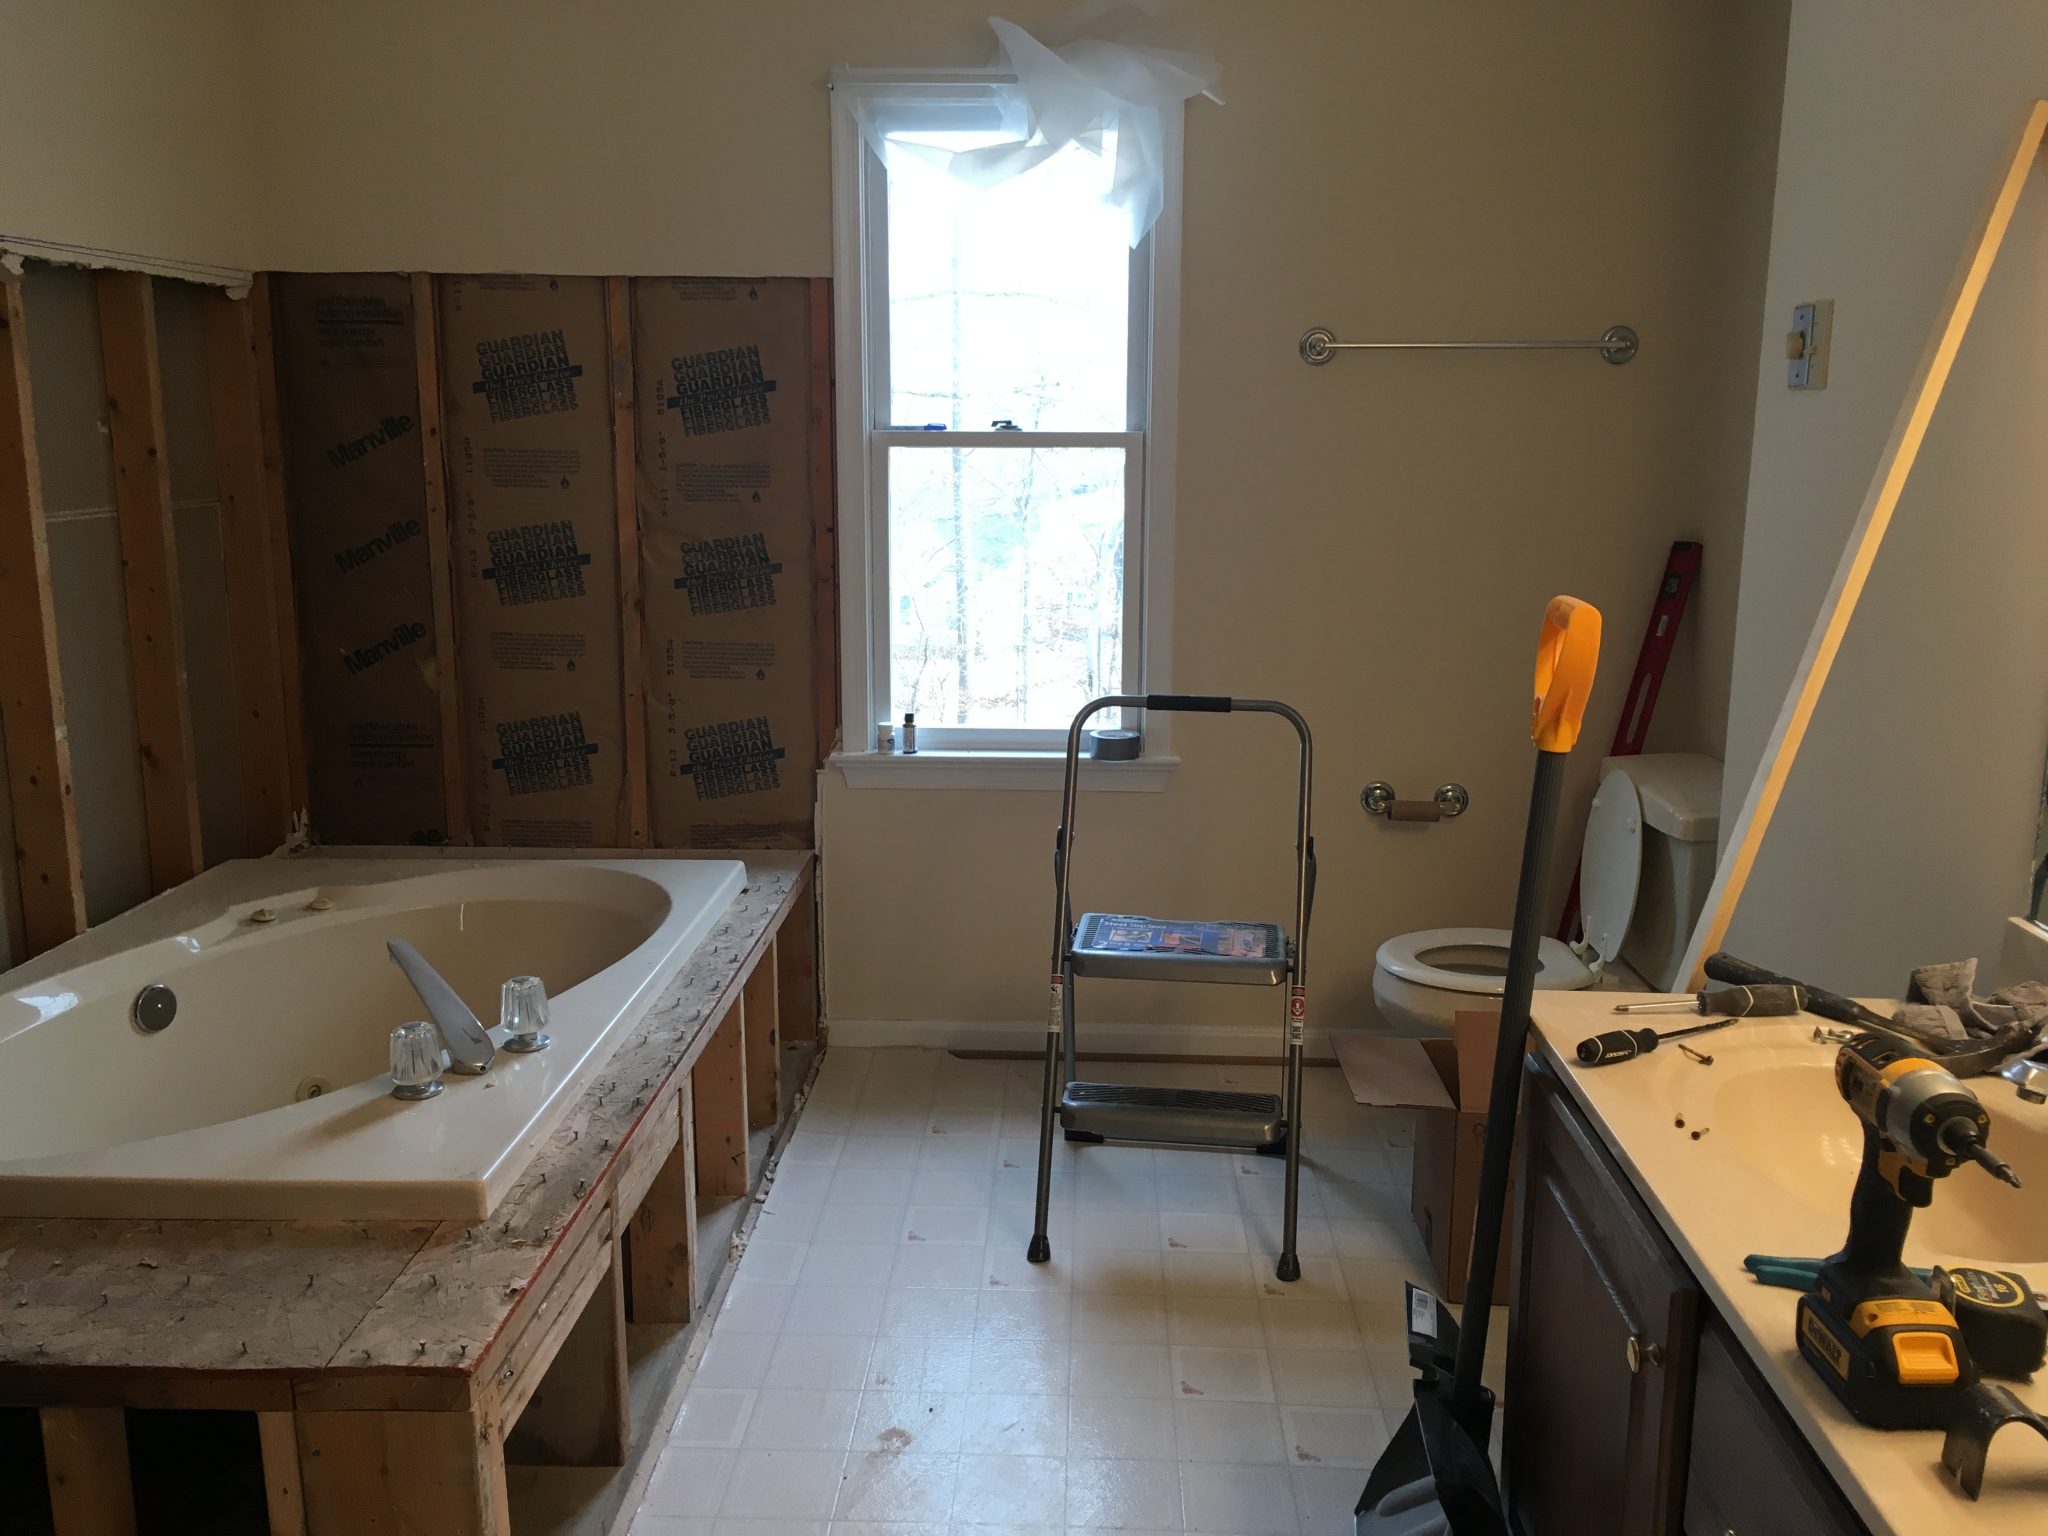
After: Master Bathroom Demo (I didn’t get an after shot between pulling out the floors and counter and the new tile going in…but you can see the beginning of the demo)
Other Destruction, Salvage & Recycling
In addition to the walls, kitchen and master bath we tackled these other general items:
01. Floors
Before: Floors
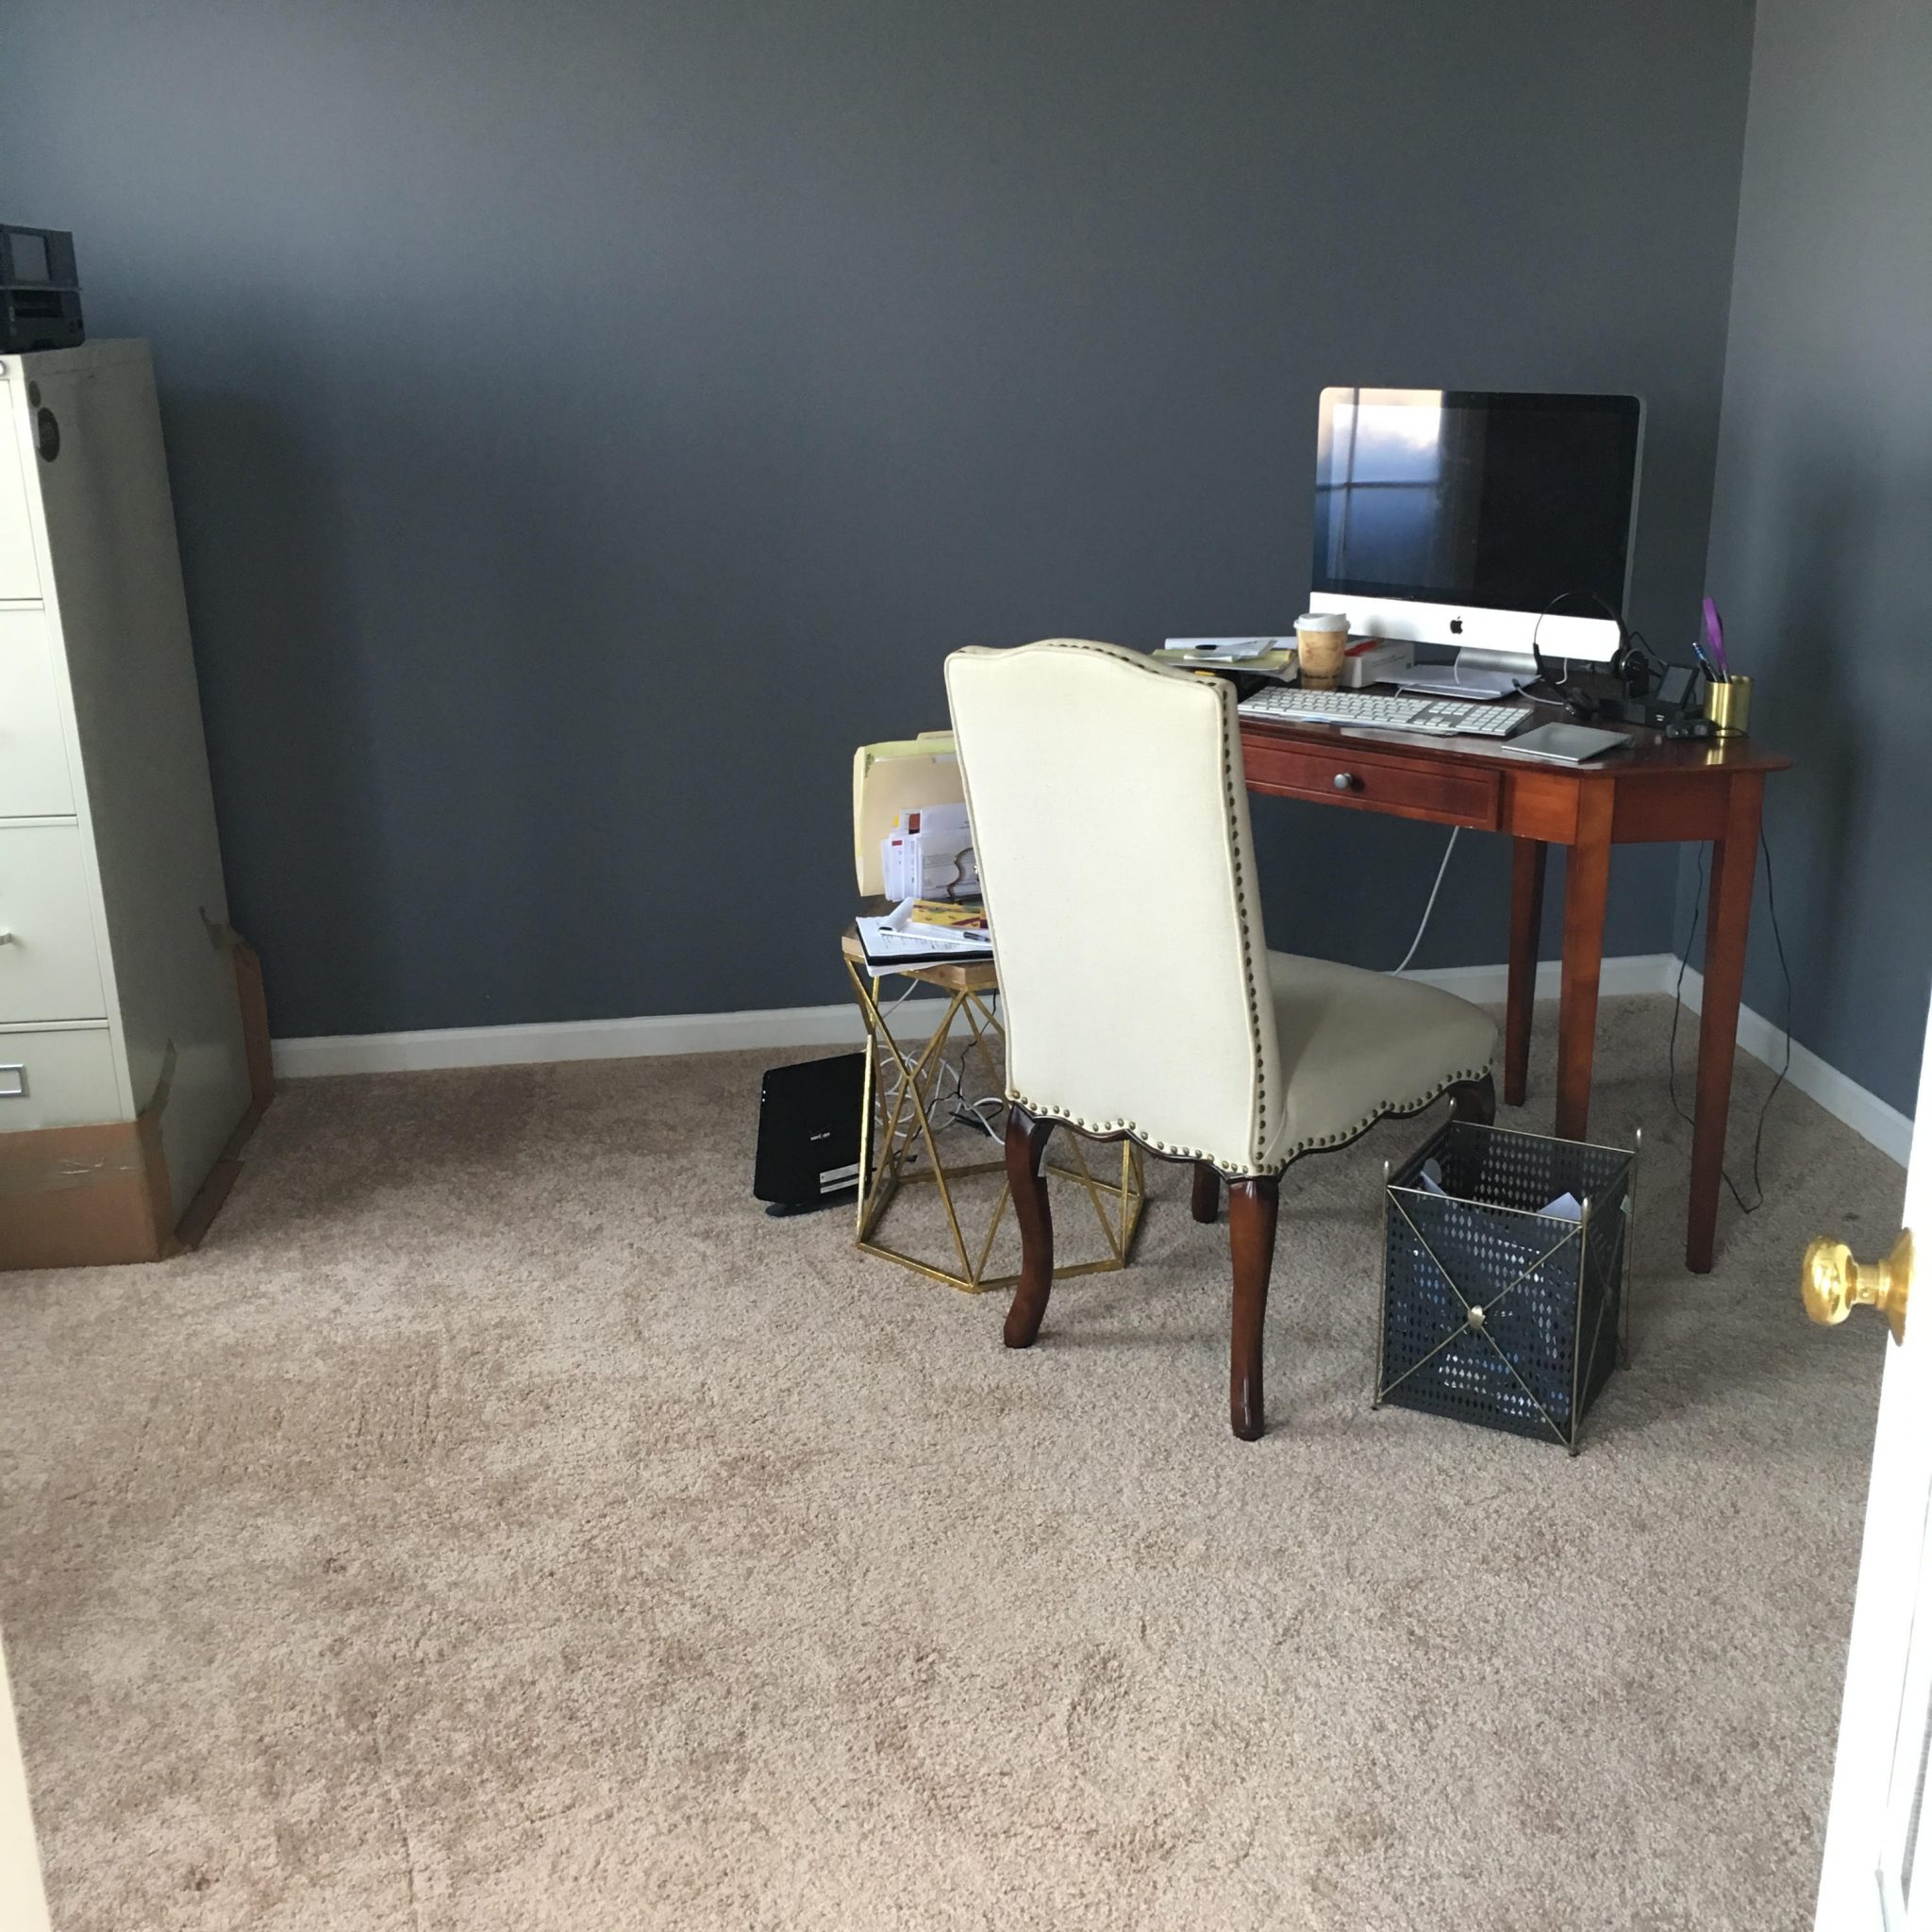
Before: Office Floor Demo
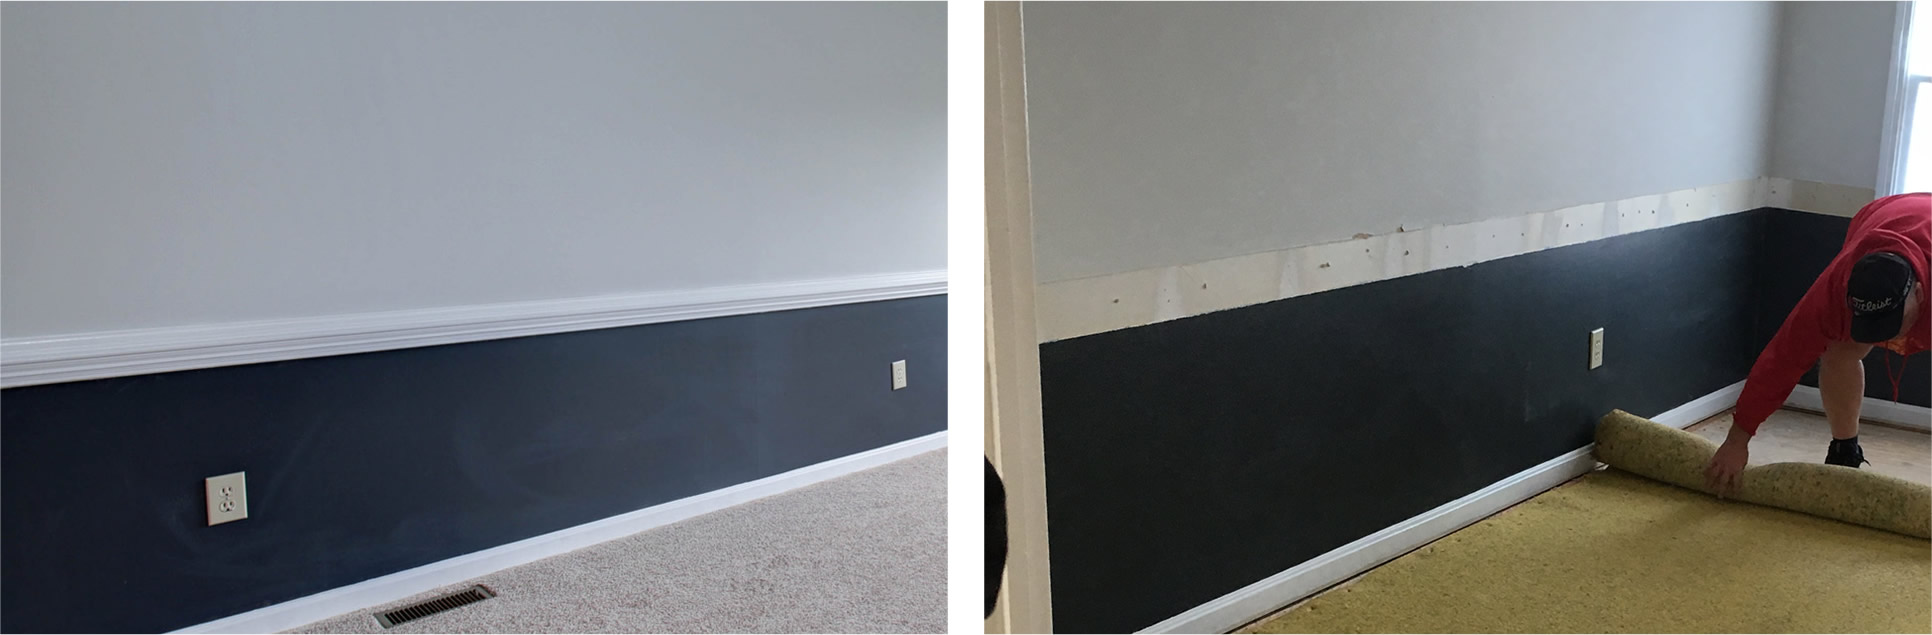
The first floor was a mix of three materials: hardwood, laminate and new carpet. We removed all of it. It was painful to tear out the hardwoods, but they were only at the entry and there was no good way to integrate them with the rest of the new floors.
The laminate was old and rough while the carpet was just installed. We tried to salvage both for recycled use in our basement. Ended up we had to toss the laminate, it was too beat (so sad). We currently have the carpet in storage and hope to install it in the basement bedroom and possibly the stairs.
We were also careful while tearing out the floor trim. We removed all the nails and staples and labeled each piece by room + N/S/E/W wall. We then bundled each room together and set aside so we can reinstall these after the new floors go in.
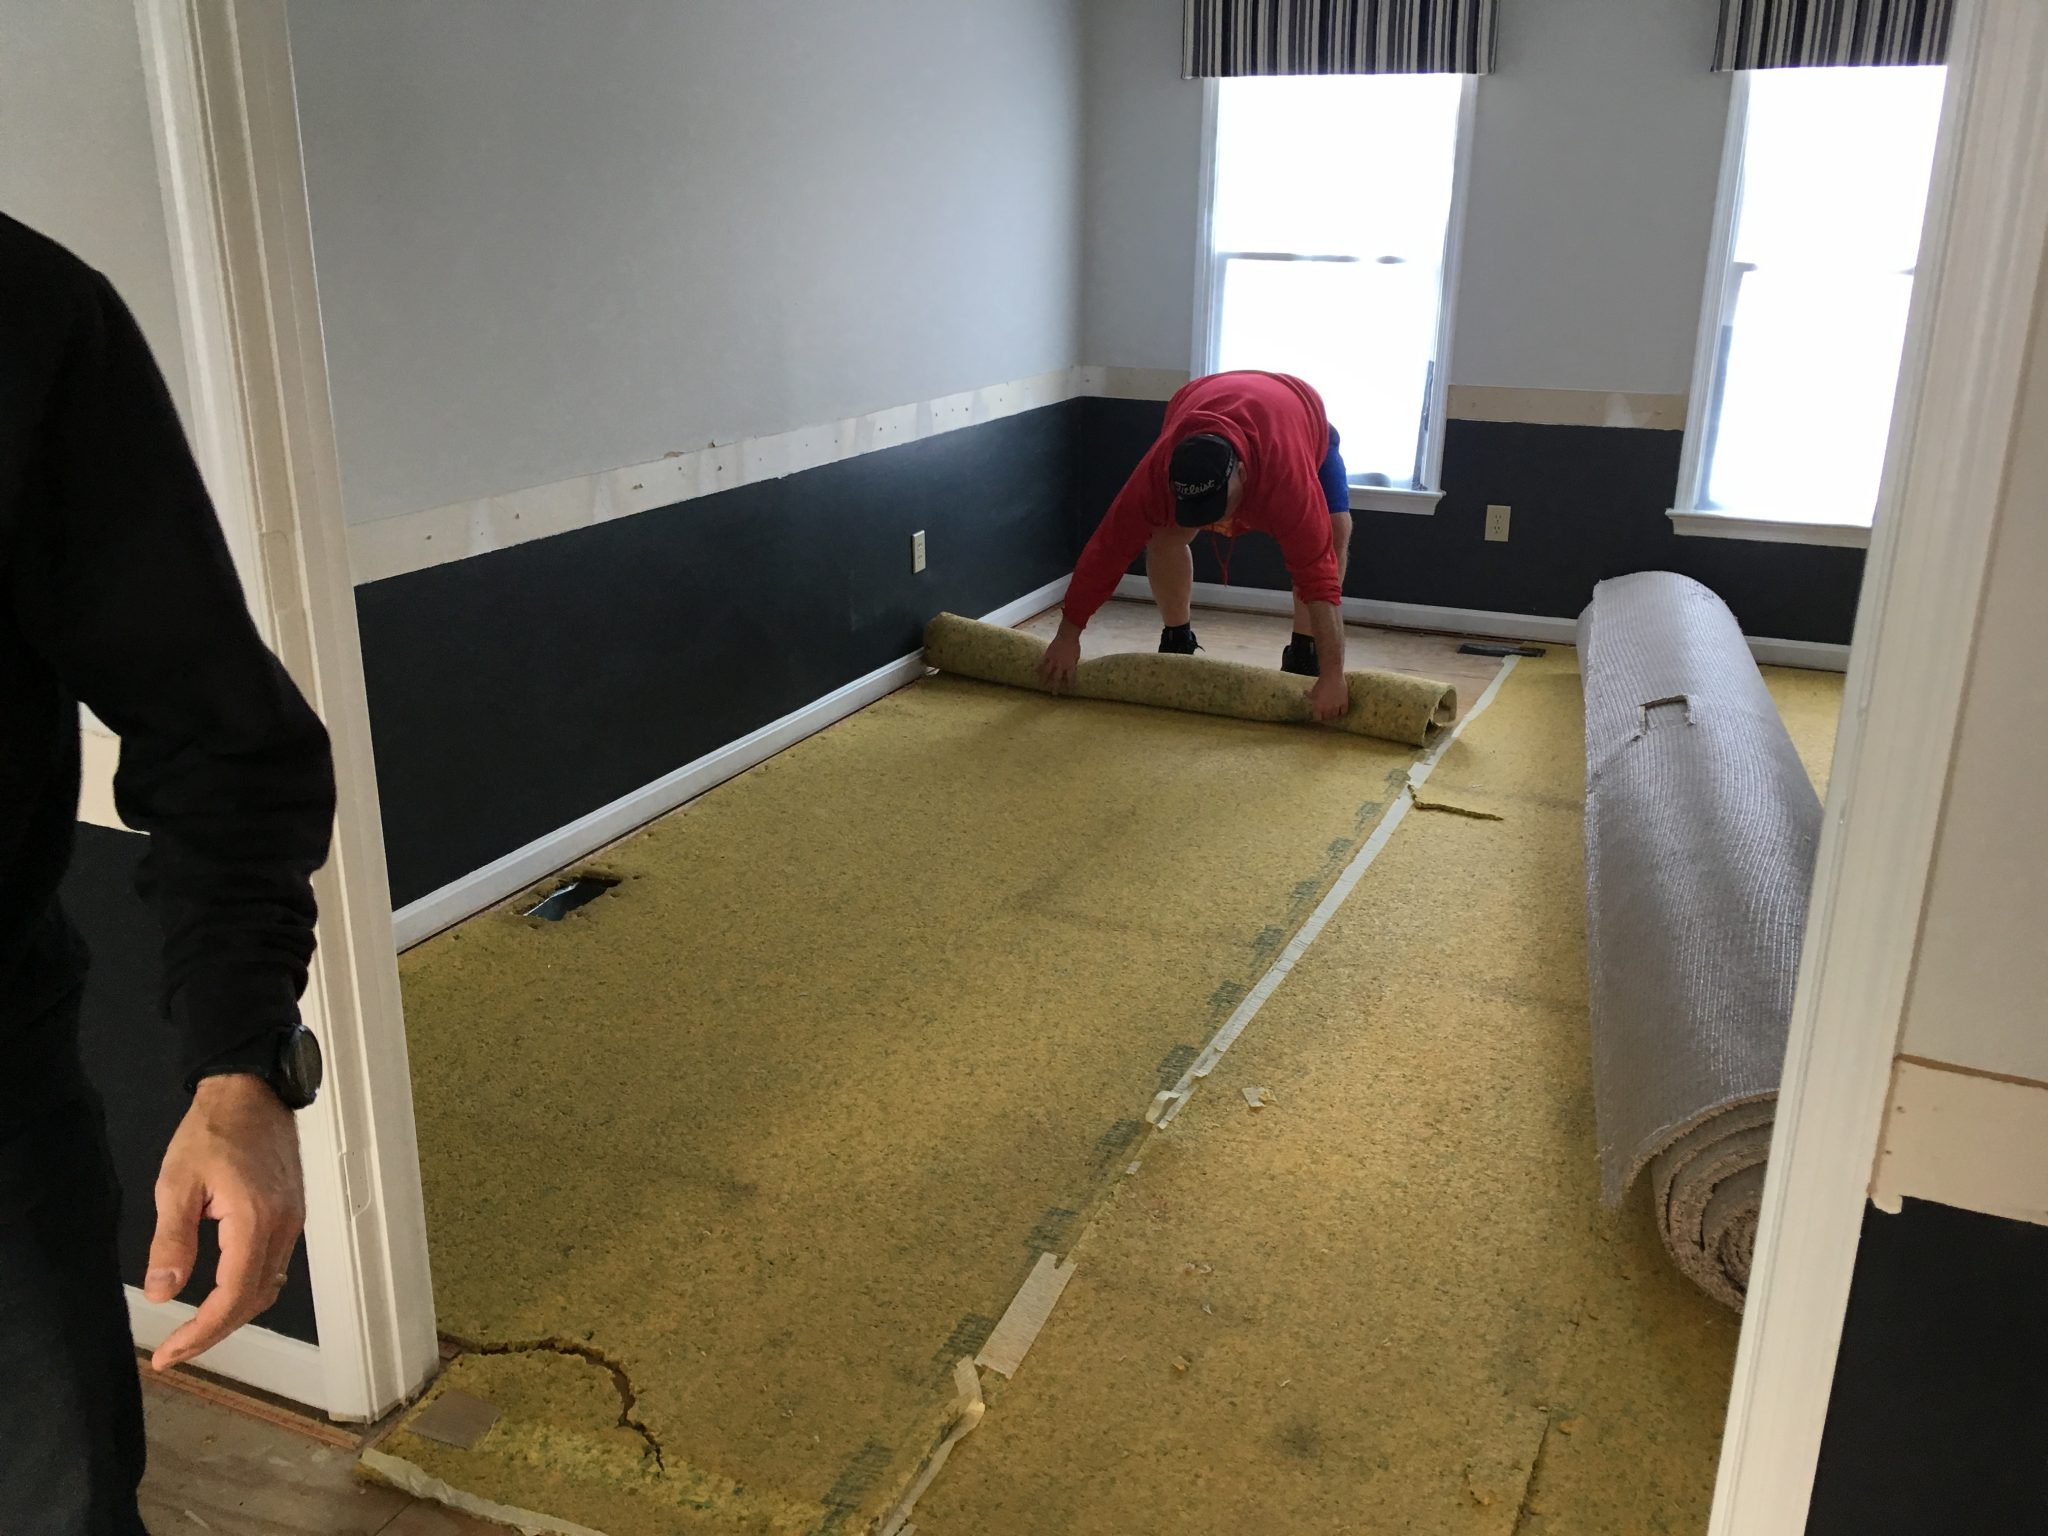
Mid-Demo: Living Room Flooring
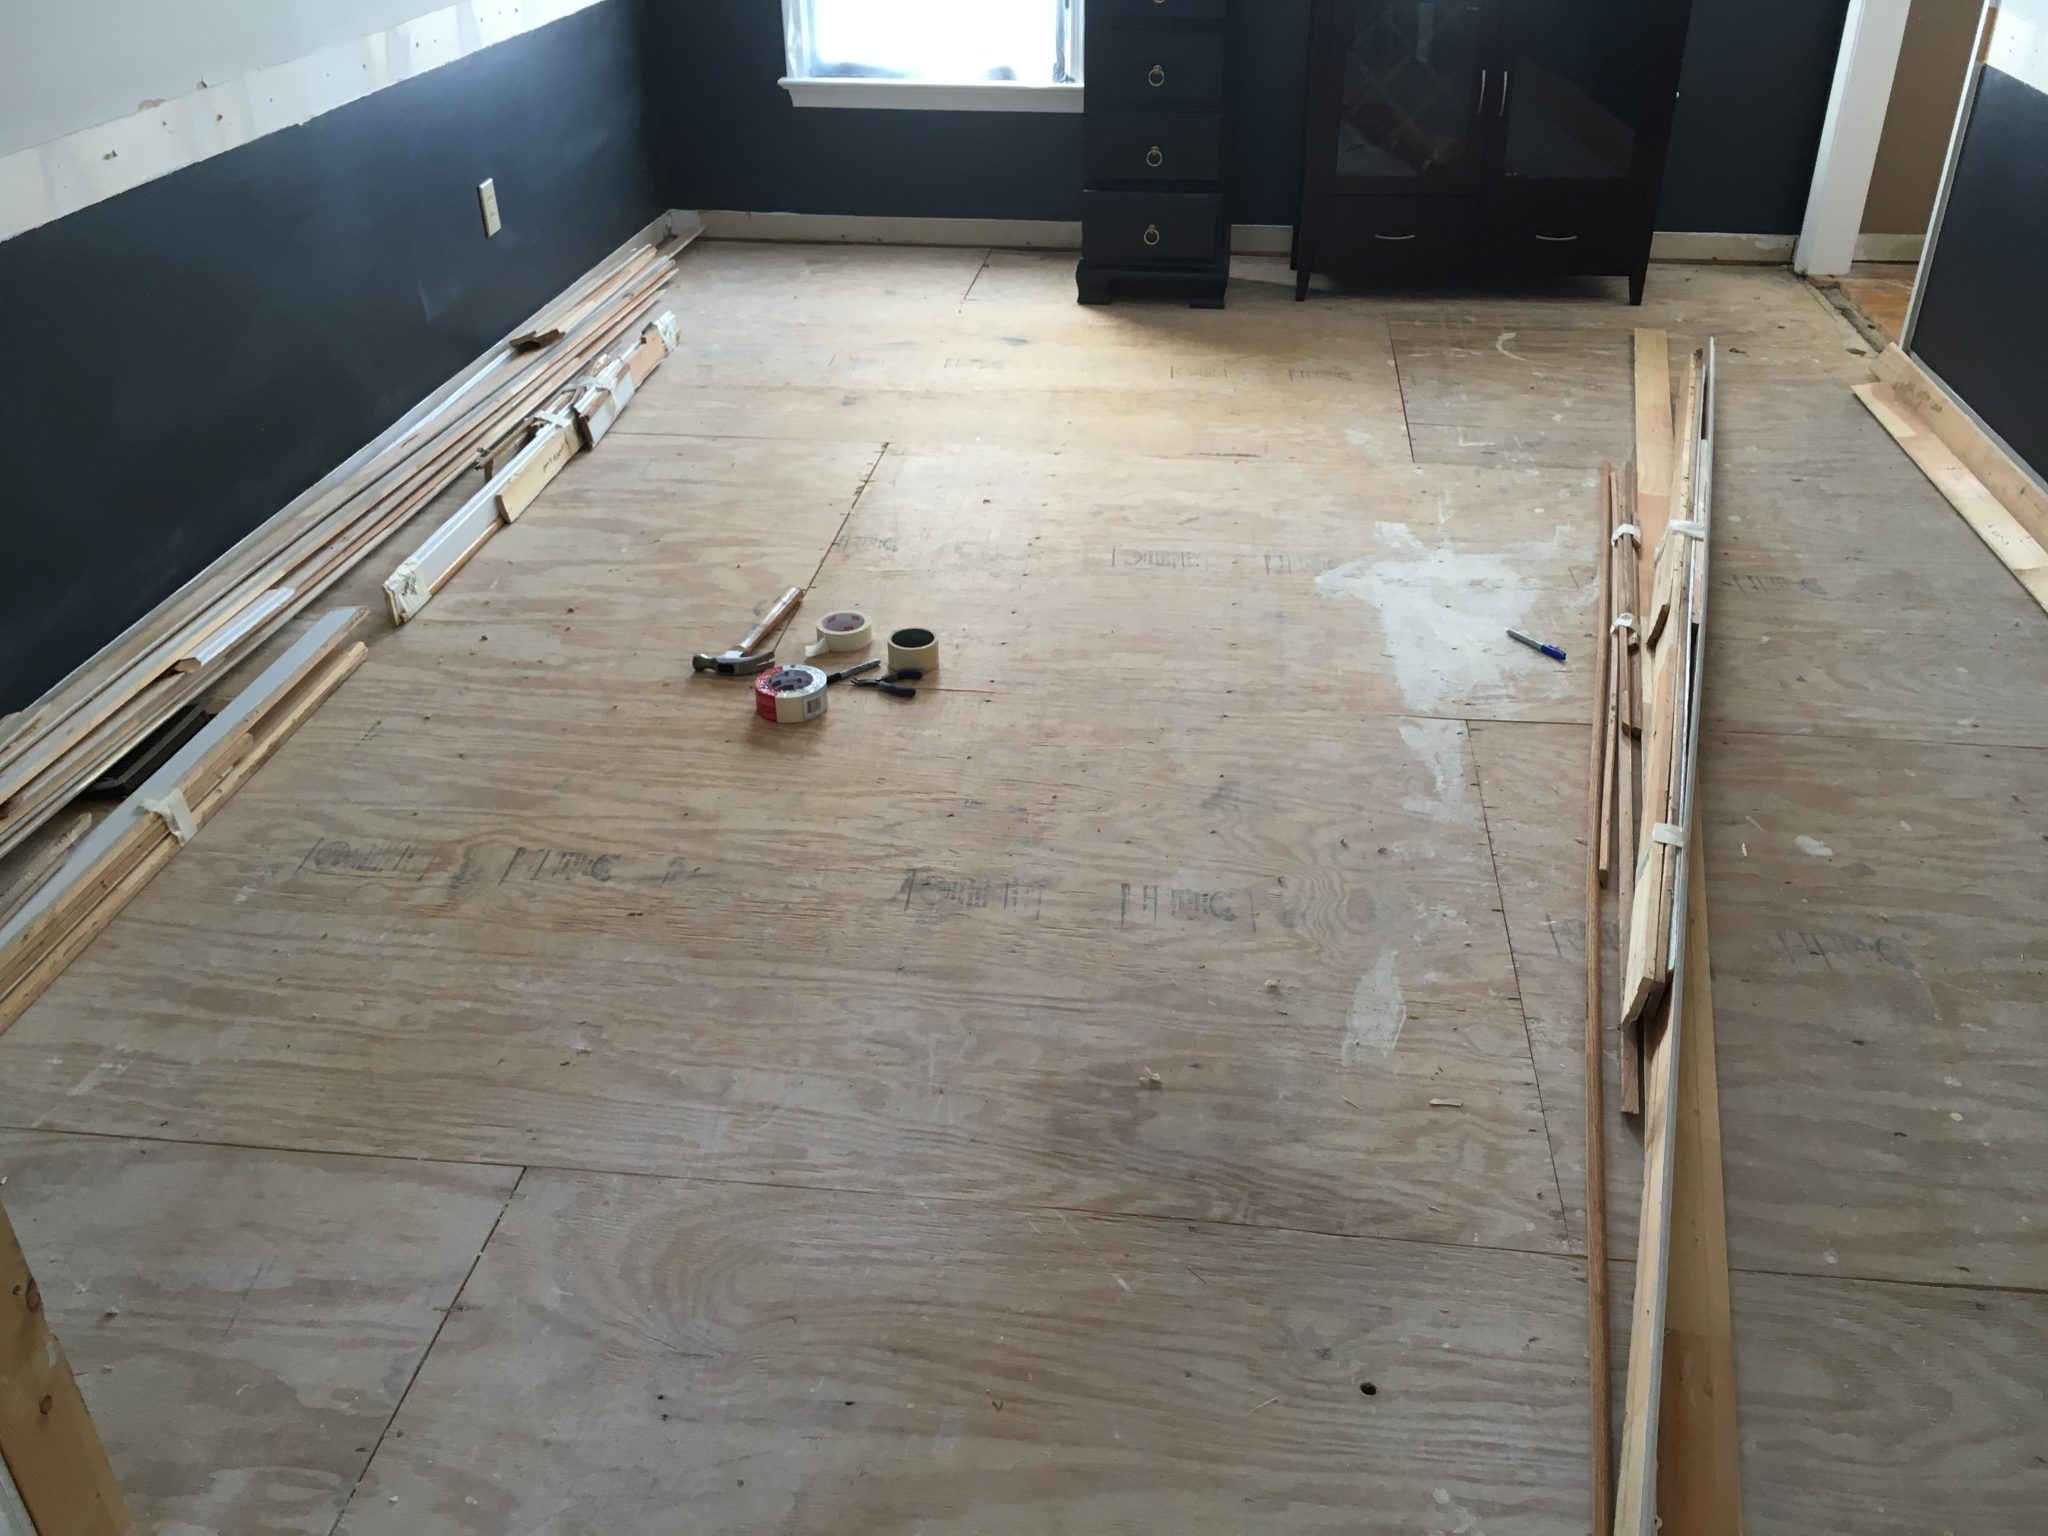
After: Living Room Flooring
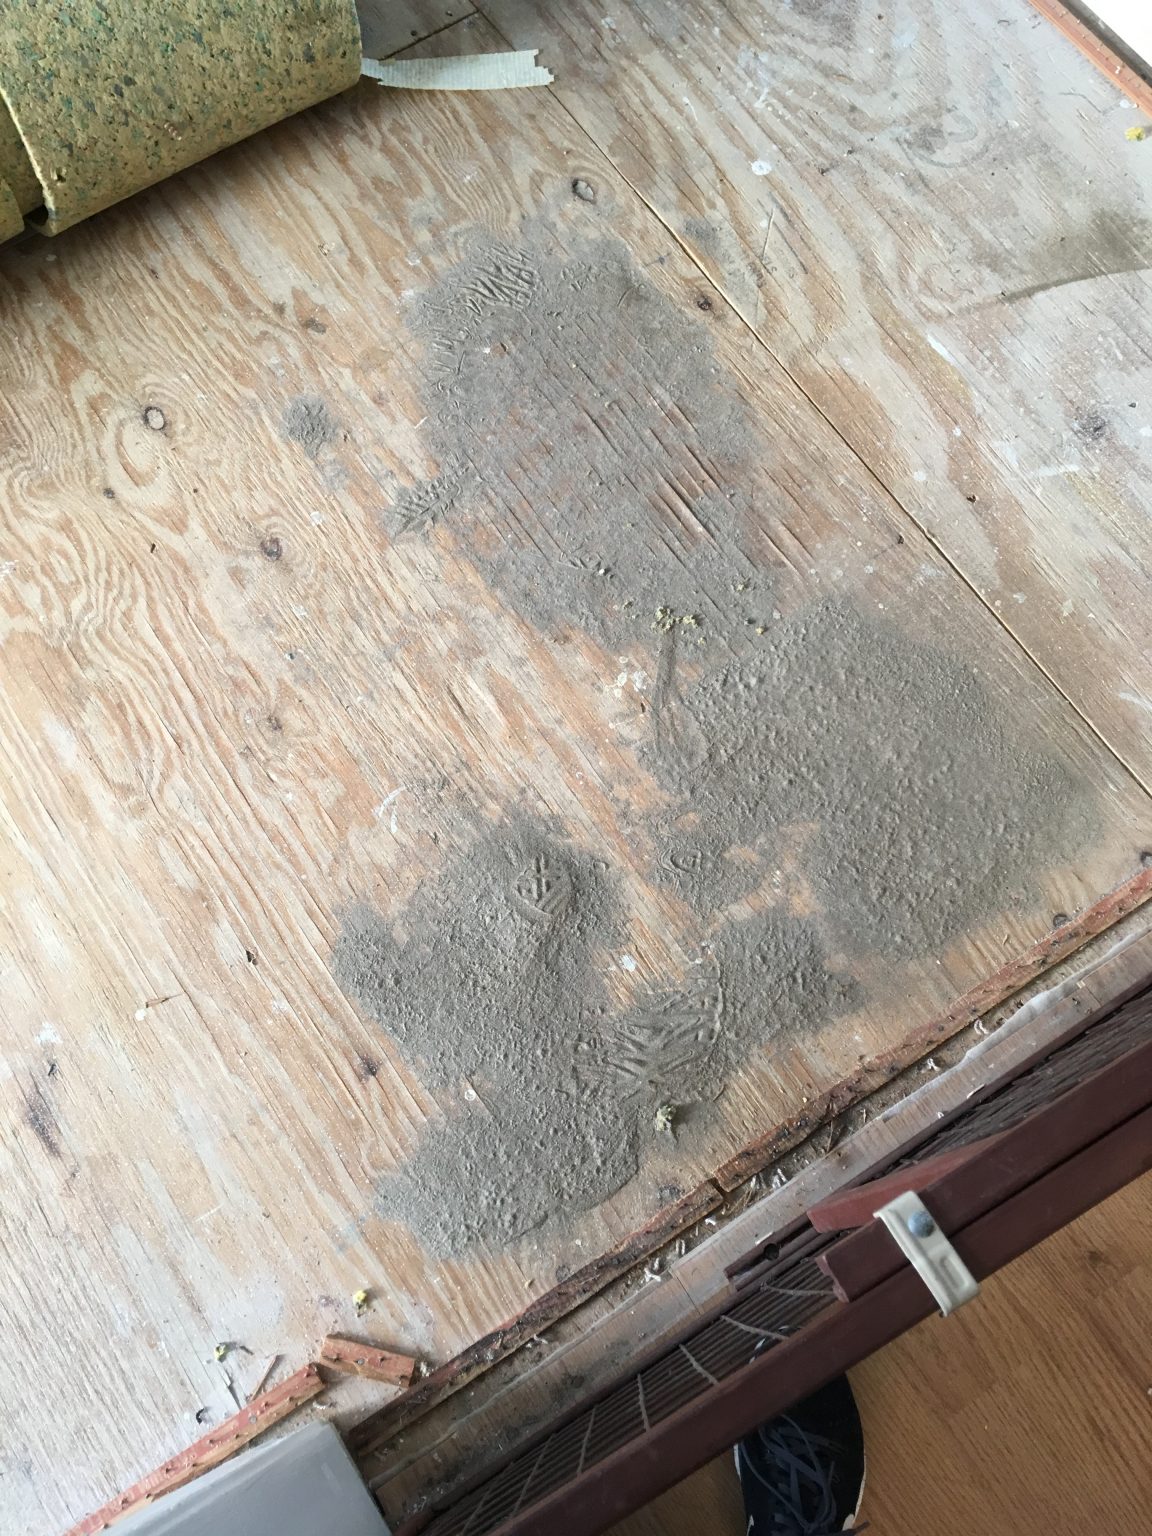
What’s hiding under your carpet? Just because it looks clean, doesn’t mean it is! This is one of many reasons I HATE carpeting! NOTE: This was not swept up, this was one spot as-is when we pulled up the padding.
02. Chair Rail
Truth be told my dad removed all of this back in December when we came out to meet our moving truck. So, technically this was not a part of the official demo week, but it didn’t take him too long. There was rail throughout the entire first floor, and it was majorly dating the house. It was some really intricate stuff, and made from some nice hardwood so I set it aside to repurpose. I’m thinking I can use if for crown in the Master Bedroom or possibly framing some of the old Bathroom mirrors. Either way I must use it for something because Drew keeps trying to throw it away and is accusing me of hoarding! Haha.
Before & After: Chair Rail Removal
Next Steps
Now that demo is a wrap, we can start rebuilding! It’s going to take some time, but we are so excited to share with you all as we go. Our priorities at the moment are the Kitchen and the floors because, TODDLER.
Stay tuned…
 We are a couple of DIY-ers who